How to Choose a Tent: Shape, Capacity, and Seasonal Fit
How to Choose a Tent: Shape, Capacity, and Seasonal Fit
When tent shopping gets overwhelming, start by locking in five factors: how you travel, party size, season, weather exposure, and who sets it up. Match shape and specs to those answers, and the right tent practically picks itself. I run both family car-camping with 3-4 people and solo ultra-light setups, and after dealing with autumn rain during setup, crosswinds on highland plateaus, and winter condensation, I can say these combinations make a measurable difference in comfort.
When tent shopping gets overwhelming, start by locking in five factors: how you travel, party size, season, weather exposure, and who sets it up. Match shape and specs to those answers, and the right tent practically picks itself. I run both family car-camping with 3-4 people and solo ultra-light setups, and after dealing with autumn rain during setup, crosswinds on highland plateaus, and winter condensation, I can say these combinations make a measurable difference in comfort. What matters is understanding compatibility across dome, tunnel, one-pole, and shelter shapes — and whether you need single-wall or double-wall construction. Take capacity ratings with a grain of salt: plan for one fewer person than the label says and budget that extra space for gear. You will be glad you did. Beyond that, target 1,500-2,000 mm hydrostatic head for general use while going higher on the floor, understand the fabric weight spectrum from 68D-210D for car camping down to 30D-40D for weight-conscious hikers, and know what polycotton, skirts, and ventilation actually do for you. High specs alone do not guarantee satisfaction — a tent earns its keep when the specs match the way you actually camp.
Five Decision Factors to Settle Before You Shop
Browsing by shape leads to decision paralysis fast. In practice, how you carry it, how many people sleep in it, which seasons you camp, how much weather you expect, and whether you pitch solo narrow the field dramatically. Skip this step, and you end up with something that is light but cramped, spacious but backbreaking, or waterproof but suffocating in summer.
Start with transportation. If you are hiking in or taking public transit, a tent is not just shelter — it is cargo. Weight and packed size jump to the top of the priority list, and you are realistically looking at 30D-40D lightweight fabrics and total weights around 2 kg in the alpine and ultra-light category. With a car, those constraints loosen up. You can consider 68D-210D fabrics with real body to them, two-room layouts with generous vestibules, and tall models with standing headroom. From personal experience, thin and supple fabrics handle beautifully on foot, but when driving, a slightly heavier fabric with more stiffness actually makes pitching easier because it holds its shape as you work.
Next, party size. A label that says "3-person" or "4-person" is not telling you how many people sleep comfortably. In real-world terms, subtract one person from the rating and use that freed-up space for gear. Family camping drives this home: kids fit neatly when they are small, but sleeping bags, changes of clothes, and toys eat floor space fast as they grow. Whether the tent has a roomy vestibule or an integrated living area changes the effective space, too. Two tents labeled "4-person" can feel worlds apart on a rainy day if one is a bare dome and the other has a proper vestibule.
Season is not just "summer versus winter." Think about the problems each season creates. Summer demands airflow and UV blocking. Spring and fall bring sharp morning temperature drops and condensation that will soak the inside of your tent if you ignore it. Winter camping calls for skirts that block cold drafts at ground level, and inner walls that are fabric rather than all-mesh. Three-season designs prioritize ventilation; four-season designs lean toward insulation and wind resistance. Conflate the two and you end up sweating through August or shivering through November.
For general camping, a fly with at least 1,500 mm hydrostatic head and an overall target of 1,500-2,000 mm is a reasonable benchmark, but the floor needs to be rated higher since body weight presses against it. Factor in condensation resistance and double-wall construction becomes the easier path. As noted in several gear references, single-wall saves weight and simplifies setup, but double-wall keeps moisture from settling directly on your living space. The critical point: a higher waterproof rating is not a universal fix. Push waterproofing too far and you sacrifice breathability and drying speed. No published test data establishes a precise threshold where breathability or condensation behavior shifts meaningfully, so treat hydrostatic head as a guideline and evaluate it alongside structure and ventilation.
Do not overlook setup crew size. If you pitch alone regularly, freestanding domes and clip-on inner designs have a real advantage. Large tunnel tents and air-frame models deliver impressive living space, but they tend to be big and heavy. Some large air-frame models hit 14.5 kg (~32 lbs) — roughly equivalent to seven 2-liter water bottles. Fine in the car, but hauling that from the parking lot to the site is a workout. "Easy setup" is not just about fewer steps; it includes whether one person can physically lift and maneuver the thing.
Quick Exercise: Nail Down Your Five Factors in 30 Seconds
Before you open a single product page, jot down your five factors in one line each. This "30 seconds" is a rule of thumb from experience, not a scientifically verified number. Keep it simple:
- Transportation: hiking/transit, or car
- Party: how many adults, how many kids
- Season: summer-focused, spring/fall-focused, or year-round including winter
- Weather risk: do you camp in rain? Are you often at windy sites?
- Setup crew: solo, or two people available?
If you write "car / 2 adults + 1 kid / spring-fall main / we go even when rain is forecast / usually pitch solo," you immediately see that an ultra-light tent is not the answer. A vestibule-equipped, double-wall, freestanding or simple-setup model jumps to the front. Flip it to "hiking / solo / summer only / skip bad weather / solo pitch" and a 2 kg lightweight dome or single-wall tent is a natural fit.
I never skip this step, and I always flag rain separately. On an autumn trip where weather looked uncertain, I rigged a tarp overhead first and then pitched the tent underneath. Kids and gear stayed dry. Since that trip, I stopped evaluating tents on waterproof ratings alone and started asking how easy it is to set up in the rain. A tent that gives you room in the setup sequence matters more in the field than any catalog number.
The Core Trade-Offs: Weight vs. Livability / Weather Resistance vs. Breathability
Once your five factors are set, the next question is what you prioritize and what you sacrifice. The two classic tensions in tent selection are weight versus livability and weather resistance versus breathability.
Chasing light weight means 30D-40D fabrics, stripped-down structures, and compact packed size. The trade-off: lower ceiling height, a smaller vestibule, less room for gear, and reduced comfort when it rains. Prioritizing livability pulls you toward two-room and large tunnel designs with generous vestibules, but weight and bulk climb fast. A tent with 180 cm (~5'11") ceiling height lets an average adult stand, change clothes, and move around without hunching — and that comfort difference is huge. But you almost always pay for it in weight.
Weather resistance and breathability play the same game. Rain, cold, and wind favor double walls, solid fly coverage, skirts, and low-profile shapes. But the more you seal things up, the more heat and moisture build inside during warmer months. Summer wants UV blocking and airflow. Spring and fall want ventilation that manages condensation. Winter benefits from insulation, but then you need to think carefully about where the moisture escapes. Waterproof ratings tell part of the story; real comfort comes from the whole package of structure, fabric, and airflow design.
💡 Tip
When you are stuck, separate one thing you absolutely will not compromise on from one thing you can live without. Solo? Protect weight and accept a smaller vestibule. Family? Protect livability and accept more bulk. That single split changes how you read every spec sheet.
Once this clicks, spec sheets stop looking like a ranking of better and worse numbers. They start reading like design intent. A tent that is wider, taller, tougher, more waterproof, and lighter all at once simply does not exist. That is exactly why settling your five factors first — even though it feels like a detour — is the most efficient path to the right tent.
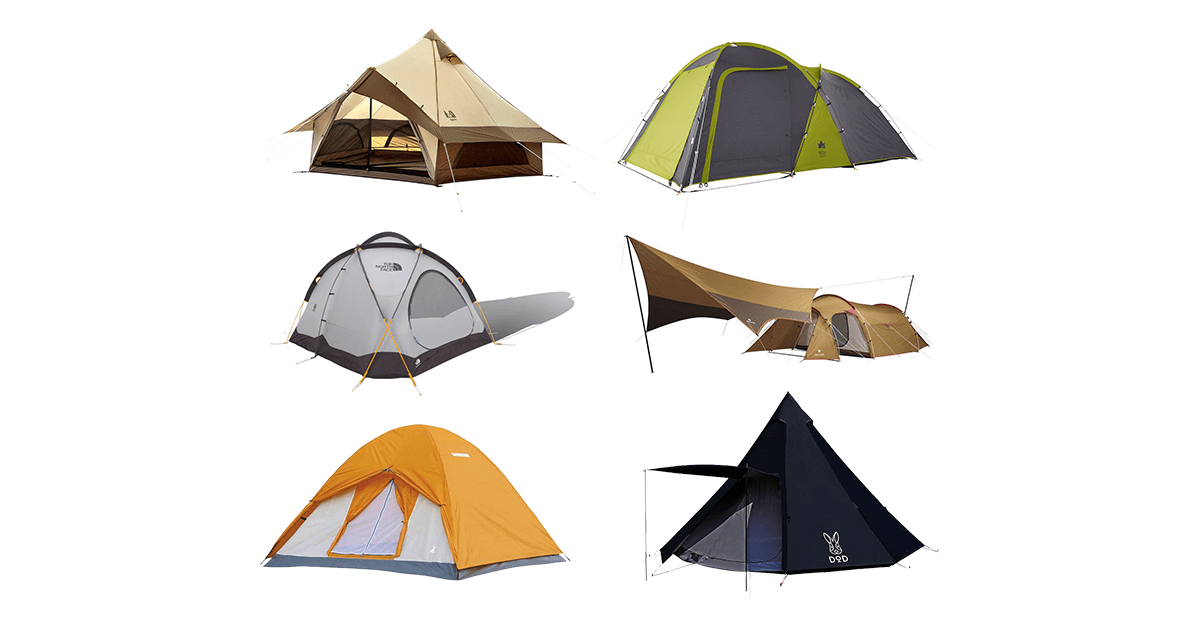
Types of Tents: Strengths and Weaknesses by Shape
Shape Comparison at a Glance
Tents do not just look different — the setup sequence, wind behavior, vestibule design, and condensation patterns all change with the shape. It is tempting to pick on aesthetics, but beginners benefit most from asking "will this be manageable on my first trip?" That focus on setup-friendliness also builds in adaptability when conditions change. My priority order for a first tent: ease of setup, stability in rain and wind, livability including vestibule, weight and packed size, then personality. Reverse that order early on and you risk dreading every setup.
With that framing, here is a broad comparison of the main shapes:
| Type | Setup Ease | Wind Resistance | Vestibule | Livability | Weight/Packed Size | Condensation | Best For |
|---|---|---|---|---|---|---|---|
| Dome | High | Medium-High | Model-dependent | Balanced | Medium | Manageable with double wall | Versatile all-rounder for beginners. Solo to small groups, solid first tent |
| Tunnel / Two-Room | Medium | High if pitched well | Usually included | High | Tends heavy and bulky | Good ventilation helps | Families and hangout camping. Solo setup and wind adjustments take more work |
| One-Pole (Tipi) | High | Medium | Small or limited | Usable area shrinks more than you expect | Relatively compact | Varies by construction | Speed-of-setup priority. Works if the center pole does not bother you |
| Shelter | Medium | Size-dependent | Creates large open space | Very high | Tends large | Depends on configuration | Modularity priority. Built around adding inners and swapping configs by season |
| Single-Wall | High | Shape-dependent | Often limited | Low-Medium | Light and compact | Prone to it | Weight-first camping. Leans toward experienced users |
| Double-Wall | Medium-High | Shape-dependent | Easier to create vestibule | Medium-High | Heavier than single-wall | Easier to manage | Beginner-friendly. Handles rain, dew, and condensation well |
Dome tents are the default recommendation for good reason. Most are freestanding — cross the poles, and the shape appears before you even drive a single ペグ. That means you can shift position, dodge a rock, or nudge the tent aside during teardown without starting over. The difference is obvious once you have compared it to a non-freestanding design. Livability alone does not beat a big two-room, but "one person can pitch it, and it holds up when weather turns" gives the dome the highest composite score for a first tent.
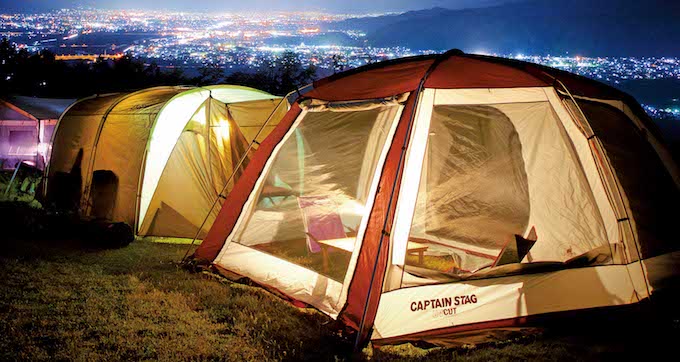
Tunnel and two-room tents connect a bedroom and living area in one structure. Rain gear, wet boots, and damp jackets have a place to go without invading the sleeping area, and you can skip the tarp on drizzly days — a major comfort win for families. Models with solid ceiling height around 180 cm (~5'11") let adults stand and move freely, and that convenience is striking once you experience it. The downside: long sidewalls catch wind. Orientation relative to the wind and proper 張り綱 tension determine how stable these tents feel. I have re-angled a tunnel tent on a windy highland and doubled up on guy lines to settle it down, and the whole time I was thinking about how much simpler a freestanding dome would have been. The comfort is excellent, but setup decisions multiply.
One-pole designs are fast to pitch and structurally simple — spread the fly, push up the center, and the outline appears. But that center pole eats into the floor plan. Walls angle inward, so gear along the edges presses against your head and shoulders, and adding sleepers amplifies the squeeze. An underappreciated issue is the rain entry path: some designs funnel water toward the floor every time you open the door. Speed and simplicity come with a learning curve on how you use the space.
Shelters create big, floorless spaces with high versatility. Add an inner tent for sleeping, remove it for a group hangout, swap configurations by season — the mix-and-match appeal is real. But a shelter is less a ready-made home and more a structure you design around. Spring and fall feel open and pleasant; cold weather calls for skirts and inners; and whether you use it as a bedroom or just a living room changes the whole equation. Rewarding for experienced campers, but a steeper learning curve as a first tent.
Single-wall versus double-wall cuts across shape categories. Single-wall is light, compact, and quick to pitch, but condensation forms right against the living space. Double-wall puts a fly and inner layer between you and the moisture, so your sleeping bag and walls stay drier — especially on cool spring or fall mornings. For a beginner, waking up to dry gear matters more than shaving grams, so double-wall has the edge as a first priority.
ℹ️ Note
If you are stuck: solo campers, start with a freestanding dome or lightweight double-wall. Families, start with a vestibule-equipped dome or two-room. One-pole and shelter designs shine when your preferences and use case line up precisely. Let that be the tiebreaker.
失敗しない! テントの選び方 - 価格.com
価格.comが紹介するテントの選び方のガイドです。テント選びに必要な基礎知識、用語解説はこちらでチェック!
kakaku.comFreestanding vs. Non-Freestanding and Pole Geometry (Cross, Tunnel, Geodesic)
Even tents that look similar can behave very differently based on whether they stand on their own and how the poles form the skeleton. Structure tells you more about real-world handling than the product name does.
Freestanding tents hold their shape from the frame alone, before any ペグ go in. The classic example is a cross-pole dome: it resists collapsing mid-setup, repositions easily, and gives you a working shape from the first moment. The benefit grows when you are working solo — shifting the tent a meter, rotating it, or straightening the ground sheet underneath all happen without drama. Most tents described as "easy to pitch" are freestanding for exactly this reason.
Non-freestanding tents need ペグ and 張り綱 tension to reach their final shape. Tunnel tents, many lightweight shelters, and one-pole designs fall here. Once dialed in, they deliver generous space or impressive weight savings, but the result depends heavily on stake placement and tension precision. Rain approaching or wind picking up while you are still adjusting stakes? That is where the gap between freestanding and non-freestanding shows up starkly.
Cross-pole geometry is the backbone of most domes: two or more poles intersect to distribute load evenly. It balances setup ease and stability well, which is why it spans everything from solo to family sizes. Clip-on inner models are especially intuitive — erect the poles, hang the inner, and the process flows clearly even on a first attempt.
Tunnel geometry runs parallel arch poles to create a long, efficient interior. Floor-area-to-usable-space ratio is excellent, making it popular for two-room and large family tents. The catch: wind hitting the broad side versus the narrow end produces very different stability. Without enough 張り綱 tension, the fabric flaps and distorts on breezy days. In the field, the difference is less about "can I pitch it" and more about "can I pitch it cleanly."
Geodesic geometry adds more pole intersections for a finer support web. The additional crossing points resist deformation under lateral wind loads, which is why this structure appears in alpine and storm-rated designs. The trade-off is more poles and more sleeve threading, making setup moderately more involved than a standard cross-pole dome. This is not typically a beginner's first pick — it is a structure chosen specifically when wind resistance outranks everything else.
These structural differences ripple into vestibule design. Cross-pole domes usually have a modest vestibule on one end — enough for boots and a pack, but not a rainy-day living room. Tunnel and two-room layouts create semi-indoor space that handles wet gear staging and meal prep. One-pole tents can carve out vestibule area near the entry, but the center pole constrains the flow, so you need to evaluate the actual traffic pattern.
Condensation behavior tracks structure, too. Single-wall tents keep things simple and light, but moisture forms close to your body and gear. Double-wall tents create an air gap between inner and fly, keeping the sleeping space noticeably drier, especially on rain days. I appreciate the speed of a lightweight single-wall on fair-weather trips, but the more I expect cool nights or unstable weather, the more I reach for double-wall. The slight weight penalty looks less important when you factor in a drier teardown and gear that does not need airing out.
For a beginner's shortcut through structure: freestanding cross-pole dome with double wall is the hardest to get wrong. Next, a vestibule-focused two-room if living space is the priority. Then one-pole or shelter if your preferences are clear, and single-wall only when weight is the overriding concern. Which spec you rank first — setup ease, wind resistance, vestibule, livability, weight, condensation — shifts the answer, but the dome family consistently scores highest on the combined card for a first tent.
テントの種類と選び方 | アウトドアお役立ち情報
アウトドア、キャンプの主役となるテントの種類と選び方をご紹介します。テントには種類、構造の違いがあります。タイプ別のテントの特徴から手入れ方法まで詳しくご紹介しています。大きさや好みに合わせてお気に入りのテントを選びましょう。
www.captainstag.netDo Not Trust the Capacity Label: How to Actually Size a Tent
Sleeping Pad Width vs. Real Sleeping Width
A tent's capacity rating tells you how many people fit inside, which is not quite the same as how many people sleep comfortably. Real-world sleeping involves pad width, shoulder clearance, tossing and turning, and somewhere to stash your gear. Three adults can line up pads wall-to-wall in a 3-person tent, but that is "fitting" — not comfort.
The detail most people miss: the width you calculate from sleeping pads does not match the width your body actually needs. Sleeping bag loft, elbow room, and the involuntary roll at 2 a.m. all add up. When one person shifting wakes the person next to them, the capacity label was technically correct and the experience was still bad. Tents with sloped sidewalls cut into usable floor area even further, so do not judge by dimensions alone.
Solo campers feel this more than you would expect. One person fits in a 1-person tent, sure. But once you add a backpack, a change of clothes, and rain gear to the interior, a 1-2 person rating handles the real situation better. I have used true 1-person tents solo many times and always hit the same wall: sleeping is fine, but in the morning there is nowhere to put anything. When your sleeping space and gear space overlap, you end up fumbling for a headlamp or jacket in the dark and knocking everything over.
For two people, a 2-person rating means "close friends only" levels of proximity. Fall and winter gear, camp chairs, cook kits, and spare clothes overflow the vestibule and creep into the bedroom. A roomy 2-person or effectively 2.5-person footprint is where real comfort starts. Just having room to roll over without bumping your partner changes how rested you feel in the morning.
Families with 3-4 people face the tightest squeeze. Young children fit for a while, but that window closes faster than you think. Gear that tucked neatly at the foot of the tent in first grade will not fit by third grade — not because you added a person, but because kids grow and their stuff grows with them. For families, plan on one person above the actual headcount for the floor layout. A family of four benefits from a 5-person-class floor, keeping sleep and gear zones from colliding.
Vestibules and Living Space Define "Comfortable Capacity"
The single biggest factor that changes how a capacity rating feels is whether the tent has a vestibule or living area. Even with identical sleeping dimensions, a tent that gives you somewhere to park boots, hang a wet rain jacket, and stage a cooler will feel dramatically roomier than one that does not. A tent with a skimpy vestibule can match the sleeper count perfectly and still feel cramped because there is no living margin. Models with a proper vestibule or two-room layout create a quality-of-life gap that goes beyond floor square footage.
For solo camping, the vestibule decides whether a rainy day is tolerable or miserable. Having a dry spot to remove boots and stage a wet jacket keeps the inner tent dry. Vestibule-free ultralight models are fast to pitch, but on wet days they limit your options and push humidity straight into the sleeping area. Solo double-wall tents with vestibules stay popular not just because of the gear space, but because you can keep the sleeping zone reserved for sleeping.
Duos amplify this. Two people entering, exiting, changing, and prepping meals in a small vestibule means a bottleneck. A roomy 2-person or compact two-room works because one person can organize gear while the other moves freely. Forget the rated occupancy — check whether the doorway area creates a traffic jam. That predicts real-world satisfaction better than any spec.
For families of 3-4, the vestibule or living area is essentially insurance on your floor plan. Kids generate shoes, changes of clothes, rain gear, and toys, and without overflow space the bedroom descends into chaos at bedtime and first thing in the morning. A two-room or generous vestibule lets you separate storage, changing, and shelter functions so the whole family can move through the day without gridlock.
Ceiling height feeds directly into comfortable capacity, too. A family tent with roughly 180 cm (~5'11") interior height lets most adults stand with headroom to spare — about 10 cm (~4 in) for an average man and about 22 cm (~9 in) for an average woman. The "I can actually move" sensation goes beyond what the numbers suggest. Family-friendly tents that earn high marks rarely win on floor area alone; they also nail the vertical dimension.
I went through this transition myself. As my kids grew, the gear layout that worked before suddenly blocked walkways, and changing clothes on a rainy day became a project. Switching to a two-room fixed it: wet gear stayed out of the bedroom, and teardown stress dropped noticeably. Capacity labels should be read one size up not because of floor area per se, but because whether you can separate living functions into distinct zones is what really determines satisfaction.
![1人で設営できるのに家族4人で過ごせるテント【オススメ5選&アンケート発表】 | CAMP HACK[キャンプハック]](https://images.camphack.jp/wp-content/uploads/2020/12/t5_869_tn_construction_01.jpg)
1人で設営できるのに家族4人で過ごせるテント【オススメ5選&アンケート発表】 | CAMP HACK[キャンプハック]
「1人で設営できるテント」は、ソロキャンだけでなく、子供から目が離せないファミキャンでも大きなメリットが。今回は、約100人のアンケート結果から、1人でも設営できるファミリー向けテントランキングを発表!さらに画期的なエアフレームテントなど5
camphack.nap-camp.comSeasonal Decision Criteria: What Changes in Summer, Spring/Fall, Winter, and Rain
Different seasons shift priorities enough that the "right tent" looks completely different depending on when you camp. A tent that performs in summer can be miserable in winter, and a winter-ready setup can cook you in July. My starting framework: summer — can I shed heat? Spring/fall — can I manage condensation? Winter — can I block cold air? Rain — can I keep moisture out of the bedroom? Reorder your spec priorities by season and decisions get simpler.
Summer puts airflow and UV protection first. Mesh coverage on the inner, functional top vents that release rising hot air — these create comfort differences you feel immediately. On east-facing sites that catch morning sun, fabric UV blocking matters, too. Polycotton excels here, softening that piercing sunlight, but it weighs more, packs bulkier, and dries slowly when wet. Polycotton's summer appeal is real, but only if you evaluate it alongside car-based logistics, multi-night stays, and whether you can dry it before packing up.
Spring and fall are better understood as radiative cooling and condensation season than as a mild middle ground. Days feel comfortable, but predawn temperature plunges widen the gap between inside and outside air, and water droplets appear on tent walls. This is where single-wall's weight advantage fades and double-wall's practicality steps forward. I have woken up on a cold morning to find condensation coating the inside of the fly. Opening vents at both the top and bottom to create diagonal airflow cut the moisture on the inner wall visibly. In spring and fall, prioritize a structure that keeps condensation out of the bedroom before worrying about warmth.
Winter shifts the lens again. The goal is not to seal out all outside air — it is to suppress cold drafts while preserving ventilation. Skirts block ground-level cold air from curling under the fly, and the difference at ankle height is tangible. I consistently notice a gap in foot-zone warmth between skirted and unskirted tents in cold weather. An all-mesh inner loses heat fast, so fabric-panel inners work better in cold months. But closing everything up sends condensation through the roof, so ventilation design is actually more important in winter than in any other season. The specs to watch are not raw numbers — they are the combination of skirt presence, inner wall material, and vent placement.
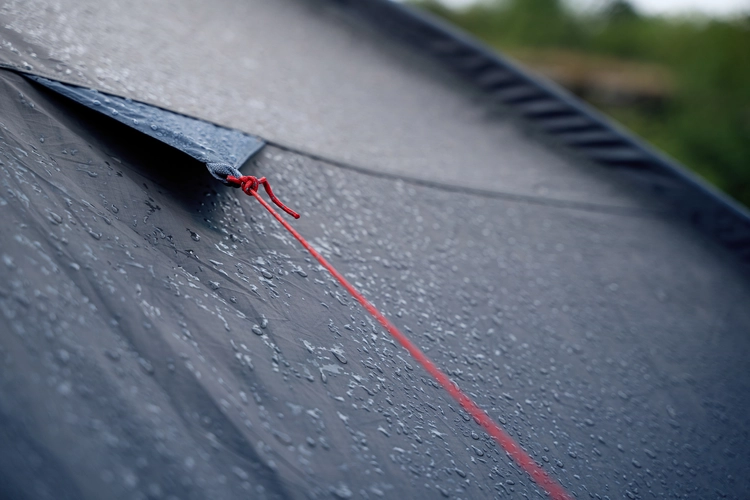
Rain performance comes down to how well the structure manages wetness, not just how high the waterproof numbers go. A double-wall tent with separated fly and inner resists pulling moisture into the living space, which is a tangible step up in any rain camp. Waterproof ratings and rain strategy do not end at a single number — as discussed elsewhere, the fly needs to handle typical rain, the floor needs a higher rating due to ground pressure, and beyond that, vestibule size, door orientation, and the ability to keep mud and rain gear out of the sleeping zone are what matter on the ground.
Site Selection and Wind Management
Seasonal performance is not just about the tent — it is about where and how you pitch it. In summer, you want airflow. A shaded spot with some breeze beats a sheltered depression where air stagnates. Orient the door and mesh panels so wind flows through the interior, and position the tent so upper vents can dump rising heat effectively.
Spring and fall bring condensation risks that site choice can amplify or reduce. Low-lying areas and damp grass trap cold, moist air at night. A site with light air movement — even a gentle breeze — dries the tent walls noticeably faster by morning. Vents help, but if the air outside is dead still, interior moisture has nowhere to go.
Winter reverses the priority: limit wind exposure without eliminating airflow. Pitched in an open field catching full gusts, even a skirted tent gets cold at the base. But hiding in a completely windless pocket invites heavy condensation. Deflect direct wind without killing ventilation — use terrain or tree cover to break the gust while keeping upper vents functional.
Rain is where site selection has the biggest impact of any season. Flat spots and subtle depressions collect water fast in even a brief shower. Well-drained ground, slight elevation, and a doorway that does not face a developing mud puddle save you enormous hassle at teardown. Setup sequence matters, too: on rainy days, rig a tarp first for a dry workspace, then pitch the tent underneath to keep the inner from getting soaked. This "roof first" approach is a field-tested tactic cited in practical rain-camping guides.
⚠️ Warning
What separates a comfortable rain camp from a miserable one is not the waterproof rating gap between tents — it is avoiding water collection zones and keeping the wet-to-dry transition outside the bedroom. Vestibules and living areas earn their square footage precisely because they make that separation possible.
キャンプの雨対策は万全に!快適な雨キャンプのための持ち物リスト&設営のコツ - 星空キャンプをするなら鋸南ほしふるキャンプ場(千葉県)
キャンプの雨対策について知りたい方必見!必要な持ち物や設営のコツ、水はけの良いサイト選びなど、キャンプを快適に楽しむための雨対策を詳しく紹介します。適切な雨対策で快適なキャンプを楽しみましょう。
kyonanhoshifuru-camp.jpThe "Higher Waterproof Rating = Better" Myth and the Breathability Balance
Among seasonal considerations, waterproof ratings are the most commonly misunderstood. When rain is a concern, big numbers feel reassuring — but comfort is not decided by a single spec. In practice, double-wall versus single-wall, whether vents create top-and-bottom airflow, and whether the entry area manages rain effectively all contribute heavily. In spring, fall, and winter especially, moisture comes from inside (condensation) as much as from outside (rain), so waterproofing alone does not solve the problem.
Summer makes this balance most visible. Push toward a sealed, high-waterproof setup and heat and humidity get trapped inside. Waking up in a tent that kept rain out but turned into a sauna is not a win. For summer, mesh coverage, vent placement, and UV blocking outrank waterproof numbers.
Spring and fall demand double-wall construction plus stacked high-low ventilation. Without it, condensation beads on the walls and transfers to sleeping bags and clothes on contact. Winter needs skirts to block cold drafts while the vents stay open to exhaust moisture. The colder the season, the more defense and ventilation have to coexist in the same design. Reading one number in isolation misleads; reading the tent as a seasonal system — what does it prioritize, and what does it sacrifice? — closes the gap between catalog promise and field reality.
For rain-focused buyers, the same logic applies. Double-wall with a fly rated for standard rain, a floor rated higher, a functional vestibule, easy-pitch design, and a well-drained site add up to consistent comfort. Waterproof benchmarks have been well-documented in gear references, but in the field, "waterproof structure" and "moisture-exhausting ventilation" matter at least as much as "waterproof number."
耐水圧…?初心者キャンパーの疑問、テントの耐水圧を徹底解説! | キャンプ・アウトドア情報メディアhinata
テントを選ぶ際の重要な要素となる「耐水圧」。この記事ではキャンプ初心者の疑問である耐水圧の基準から、見るべきポイントまで解説します。
hinata.meReading Spec Sheets: Hydrostatic Head, Denier, Materials, and Ventilation
Spec sheets are not a competition for the highest number. They are a window into what the designer optimized for. My approach: start with hydrostatic head to gauge rain baseline, check denier to understand the weight-versus-durability stance, then look at materials and ventilation to see whether the tent breathes well or traps moisture. Together, those four readings tell you whether you are looking at a tent that runs hot but dry, light but delicate, or sealed but stuffy.
Hydrostatic head measures how tall a column of water a fabric can hold before it leaks, expressed in millimeters. For general camping, there is a practical sweet spot. The key nuance: fly and floor serve different roles. The fly sheds rain, so a solid baseline keeps things manageable. The floor bears body weight, so a higher rating pays off where pressure pushes water upward.
Denier (D) indicates yarn thickness — higher means heavier and tougher fabric. This is not a "more is better" scale; it is a design choice. 30-40D ultra-light fabrics feel instantly nimble in your hands, but rocky sites and careless teardowns can punish them. 68D and above — the car-camping range — gives the fabric enough body to handle rough treatment, and at 210D the durability confidence is palpable. The flip side: heavier fabric dries slower and packs bulkier. You can feel the character difference in setup — 40D drapes soft and thin, while heavier fabric has a stiffness that holds shape on its own.
Materials split cleanly. Polyester and nylon are light, quick-drying, and the standard for three-season general-purpose tents. Polycotton (cotton blend) brings better UV blocking, natural breathability, and reduced condensation. When you spend hours inside during autumn or winter, that "the air is not stuffy" quality makes a genuine difference. But polycotton absorbs rain and morning dew, gaining weight and resisting drying. It is a fabric whose personality extends all the way to teardown day. For portability, go synthetic. For living-room ambiance, consider polycotton — but with eyes open about the drying trade-off.
Ventilation is the most overlooked spec. Having vents is not enough — whether cool air enters low and warm air exits high is what separates effective ventilation from decorative mesh. Warm, humid air rises, so a functional top exhaust visibly reduces that "everything is damp" feeling in the morning. Double-wall construction adds another layer of protection: condensation forms on the fly instead of directly over your sleeping space, so the same humidity level feels less oppressive. For winter or cold-weather use, check whether the inner is all-mesh or has fabric panels, and look for skirts. A tent that blocks drafts at ground level while keeping an exhaust path open overhead handles cold weather well by design.
Spec Benchmarks at a Glance
Read spec sheets by asking "which band does this fall in?" rather than chasing absolute numbers. For general camping, hydrostatic head in the 1,500-2,000 mm range is a useful baseline. Fly ratings of 1,500 mm and above are easy to work with; floors benefit from being set above that due to ground pressure.
Denier for car camping clusters around 68D-210D, reflecting durability-first design. Ultra-light and alpine tents sit in the 30D-40D band, reflecting weight-first thinking. Jumping from 40D to 80D roughly doubles the thread density per unit area. Total tent weight obviously includes poles and hardware too, but the fabric character shift between those bands is substantial.
Translating numbers to feel: a 30-40D tent is "light and packable but demands care on rough ground and during teardown." A 210D tent is "forgiving to handle but heavy to dry and bulky to stow." Spec sheets are just these feelings, delivered in advance. Reading them that way changes how you shop.
ℹ️ Note
If spec sheets overwhelm you, assign each column a job: hydrostatic head = rain baseline, denier = weight-versus-toughness balance, material = interior air quality, ventilation = condensation management. One role per spec keeps the picture clear.
Coating Thickness, High Waterproof Ratings, and the Condensation-Breathability Relationship
Raising the hydrostatic head number means making the fabric resist water penetration harder. That is where coating comes in, and the critical thing to understand is that waterproofing and moisture release often pull in opposite directions. A catalog-impressive waterproof rating paired with weak ventilation design can trap moisture inside.
In real camping, wetness does not only come from rain. Breathing during sleep, damp clothes, and ground moisture push surprising amounts of water vapor into a tent. A high-rated fabric stops rain effectively, but if there is no exhaust path, that interior vapor condenses on the walls. The classic spring, fall, or winter symptom — "it did not rain, but the tent walls are wet in the morning" — is this mechanism in action. Single-wall tents put that condensation right against your living space; double-wall tents interpose a buffer.
This means hydrostatic head reads best alongside ventilation layout and wall construction. A tent with top-and-bottom airflow paths and a double-wall buffer outperforms its rating on paper. Conversely, a tent with an impressive waterproof number but sparse vents and a simple air path becomes clammy on wet nights and cold mornings.
Winter-oriented models illustrate the balance well: skirts suppress cold-air infiltration at ground level, but upper vents stay open to exhaust moisture. Fabric inner panels (not all-mesh) reduce draft exposure without sealing the tent shut. The more you close things up, the more condensation you invite — so cold-weather design and condensation management are not separate topics. They are one design problem: how to move air through a tent that also needs to block cold.
Ultimately, the most useful thing a spec sheet can tell you is not "which number is biggest" but whether the numbers fit together coherently. Waterproofing, weight, material, and ventilation that align with each other produce a tent that feels as good in the field as it looks on paper. A single standout spec with mismatched supporting specs is a recipe for disappointment.
Choosing by Camping Style: Recommendations by Use Case
Start Here if You Are Unsure
Condensed down to one line per style: ultra-light solo — prioritize weight; beginner car camping — prioritize forgiveness; family — prioritize livability for everyone; winter and wind — prioritize weather-hardened construction. Do not hunt for a do-everything tent. Pick the discomfort you most want to eliminate, and the answer follows.
For ultra-light solo, the axis is a lightweight single-wall or a lightweight double-wall. Small domes and shelter-plus-inner combos work well here. Fabrics in the 30-40D band hit the sweet spot between packability and adequate confidence. At this thickness, the grab-and-go ease is unmistakable, but rocky ground and rough handling demand attention. When every gram rides on your back, cutting weight here delivers disproportionate payoff.
Beginner car campers do best with a freestanding dome with vestibule or a compact two-room. Prioritize setup simplicity. Double-wall construction handles rain, morning dew, and condensation in one package. For a first tent, "the pole routing is obvious" and "it stands up on its own" beat fancy features every time. At the learning stage, pitching fast without mistakes is worth more than peak livability.
Families of 3-4 should think tunnel or two-room, rated for one person more than your actual party. Sleeping is only part of the equation — changing clothes, stashing gear, and giving kids rainy-day space all demand extra volume. Around 180 cm (~5'11") ceiling height adds a tier of comfort, giving an average adult man about 10 cm (~4 in) of headroom and an average woman about 22 cm (~9 in). That is enough to stand and move without hunching. Planning for fair weather only is a trap — ask whether the whole family can retreat inside and still function on a rainy day.
Winter campers need four-season-leaning construction: skirted, double-wall, with functional ventilation. The key is not insulation per se, but controlling where cold air enters and where moisture escapes. Closing every opening on a cold night is tempting, but sealed vents mean morning condensation overwhelms comfort. I evaluate cold-weather tents on the pairing of "draft-blocking elements" and "moisture exhaust paths." A good winter tent is not just warm — it is a tent where you can manage both cold and condensation.
Highland and windy-site campers should favor low-profile domes, geodesic frames, and models with multiple 張り綱 anchor points. In gusty highlands, a tall spacious tent fights you; a wind-shedding profile cooperates. From personal experience, a low dome oriented into the wind with extra stakes and 張り綱 is remarkably steady. Prioritize resistance to deformation under wind load over raw interior volume, and the field experience improves.
Frequent rain campers benefit most from a generous vestibule or two-room layout. Separating wet boots, rain jackets, and soggy gear from the sleeping area cuts rainy-day misery dramatically. Double-wall is the natural fit, and the setup sequence stays friendly even for less experienced campers because you can protect the inner during pitching. On rainy weekends, I default to a two-room with two lanterns and a clothesline strung inside. Interior light and somewhere to hang damp items are all it takes to turn rain from a dealbreaker into background noise.
💡 Tip
Pick your worst-case scenario and build the decision around it. Carrying weight on your back? Go light. Tearing down in rain? Get a vestibule and double wall. Family feeling cramped? Two-room with standing height. Freezing and waking up damp? Skirted, vented, four-season-leaning build.
Family Growth and the Replacement Cycle
Tent selection works better when you look 2-3 years ahead, not just at this season's headcount. Family camping especially: kids' builds change, gear volumes swell, and play habits evolve. A tent that fits perfectly right now can feel unlivable in two seasons.
A couple with one small child can start comfortably with a setup-friendly dome. But as kids multiply, gear scales up, and rainy-day camping frequency increases, vestibule value surges. When that upgrade moment arrives, stepping from a larger dome to a two-room or tunnel layout delivers a more noticeable quality-of-life jump than just sizing up within the same shape.
For families of 3-4, the bottleneck shifts from sleeping capacity to daytime living space. Fair weather hides the issue, but the moment wind or rain pushes everyone inside, the shortfall hits hard. Subtracting one from the capacity label accounts for this "living space included" headcount. When I evaluate family tents now, I weight traffic flow around the table, gear overflow space, and whether wet items can stay out of the bedroom more heavily than the sleep count.
Families eyeing winter should start with cold-weather-capable construction rather than layering winter add-ons onto a summer tent. A skirted, well-vented double-wall works in spring and fall without modification. Going the other direction — starting light and adding winter gear — often outpaces the tent's airflow design, leaving you fighting both cold and condensation.
Solo ultra-light follows a different trajectory: not so much replacement as role specialization. Start with a lightweight double-wall, and as your hiking intensity grows, add a minimalist shelter for fair-weather speed missions. Lightweight tents have sharp use-case profiles, so splitting your kit into a "backpacking day" tent and a "weather-priority day" tent tends to satisfy more than forcing one tent to do everything.
Highland, windy-site, and frequent-rain campers replace tents not because of size but because the terrain gets harder. Moving from flatland-comfortable gear to a low-profile dome with multiple anchor points, or shifting to a vestibule-heavy two-room, is not an upgrade — it is a design philosophy change. The tougher the field conditions, the more structural suitability outweighs raw spaciousness.
Family tents invite the "one tent forever" mindset, but in reality weather response and lifestyle changes outpace headcount as the reason to switch. A logical progression: first tent is a low-difficulty double-wall, second tent is a two-room or weather-hardened model. Chasing higher specs matters less than tracking how your family's time outdoors is actually evolving.
Pre-Purchase Checklist That Reduces Regret
Having a fixed order for reading spec sheets keeps decisions from spiraling. When I look at a new tent, I run through season of use, who pitches it, how it travels, whether the sleeping space is adequate, and how rain and condensation are handled — in that order. A tent can look incredible on the product page and still fall apart under this sequence if the design does not match the use case.
Start with season. Summer-focused, spring/fall core, or year-round including winter — the target construction shifts with each answer. An easy detail to miss is rain frequency: fair-weather-only campers can lean toward open, breezy designs, but if you camp through rain, drying speed, vestibule space, and ventilation paths all climb in priority. Summer leans on high mesh coverage and airflow, spring/fall on the balance between breathability and warmth retention, and winter on skirts and draft-resistant inner panels.
Setup crew directly affects post-purchase satisfaction. If solo pitching is even a possibility, verify the tent can be erected by one person. Large tunnel and two-room models deliver great livability, but the initial positioning and frame threading can demand extra hands. Domes and simple clip-on designs flow naturally solo. I put heavy weight on "can I raise this alone without dragging the fabric on the ground or losing control in a gust?" That matters more than raw setup time.
Packed size and weight hit harder than expected. Car campers have more flexibility, but even with a car, a long packed length can suddenly make loading awkward. Backpackers face a sharply narrowed field. Large tent examples reach 14.5 kg (~32 lbs) — fine as cargo, real work as a carry. I have made this mistake enough to now think through the full loop: home to car, car to site, site to car, car to drying rack.
Inner dimensions are better judged by sleeping width and vestibule size than by the capacity label. A bed that fits your body count but leaves no room for gear still feels tight. Ceiling height matters if you change clothes standing or help a child get dressed inside — around 180 cm (~5'11") lets most adults move comfortably. If the tent is strictly for sleeping, floor shape regularity matters more than height. One-pole designs where the center post carves into the usable area need creative gear placement that the dimensions alone do not warn you about.
Hydrostatic head should be read split between fly and floor, not as a single number. For general camping the fly works well at 1,500 mm and above, and the floor benefits from a higher figure because of ground pressure. But even solid numbers cannot compensate for a cramped vestibule, weak ventilation, or fabric that takes forever to dry. Rainy-day satisfaction is a systems outcome, not a single-spec victory.
Ventilation is best evaluated by asking whether air can enter low and exit high through at least two points. Top-only venting is less effective than a diagonal flow path for clearing both heat and humidity. Mesh density on the inner affects summer cooling versus cold-season coziness. Lightweight single-wall tents expose ventilation design strengths and weaknesses most directly. If reducing condensation matters to you, check whether the vents can stay open without funneling rain inside.
Skirt presence is not a winter-only feature. Chilly mornings in spring and fall, and windswept sites in any season, benefit from ground-level draft blocking. In warm weather, a skirt can restrict airflow, so designs that let you open or tuck the skirt are easier to live with across seasons. For winter-capable tents, evaluate the skirt together with ventilation — one without the other creates problems.
Drying and maintenance burden tends to be ignored at purchase and deeply felt after the first wet teardown. Polycotton's breathability and ambiance are appealing, but it dries slower than synthetics and gains weight when wet. I underestimated this once, and a post-rain teardown turned into a slog — the fabric was heavy, the car was tight, and the drying timeline at home stretched way longer than expected. Since then, I shake the inner out, tip the fly to drain, and factor in a balcony-drying session before I even decide which tent to bring.
To cut through the noise, run through the list as a loop: season, setup crew, transport method, sleeping arrangement, rain and moisture management, drying logistics. One pass through those six filters and the field narrows to a handful of realistic candidates.
⚠️ Warning
The goal is not to find the tent with the highest specs. It is to simulate your actual use: which seasons, whether you pitch alone, how you load the car, how many people sleep, what happens during a rain teardown, and where you dry the tent afterward. Run that mental loop and the candidates sort themselves.
Common Mistakes by Condition and How to Avoid Them
Knowing the theory is one thing; picturing how a specific mismatch plays out in the field is what actually prevents bad purchases. The failures I see most often are not about insufficient specs — they are about conditions and structure not matching. Rain, wind, party size, and materials are the four areas where things go sideways most reliably.
Rain Failure: Stripping Away Living Space in the Name of Light Weight
The classic rainy-day mistake is taking a vestibule-free single-wall tent into wet conditions and soaking the sleeping area every time you enter. Sleeping works, but there is nowhere to park boots, stage a wet jacket, or prep a hot drink without moisture invading. Single-wall compounds the issue with condensation — interior water droplets meet tracked-in rain, and by morning everything is damper than you bargained for.
The fix is straightforward: shift to double-wall with a vestibule and comfort improves dramatically. Families or gear-heavy campers may as well go two-room. For setup, rigging a tarp for rain cover before pitching the tent keeps the inner dry from the start. A "roof first" setup sequence is a proven field technique — it drops the difficulty of rain pitching significantly and protects the sleeping space before it is even assembled.
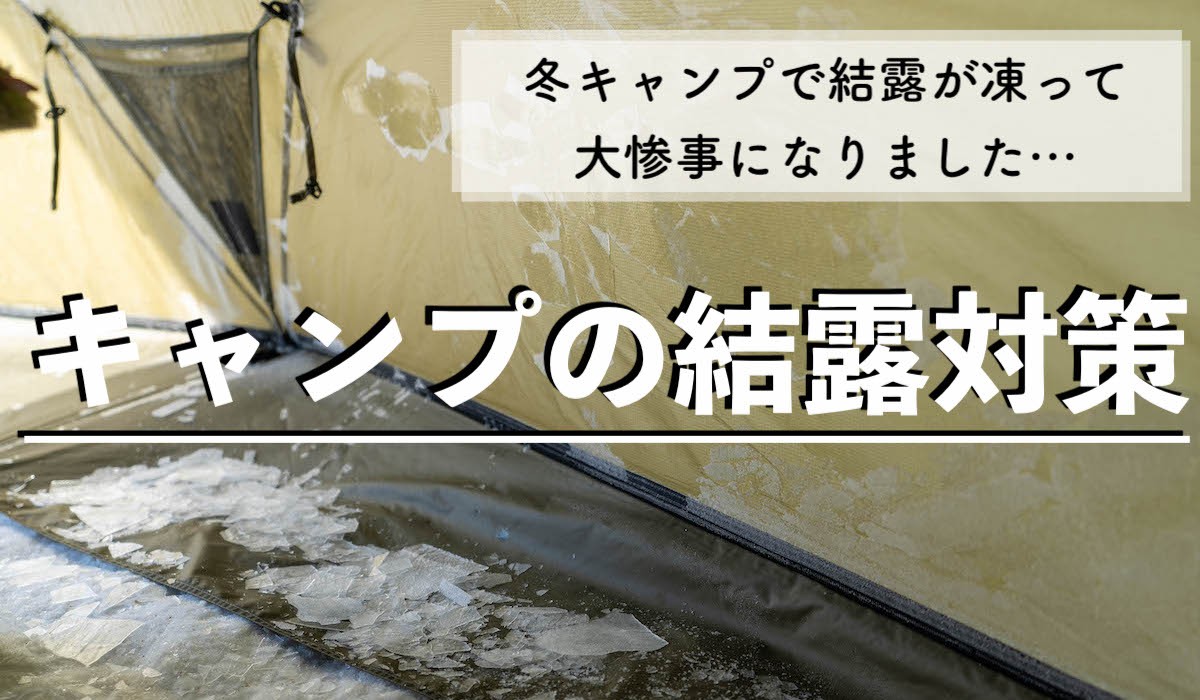
【体験談】冬キャンプで結露が凍って大惨事!テント内の結露が発生する仕組みと対策方法を解説|Possibility.Laboポジラボ*北海道キャンプブログ
【冬キャンプ失敗談】テント内の結露が凍って大惨事!結露が発生する仕組みや原因と対策、対処方法を解説。おすすめは、TC素材のテント!通気性がよいテントを使って、換気、空気循環を促して湿度を上げないようにしましょう!必要以上に温めないのもポイン
possi-labo.comWind Failure: Ignoring Shape-Specific Wind Behavior
Wind mistakes typically start with choosing a tall tunnel tent based on calm-weather setup ease without considering how it handles gusts. The broad sidewall area catches wind, and if the initial orientation is wrong, re-pitching after staking is a serious hassle.
The correction: orient the narrow end into the wind, add 張り綱 where needed, and build tension into the structure. If windy sites are your norm, a low-profile dome is inherently easier to work with. It balances well structurally, needs less correction during setup, and holds its shape under load. Visual livability draws you toward big, roomy tents, but in wind the question is "does it stay put once pitched?"
Capacity Failure: Buying to Label and Losing Gear Space
The textbook capacity mistake is family of four buys a 4-person tent. The label says they fit, but clothes, a cooler, kids' gear, and rain equipment fill the floor within a season. Kids grow, and a layout that worked initially stops working without adding a single person.
Comfort is determined less by sleep count than by how much margin you build in. Default to one fewer person than the label, prioritize vestibule size for gear overflow, and evaluate whether everyone can function in the morning — not just lie down at night. Buying for the labeled capacity reliably underdelivers on the living experience.
Material Failure: Underestimating Climate Fit and Drying Burden
Material mistakes cluster around polycotton: drawn in by the UV blocking and cozy interior feel, campers make it their primary tent through rainy or unstable weather. Polycotton genuinely breathes well and tames condensation, but once it absorbs sustained rain, drying speed collapses. A soaked polycotton tent is heavier than you expect, bulkier to pack, and stubbornly slow to dry at home.
I learned this one personally. The in-use comfort was excellent — right up until teardown, when reality hit hard. Since then, I treat polycotton as a fair-weather tent and switch to synthetics when rain is likely. If UV protection is the draw, adding a shade tarp to a synthetic tent is a more operationally flexible answer.
⚠️ Warning
Read the failure cases in reverse and the correct answers appear. Rain: vestibule and double wall. Wind: low profile and easy-tension structure. Capacity: rate for one fewer than the label. Materials: include drying logistics in the decision. Focus on what goes wrong in the field, not what looks appealing in the catalog.
Summary and Next Steps
Tent selection gets faster and more reliable when you lock in your five factors — transportation, party size, season, weather exposure, and setup crew — before matching shape and specs to those answers. For a first tent, a double-wall design with a functional vestibule is the safest starting point from a usability standpoint. Let your actual camping conditions — not popularity or aesthetics — define where the comfort gap matters most, and the mistakes shrink.
Your next move is simple:
- Write down your conditions and narrow to three candidates.
- If rain readiness needs more attention, a tent rain strategy guide goes deeper. If sizing questions remain, a tent sizing guide will tighten the shortlist further.
Related Articles
The Complete Guide to Choosing a Tent
Before hunting for popular models, understanding tent shapes, materials, and sizing will save you from costly mistakes. Whether you're buying your first tent, deciding between solo and family setups, or rethinking rain and wind protection, this guide lays out the criteria that actually matter.
Best Solo Tents Compared: How to Pick the Right One
Choosing a solo tent is never as simple as going with the lightest option. Weight, ease of setup, livability, waterproofing, and vestibule usability all factor in — skip any of them, and buyer's remorse hits fast. This article covers
How to Choose a Family Tent: A Practical Buying Guide
Picking a family tent based on looks or popularity alone often leads to regret -- it felt smaller than expected, or rainy days were miserable. This guide is for families buying their first tent or outgrowing their current one.
How to Choose an Easy-Setup Tent: A Structure-by-Structure Comparison
Picking a tent based on 'looks easy to set up' or 'I like the style' tends to backfire the moment rain or wind hits on your first overnight. This guide breaks down instant, pop-up, dome, and single-pole designs by real-world usability and overnight performance for first-time buyers and anyone tired of regrettin