How to Choose a Winter Camping Tent | Snow-Free vs. Snow Conditions
How to Choose a Winter Camping Tent | Snow-Free vs. Snow Conditions
Choosing a winter tent based on "looks warm" is a recipe for disappointment. Breaking it down into five criteria — windproofing, insulation, ventilation, weather resistance, and setup stability — makes it far easier to identify the specs you actually need. Even within "winter-rated" tents, what matters most shifts significantly between snow-free cold-weather camping and genuine snow camping.
Picking a winter tent based on how warm it looks is one of the most common mistakes out there. The better framework is five criteria: windproofing, insulation, ventilation, weather resistance, and setup stability. What matters most in each category shifts depending on whether you're camping in cold-but-dry conditions or dealing with actual snow accumulation.
This guide covers everything from repurposing a 3-season tent to understanding the real differences between 4-season tents and TC (poly-cotton) shelters — wind speed thresholds, waterproof ratings, CO safety, sleeping pad R-values, all in one place. I've personally observed how a skirted tunnel tent performed on a cold highland in December (minimum -2°C, no snow, wind at 6 m/s) versus a snowy lakeside in February (20 cm of accumulation), watching how skirt presence and ventilation count affected real-world comfort. The bottom line: tent comfort in winter depends less on the tent itself and more on whether you've matched the shelter to your specific conditions.
By the end of this article, you'll be able to clearly define what you need in a winter tent based on your own scenario — snow or no snow, solo or group, with or without a heater.
The Five Requirements for a Winter Camping Tent — Starting with the Conclusion
If you had to distill winter tent requirements into one sentence: a structure that limits cold air entry, retains heat, allows moisture to escape, withstands rain, wind, and snow, and stays taut through the night. These five criteria shift in priority depending on conditions. As a rule of thumb from my own experience: for snow-free winter camping, the order is windproofing → ventilation → water resistance (rain/sleet) → insulation → setup stability. For snow camping, it flips to setup stability → wind/snow resistance → ventilation → windproofing → insulation.
Windproofing
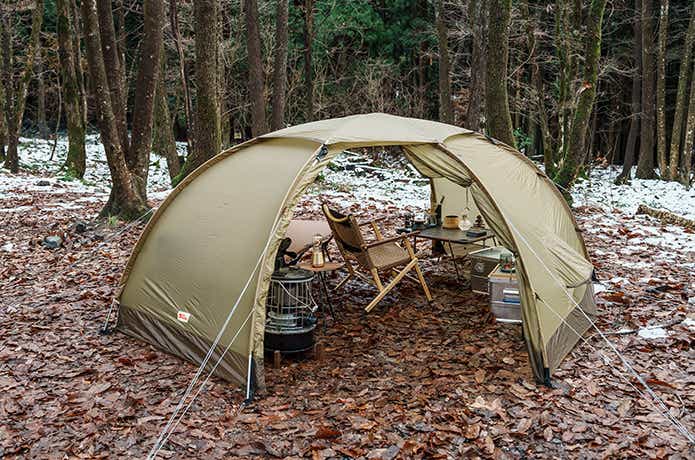
Windproofing is the first thing to evaluate. The reason is simple — at the same temperature, a tent that lets wind in gets cold fast. Three things matter here: a snow skirt, minimal gap between the tent body and the ground, and a shape that deflects rather than catches wind.
A snow skirt's main job is reducing cold air creep along the floor. It's treated as a baseline requirement for winter camping in most serious gear guides. In my own field observations, using a skirted tunnel tent on a cold highland plateau, there was a clear reduction in cold air pooling around the feet overnight. The sleeping area sits close to the ground, so how the tent hem is managed translates directly into felt warmth.
おこもりスタイルを実現!冬キャンプを格上げするおすすめテント30選
冬キャンプにおすすめのテントをソロ・ファミリー・2人の人数別に紹介! コールマンやスノーピークなどの人気ブランドのものから暖房が使えるものまでピックアップしています。選び方やレイアウトも解説しているのでぜひ参考にしてみてください。
camphack.nap-camp.comInsulation
Insulation isn't as simple as "thicker fabric = warmer." It's better evaluated through the combination of low-mesh inner walls, a double-wall construction, and a full-coverage fly. Unlike sleeping bags, there's no standardized warmth rating for tents, so reading the structure is the only reliable method.
For winter, what you want is a non-mesh-dominant inner rather than the large-mesh inners common in 3-season designs. A double-wall setup — where an air gap exists between the fly and the inner — keeps cold air from making direct contact with the living space. A full-coverage fly that extends down the sides (not just over the roof) provides better protection against wind-driven cold and sleet.
One important nuance: the better the insulation, the more ventilation matters. Tents that lean toward 4-season performance excel at blocking wind and retaining heat, but their closed-up design is more prone to condensation buildup. As covered in 4-season tent guides, the real difference from 3-season tents isn't just "warmer" — it's the balance between wind resistance and ventilation design. Insulation isn't a standalone property; it only works in equilibrium with windproofing and ventilation.

知っておきたい4シーズンテントの選び方!3シーズンとの違いを知って冬キャンプを楽しもう | キャンプ・アウトドア情報メディアhinata
季節問わずに使える4シーズンテント。この記事ではおすすめしたい人気の4シーズンテントと選び方、さらには注意すべき結露への対策や快適な使い方を紹介します。
hinata.meVentilation
Ventilation is non-negotiable in winter. Condensation forms when humid air from breathing and cooking hits the cold tent walls. The key feature to look for is multiple independent vents split between upper and lower positions.
The physics: drawing cool air in from below while hot, moist air escapes from the top creates natural convection. That's why a tent with both upper and lower vents manages condensation better than one with upper-only ventilation. Beyond simply "having vents," check whether they're operable from inside and whether they have a canopy design that keeps rain and snow out.
When you're running a heat source, ventilation stops being about comfort and becomes a safety issue. Combustion-based heaters produce carbon monoxide, and the importance of ventilation paired with CO detectors in winter camping is well-documented. A tent that feels warm but doesn't move air is not a winter-capable design.
💡 Tip
When evaluating winter tent ventilation, look at whether vents are split between top and bottom — not just how many there are. A tent with two upper vents often performs worse in practice than one with a single lower vent plus a single upper vent.
【注意喚起】冬キャンプに潜む大きなリスク(火災・一酸化炭素中毒)を忘れていませんか
www.lantern.campWeather Resistance
Weather resistance is about how well the tent holds up under winter rain, sleet, and strong wind. Break it down into three areas: waterproof rating, seam quality, and wind-load design.
Waterproof ratings follow JIS L 1092 or ISO 811 hydrostatic pressure testing. A common general benchmark is 1,500–2,000 mm for the fly. For more demanding winter conditions, some practitioners cite targets of approximately 5,000 mm for the fly and 3,000 mm for the inner — though this reflects specific expert opinion rather than any official standard. Whatever numbers you look at, match them to your expected conditions and the tent's overall ventilation design.
Seams are often overlooked. Even with strong fabric, poor seam treatment creates weak points under precipitation. Proper seam sealing, panel construction that prevents seams from pulling open under tension, and reinforcement at pole-to-fly contact points all factor into real-world weather resistance. High waterproof numbers on a spec sheet don't tell the full story — what matters is whether the tent is designed to handle simultaneous rain and wind.
Setup Stability
In snow conditions, setup stability jumps to the top of the priority list. More than the tent body's strength, adequate tent peg/stake points and guy lines, along with poles capable of handling load, determine real-world usefulness.
Even in snow-free winter, a design that doesn't allow guy lines to be skipped is worth prioritizing. More poles isn't automatically better — what matters is whether the crossing points and tension distribution are rational. The reason snow-oriented 4-season domes tend to use cross-pole configurations is to distribute snow and wind loads rather than concentrating them at one point. Conversely, large shelters optimized for interior space may perform poorly in winter if anchor points are insufficient.
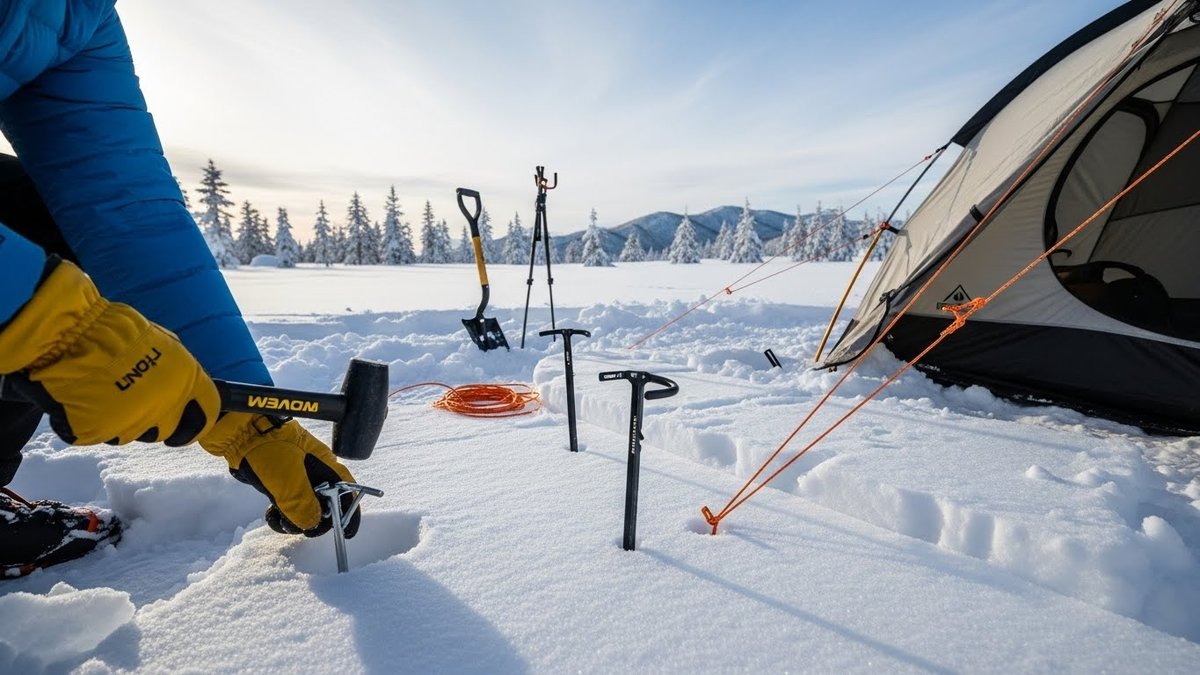
On snow, anchoring works differently. Based on established snow camping guidance: 40–50 cm snow stakes handle 10–30 cm of accumulation reliably, while 60 cm stakes plus deadman anchors are more appropriate beyond 30 cm, with an insertion angle of 30–45 degrees as the standard. Standard tent pegs/stakes lose effectiveness in snow — getting this wrong undermines even a top-spec tent. From my own experience, in 20 cm of snow, the quality of the anchor system consistently mattered more than the tent's specs for feeling secure overnight.
雪中キャンプで本当に頼れるペグと使い方ガイド | カヌエスタ
雪中キャンプでは、地面が見えないことや気温の低さ、風の強さなどでペグ選びと扱い方が重要になります。適切なペグを用意し、雪の状態に合わせた打ち方や補助方法を覚えておけば、テントの安定感が大きく変わり不安なく過ごせます。この記事では、最低限必要
akagi-canoe.com3-Season vs. Winter Tents: What Actually Changes
What 3-Season Tents Are Designed For
3-season tents are built around spring-through-fall use. Their design priorities are breathability and light weight — large mesh panels in the inner, and a fly that's more about shedding rain while keeping air flowing than blocking wind entirely. Popular models like the Snow Peak Amenity Dome or mont-bell Moonlight reflect this philosophy: they don't cinch down aggressively at the hem, prioritizing summer airflow over cold-weather sealing.
When you try to use them in winter, three gaps show up quickly: no snow skirt, too much mesh in the inner, and a fly that leaves the lower section open. The result is cold air entering at floor level. I've done it — using a high-mesh 3-season inner at around -1°C minimum, and my feet got cold well before the rest of my body. Even adding fabric inside to block openings doesn't fully address the gap between the hem and the ground.
Pole structure is another difference. 3-season tents typically use simple cross-pole configurations optimized for easy setup and low weight. That's rational for non-winter use but leaves less margin when heavy winds or snow load get involved. Guy line attachment points are usually kept to a minimum, making it harder to tension the tent thoroughly.
What Makes a 4-Season or Winter Tent Different
4-season and winter-specific tents swing the design priorities toward wind resistance, insulation, and weather protection. As multiple gear guides note, the distinction from 3-season isn't just "warmer fabric" — it's a structure that limits cold air infiltration and maintains its shape under wind and snow.
The clearest differences show up in the skirt, low-mesh inner, and full-coverage fly. Winter models commonly include a skirt at the hem that blocks cold air along the ground. The inner uses fabric rather than full mesh, reducing direct airflow exposure. A fly that wraps down the sides provides better protection against crosswinds and sleet. Rather than checking for a "winter-rated" label, look at which parts of the tent are open and which are sealed.
On the pole side, more poles, more crossing points (geodesic-style), and more guy line attachment points all contribute. Mountain-oriented models like the MSR Access or reinforced-fly alpinist domes exemplify this approach — distributing wind and snow loads rather than concentrating them. Even among auto-camping tents, winter-capable 2-room and tunnel designs often feature larger-diameter poles and more anchor points than standard versions. These structural differences affect not just wind penetration but also whether the tent stays taut through the night.
The trade-off is real, though: winter tents sacrifice summer comfort. A closed-up, windproof design traps heat in warm conditions and is heavier and less airy than a 3-season alternative. Higher-spec fabrics that boost waterproofing also limit breathability, meaning condensation has to be managed through ventilation and technique rather than the fabric itself. A 4-season tent isn't a universal upgrade — it's a category optimized for specific seasonal conditions.
Where TC/Poly-Cotton Fits In
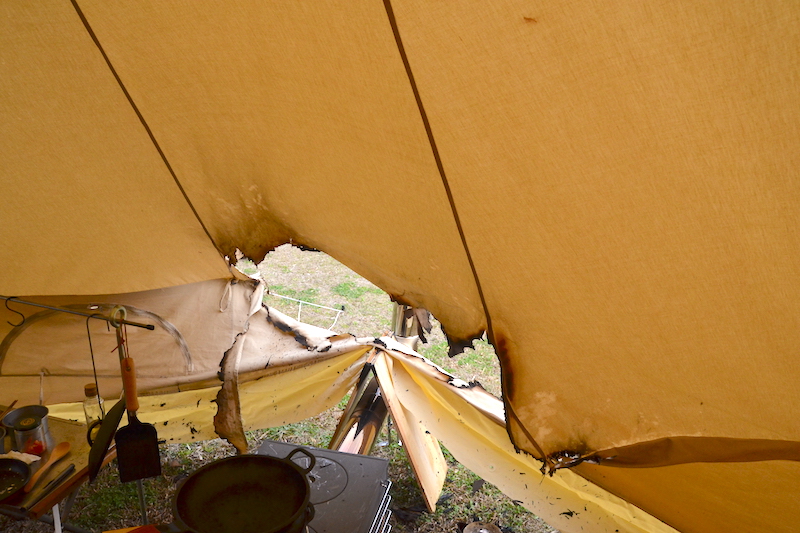
TC (poly-cotton) is not a middle point between 3-season and 4-season — it's a different direction on the comfort axis. The fabric's natural moisture absorption softens the condensation experience compared to pure polyester, and it handles embers from a campfire better than synthetic fabrics. That's why TC shelters from brands like Tent Mark Designs (Circus TC) and WAQ are popular for winter auto-camping.
That said, TC doesn't automatically mean "snow-capable." The warmth perception the fabric creates is real, but what actually handles strong winter wind and snow is the pole structure, panel geometry, and guy line design. A skirted TC tent resists floor-level drafts better than one without a skirt, but a large TC shelter with few poles is a fundamentally different beast from a geodesic 4-season alpine dome in wind and snow performance.
The other real-world factor with TC is weight and packed size. The cotton blend makes the fabric heavy, heavier still when wet. Packed volume is substantial — for solo campers managing everything from carry-in to post-trip drying, that difference adds up. In hot weather, TC can also trap heat and moisture despite its breathable reputation. The strengths — ember resistance, soft condensation feel — are genuine, but TC is better understood as comfort-optimized for cold-but-dry winter conditions rather than a year-round solution.
Putting it together:
| Feature | 3-Season Tent | 4-Season / Winter Tent | TC / Poly-Cotton |
|---|---|---|---|
| Primary use | Spring–Fall | Winter, high wind, snow | Cold-but-dry winter, comfort focus |
| Breathability | High | Moderate | Higher |
| Wind resistance | Low | High | Relatively high |
| Snow skirt | Often absent | Usually present | Many models include one |
| Condensation | Can accumulate noticeably | Managed through ventilation design | Softer condensation feel |
| Weight / packed size | Light | Tends heavier | Heavy and bulky |
| Summer suitability | High | Gets hot | Can get stuffy |
| Snow capability | Weak | Strong | Depends on structure, not fabric |
| Ember resistance | Low | Depends on material | Relatively strong |
This comparison makes it easier to assess how far a 3-season tent can stretch into winter, and whether a 4-season or TC model makes more sense as an addition. The principle of evaluating a tent by its full structure runs through every section of this guide.
Five Checkpoints for Choosing a Winter Tent
Knowing the feature names isn't enough. In practice, working through skirt → ventilation → fabric → shape → size → waterproofing → packed size in that order reduces mistakes and improves confidence in bad weather. The earlier items in that sequence have the most direct impact on winter comfort and usability. Reading past the marketing copy to look at the hem, vent placement, fabric type, and pole geometry makes shortlisting candidates dramatically faster.
Snow Skirt
The skirt is one of the first places where winter tents diverge. Just that strip of fabric hanging at the hem does a meaningful job of blocking cold air that would otherwise creep in along the ground — even in snow-free winter, the felt difference is real. For auto-camping setups like 2-room tents and shelters, the presence or absence of a skirt noticeably affects floor-level comfort, and this is one of those things you immediately understand after experiencing it firsthand.
But "does it have one?" is only the starting question. Does the skirt wrap all four sides? Is it shorter only at the entrance? Can it be rolled up? These details determine actual usefulness. Models like Coleman's Tough Screen series and Snow Peak's winter shelters, where the hem treatment is thorough, are easier to work with for cold-air management. Tents where parts of the hem stay open create persistent draft channels, and those gaps are hard to address after the fact.
Ventilation
Seal up the bottom with a good skirt, and ventilation design immediately becomes more consequential. Winter camping tempts you to keep everything closed for warmth — but real comfort depends heavily on vent placement. From repeated field experience, a tent with two independent vent systems (top and bottom) noticeably reduces moisture on the inner walls on cold mornings compared to single-upper-vent designs. Upper-only venting doesn't provide enough of an escape route for warm, humid air, and the result in the morning is wet inner walls that risk contacting your sleeping bag.
The diagnostic is simple: is there an exhaust path at the top and an intake path at the bottom? A large roof vent doesn't create circulation if there's no path for fresh air to enter from below. Opening the door partway is one workaround, but it's impractical for overnight use — a dedicated lower vent is the more hands-off solution for sleeping hours.
Fabric
Fabric affects condensation behavior, drying speed, weight, and ember resistance more than it affects warmth in any direct sense. The main options in winter are synthetic fabrics (polyester or nylon) and TC/poly-cotton.
TC absorbs moisture instead of letting it bead up and drip, which makes the interior feel better in winter. That's why brands like Tent Mark Designs and WAQ have found strong audiences with their TC shelters. The catch: TC's typical waterproof rating sits around 300–400 mm, versus 1,500–2,000 mm for standard synthetic tents. In hydrostatic terms, 300 mm is approximately 2.94 kPa versus 14.71 kPa for 1,500 mm — the gap is much larger than it feels intuitively. TC trades a gentler condensation experience for less margin against sustained rain or sleet.
Synthetic fabrics hold waterproof ratings more reliably and dry faster — the approach taken by mountain brands like MSR and Arai Tent as well as auto-camping brands like Ogawa and Coleman. When evaluating fabric for winter use, the more useful question is how the tent balances breathability and waterproofing in its design, not how "warm" the material looks.
Shape
Shape matters more than most people expect. Because wind is a major factor in winter, lower-profile designs that deflect rather than catch wind have a structural advantage. Dome tents, low-profile tunnel tents, and geodesic-style designs with multiple pole intersections tend to be more stable; single-pole (tipi) tents and wide-wall shelters lean toward the comfort-priority end of the spectrum.
What to actually look at is not "is it a dome?" but whether the panels are oversized, whether pole crossings are sufficient, and whether the tent is designed assuming guy lines will be used. Mountain-grade models like the Arai Tent Eraize with its winter fly are built from the ground up for bad weather. Large shelters prioritize interior efficiency, but in winter wind, wider wall faces take more pressure — something worth checking before committing. Snow-free winter camping with manageable wind? Interior comfort can be the priority. Sites exposed to serious wind? Shape differences show up directly in how quietly you sleep.
Size
In winter, you need more space than the listed capacity suggests. A useful benchmark: plan for 1–2 more people than your actual count. Two people → 3–4 person tent. Three people → 4–5 person tent. This isn't luxury — winter gear is bulkier, thick sleeping bags and pads and extra clothing layers eat into floor space fast.
Even without a heater, whether there's room for gear and clear movement paths significantly affects the experience. You need to take off boots, store wet outer layers, and get dressed in the morning without pressing against the condensation-covered walls. A tent that's technically right-sized for your party often feels one or two people too small once you're actually in it with full winter kit.
ℹ️ Note
In winter, you need floor space not just for sleeping but for gear storage and movement around the entrance. A tent at exact rated capacity tends to feel cramped not while sleeping, but during the morning dress-and-pack routine — and once you've experienced that, it's hard to ignore.
Waterproofing Benchmarks
Higher ratings are reassuring, but rating numbers alone shouldn't decide your choice. For general camping, 1,500–2,000 mm is a common benchmark. In demanding conditions, some practitioners suggest aiming for approximately 5,000 mm on the fly and 3,000 mm on the inner — but this reflects specific expert perspective, not a universal standard. Also check which parts of the tent actually carry those ratings; high numbers on one panel don't mean the full tent performs at that level.
Packed Size and Weight
The more winter-capable a tent is, the more its packed size and weight become practical considerations. TC and large 2-room tents particularly show their weight during packing, carrying, and drying rather than during setup. Car camping makes weight manageable — but for solo campers who regularly set up and break down, the question isn't "can I fit this?" but "can I handle a wet, heavy pack-out?"
Think beyond the tent body: pole bag, tent pegs/stakes, guy lines, and winter add-ons all need to fit together. Winter camping also means snow stakes, longer anchors, thick sleeping pads, and insulated layers competing for cargo space. For families, the question is width in the cargo area; for solo campers, it's whether the tent takes over space needed for other essentials. Snow Peak's large tent lineup and Ogawa's TC models offer excellent comfort, but their true usability only becomes clear when you account for the full packing reality.
What Changes Between Snow-Free and Snow Camping
Snow-Free Cold-Weather Camping
Snow-free winter camping looks easier than snow camping on the surface — but in practice, temperatures near 0°C and wind exposure at open campsites are the primary challenges. The focus here is less on snow load and more on blocking cold air infiltration and keeping the tent stable under wind. As noted earlier, lower-profile dome or tunnel tents that deflect wind outperform tall, wide-walled designs for winter practicality.
In this scenario, a snow skirt becomes particularly meaningful. It doesn't dramatically raise interior temperature — its job is specifically to block cold air creeping along the floor. My observations at cold highland campsites confirm that skirt presence makes a consistent difference in floor-level comfort, which is one of the reasons skirted TC shelters have found a following for snow-free winter use.
Interpreting weather resistance looks slightly different here too. Snow load isn't the concern — resilience against wet conditions including rain and sleet is what matters. A practical target is 1,500–2,000 mm or above as a general guideline, with more margin worth seeking if you camp in areas prone to extended rain or expect sleet with wind. TC tents offer a comfortable interior experience, but their waterproof numbers leave less margin than synthetic tents — for snow-free winter use, "good for cold weather" and "good when wet" need to be evaluated together.
On setup: don't skip the guy lines. It's easy to set up like it's a standard camping trip when there's no snow — but winter wind can shift direction, and a tent with minimal guying loses stability fast. My rule of thumb for windy forecasts is to set every available guy line at pitch time rather than adding them later. It's far quieter overnight when the tension is worked out from the start.
⚠️ Warning
Manufacturer guidelines (such as those from Shinano Tent) suggest tent fabric begins moving noticeably around 5 m/s, that maintaining comfort becomes difficult around 8–10 m/s, and that 10+ m/s is considered a danger zone. My field observations align with this — shape differences in tent performance tend to emerge right around that 5 m/s range. Check both official guidelines and weather forecasts before heading out.
Snow Camping
Snow camping shifts the requirement profile substantially. Snow-free winter is mostly about hem management and windproofing — but with 10–30 cm of snow accumulation, the tent now faces wind plus snow load. What handles that is not fabric thickness but pole strength, the number of crossing points, and a shape that distributes load. Mountain-oriented 4-season tents favor dome and geodesic structures not for appearance but because they spread snow weight rather than concentrating it.
Overnight snow is especially tricky because it can shift character. Wet, heavy snow exerts much more pressure than the same depth of light powder. Buildings have standardized snow load ratings; camping tents don't. That's why evaluating pole count and crossing configuration is more reliable than trusting catalog descriptions. The reputation of brands like MSR, Arai Tent, and Hilleberg in winter conditions comes specifically from this structural approach.
Anchoring is a completely different problem on snow. Instead of driving a stake into soil, you're trying to get surface area working for you with snow stakes or deadman anchors. For 10–30 cm of accumulation, 40–50 cm snow stakes are the practical starting point. Beyond 30 cm, 60+ cm stakes and deadman anchors are the realistic answer. Detailed guides on snow anchoring confirm this — but what the written instructions don't fully convey is how large the difference in performance actually is between lengths. At a snowy lakeside campsite in 20 cm of snow, I once ran 40 cm snow stakes that held fine after setup — then wet, heavy snow arrived overnight and the stakes gradually worked loose. Adding deadman anchors mid-night finally brought stability. Snow isn't "anchored if it went in" — holding power comes from how much compacted snow the anchor engages, not just depth of penetration.
Technique matters too. Drive snow stakes at a 30–45 degree angle against the pull direction rather than straight down — angled stakes resist extraction better. If your tent has a snow skirt or snow flap, pressing snow lightly over it creates a snow flap system that simultaneously blocks cold air infiltration and secures the hem. Where the skirt was the star feature for snow-free conditions, in actual snow it also pulls double duty as part of the anchoring system.
One more hazard that gets less attention than snow load: snowmelt water. When afternoon sun melts snow around the tent perimeter and that water refreezes overnight, morning packing and entry become significantly more difficult. Water that routes under the floor can undermine even well-insulated setups.
Frozen Zippers: Practical Solutions
One of those unglamorous but frequently painful winter tent problems is a frozen zipper in the morning. It's not a defect — it's condensation or snowmelt water that settles around the zipper track and freezes overnight. Forcing a frozen zipper damages the slider; in the worst case, it destroys the zipper elements. These small details separate tents that feel good in cold conditions from ones that don't.
The most effective prevention starts at setup: fold the groundsheet edges inward, under the tent floor. Edges that stick out become channels that guide water toward the floor and entrance. Winter ground that looks flat often has subtle slopes that redirect water, and a groundsheet that acts as a collection tray creates exactly the wet-floor and frozen-zipper problem you're trying to avoid.
Before sleeping, wipe moisture from around the zipper tracks. The bottom edge of the door, ventilation closures, and vestibule panel seams all trap water and freeze easily. I keep a small absorbent cloth specifically for running along the door bottom before bed — it sounds like a small thing, but it consistently makes morning exits smoother.
If the zipper is frozen in the morning anyway, wait for sun to warm it rather than forcing it. Winter mornings create urgency around packing, but yanking on a frozen zipper shortens its life dramatically. Pitching with the entrance facing east helps — morning sun hits the door earlier and naturally thaws the zipper. In snow camping overall, anticipating how water and ice behave tends to prevent more problems than chasing high-spec fabrics.
If You're Running a Heater, Ventilation Is Non-Negotiable
CO Basics and the Numbers That Matter
When combustion-based heaters come into the conversation, carbon monoxide (CO) is more important than comfort. Wood stoves, kerosene heaters — any device that burns fuel in an enclosed space can produce CO if oxygen depletes or exhaust is disrupted. CO is colorless and odorless, and its symptoms (fatigue, headache, drowsiness) are easily mistaken for cold and sleepiness. Alongside fire risk from embers and radiant heat, CO is the highest-priority hazard in a heated winter tent.
The practical threshold: maintain below 50 ppm. At 200 ppm, there's a realistic risk of mild headache within 2–3 hours. Tents are small volumes, and sleeping occupants may not notice impairment until it's dangerous. Once a tent warms up, the "thin air" sensation or mental heaviness is easy to attribute to warmth or tiredness rather than CO — never rely on body sensation alone to assess safety.
A CO detector is mandatory whenever combustion heating is used in a tent or shelter. Even excellent ventilation design can be compromised by a wind shift, a blocked skirt, or a chimney draft change. The instrument is more reliable than your senses. When I'm running a heater in a shelter, I decide where the CO alarm goes before I think about anything else — detecting danger early outranks all other gear priority.
Building a Ventilation Flow Path
Ventilation isn't about cracking something open — it's about creating an actual inlet and outlet so air genuinely moves. Since warm air rises in a tent while cold air settles near the floor, the structural solution is upper exhaust plus lower intake. With both directions available, natural convection develops and you address condensation and CO risk simultaneously.
In practice, either a full 2–3 minute flush every hour or maintaining a constant 2 cm opening are both workable. Ideally, open upper and lower vents on opposite sides of the tent — air moves more naturally in a diagonal cross-draft than in and out the same side. Shelters designed for stoves tend to use this configuration, and it consistently keeps interior moisture lower and CO accumulation reduced. Under no circumstances should you run with all openings closed.
On the design evaluation side, don't count vent openings — check whether the layout creates a viable path from a lower inlet to an upper exhaust. Upper vents without lower air entry points create weak circulation. For kerosene stoves, the question is whether the vestibule or hem area allows a lower air path. For wood stoves, the primary questions are chimney port availability and whether the interior layout allows enough clearance between the chimney and tent walls. Tents like CanvasCamp's cotton canvas shelters are designed with stove operation as a first-class consideration; most standard 2-room and single-pole tents are not.
ℹ️ Note
For tents running combustion heaters, what matters most isn't the number of vents but whether they split upper and lower, and whether keeping them partially open is compatible with normal movement through the tent space.
Interior layout deserves attention too. Keep combustibles away from the heat source — tent walls, inner panels, chair backs, and drying clothing all need clearance. Winter's loaded interior makes it easy for proximity violations to happen. Before placing a stove in a shelter, my three-point check is: "path out the top," "gap in from below," and "open floor area around the heat source."
On Manufacturer Restrictions
The baseline here is straightforward: if a manufacturer prohibits or discourages combustion heating in a tent, don't plan around using it. Brands like Finetrack make this explicit for ultralight and mountaineering shelters — and when you look at the materials, clearance dimensions, and exhaust design, it's obvious they weren't built with combustion heating in mind. The "just open it a little and it'll be fine" approach applied to a standard polyester or nylon tent crosses outside the design envelope.
TC fabric's ember resistance gets widely cited, but it doesn't mean lower CO risk. This is a common misunderstanding. Popular winter TC tents from Tent Mark Designs, WAQ, and others offer genuine advantages in a campfire environment — but heating safety depends on chimney port design, heat shielding, interior clearance, upper and lower ventilation, and having a CO monitoring setup in place. Ember resistance and ventilation safety are separate issues.
Manufacturer restrictions often look overly conservative from a user standpoint, but the engineering logic behind them is sound. A tent is not a room: it has no rated exhaust system, no non-combustible interior surfaces, its walls flex under wind pressure, and its vents can be blocked by weather conditions. I'm not in a position to say "you can manage it yourself" when looking at those structural constraints — and that goes double for kerosene heaters, which can be perfectly well-behaved in home environments but operate under completely different conditions in a small tent volume.
The practical rule: when planning winter heating, determine first whether the tent's design actually accommodates combustion heating. Even stove-compatible models need a layout that achieves the required ventilation flow and clearance — and non-recommended tents present safety risk before comfort enters the equation. Starting a winter tent search from "looks warm enough to heat" leads to poor decisions; the right starting point is whether the heating design and tent design are compatible.
What Makes a Tent Resist Condensation
How Condensation Actually Works
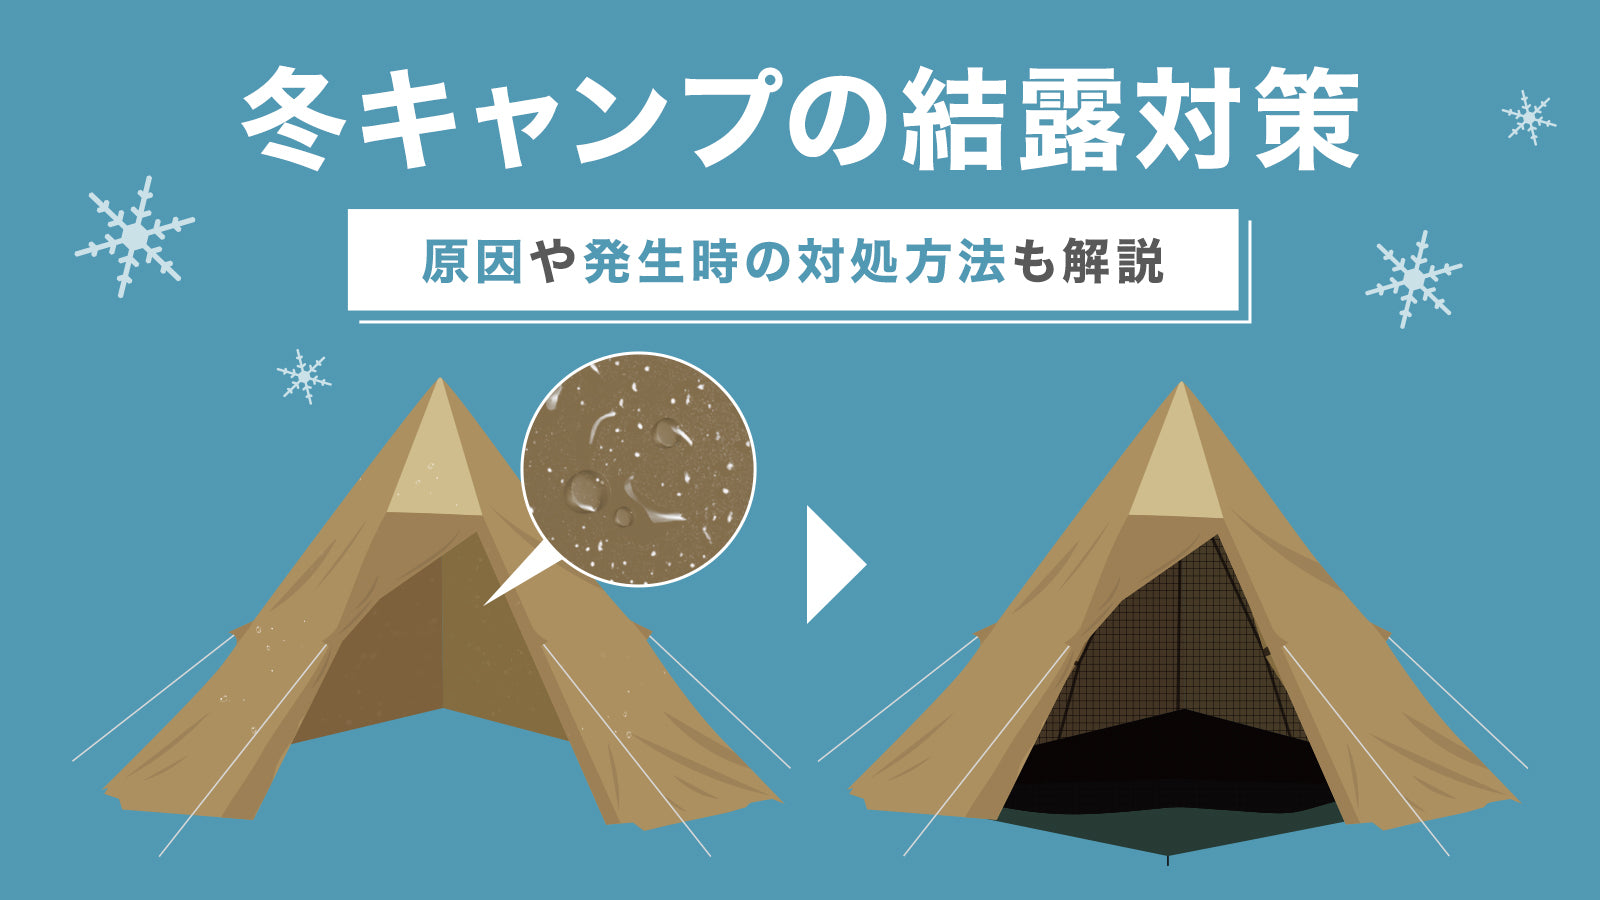
Condensation in winter tents comes from two factors interacting: the temperature differential with outside air, and rising humidity inside from breathing, cooking, and wet gear. When warm, moist interior air hits a cold fly or inner wall, it becomes water. The mechanics are consistent, and they're the same reason condensation is a fundamental winter tent challenge rather than a product defect.
The useful mental shift: instead of trying to eliminate condensation, choose a tent where it's less likely to form, easier to wipe away, and harder to reach your sleeping bag. In cold conditions, some moisture will always find its way into the tent interior. So evaluate "a tent that won't destroy your night's sleep from condensation," not "a tent that doesn't condense."
The experience varies. A tent where moisture appears as a light mist on the inner walls — easy to wipe with a cloth in the morning, not likely to transfer when your sleeve brushes the wall — is fundamentally different from one where water beads up and runs down the sides, or where the interior geometry means your sleeping bag inevitably contacts the wet wall during the night. Condensation management isn't just about ventilation — it's about where water forms and how far it intrudes into your living space.
冬キャンプの結露対策7選を紹介!原因や発生時の対処方法も解説
冬キャンプの悩み「結露・夜露」の原因と対策をわかりやすく解説します。発生を抑える工夫や、濡れたときの対処法も紹介。
waq-online.comFabric and Structure: What Works
TC and cotton-blend fabrics have a structural advantage here. Their moisture-absorbing nature means water tends to disperse into the fabric rather than beading up and dripping, which softens the condensation experience compared to pure polyester. I've used TC shelters on sub-zero mornings where the inner walls were genuinely cold but the surface felt damp rather than wet — no "instant soaking if your sleeve touches the wall" situation. The additional ember resistance is also useful when you're running winter camping gear nearby.
The trade-offs are clear: more weight and more packed volume, and lower waterproofing numbers compared to synthetic tents. As covered earlier, TC's waterproof rating typically trails standard tent fabrics significantly — TC doesn't compensate through raw waterproofing in extended rain or cold rain conditions. Better condensation experience in exchange for reduced wet-weather resilience and heavier carry. It's a classic trade-off rather than one option being better overall.
Structurally, double-wall construction is the most reliably effective approach. The fly handles the cold exterior surface while an air gap between fly and inner keeps water from reaching the living space directly. Pair that with upper and lower ventilation that lets warm, humid air escape upward while drawing drier air in from below, and you've addressed the main condensation drivers. For winter tents, evaluate not just the number of vents but whether the inlet and outlet are on separate levels.
Inner material matters too. In deep winter, a fabric-dominant non-mesh inner (rather than full-mesh) puts physical distance between cold air and your sleeping space. And adequate clearance between the fly and inner means moisture forming on the outer surface stays there rather than transferring through to the interior — which keeps your sleeping bag dry during the night. Reading TC shelters like the Circus TC as "using material properties to manage condensation" and 4-season domes as "using double-wall construction and ventilation routing to control it" is a useful way to frame the comparison.
💡 Tip
TC fabric alone is not enough for winter condensation management. You need moisture-absorbing material combined with upper-lower ventilation, double-wall construction, and interior dimensions that keep you away from the walls. All of those together is what actually reduces the discomfort.
How Campsite Conditions Shape the Result
The same tent will behave differently depending on where you pitch it. Lakeside, streamside, and basin locations are particularly prone to heavy condensation — radiative cooling combines with trapped moisture, and mornings tend to be wet regardless of what tent you're using. Spec sheets don't capture this, but terrain and airflow have a stronger effect on winter condensation than most tent-specific variables.
In practice, low-lying and waterside spots see stronger wall cooling overnight and more water on the fly in the morning. Places with even slight air movement — colder as they may feel — allow moisture to escape, which keeps inner wall buildup lower. Downwind spots and shaded areas are doubly problematic: condensation forms more readily and dries more slowly. When a campsite leaves everything feeling damp well into the morning, the terrain is often more responsible than the tent.
Thinking about condensation-resistant tents means including how the tent behaves in moisture-trapping environments, not just what its spec sheet shows. TC's value in cold mornings comes specifically from managing the moisture behavior in those tough conditions — not from preventing condensation entirely. And for reducing that winter discomfort, being able to choose a spot with some air movement may matter as much as the tent itself.
Matching Tent Type to Your Camping Style
Solo
Solo winter tent selection is the most clear-cut. If you're not running a heater, prioritize a compact, defined sleeping space with a functional vestibule over raw interior volume. Large interiors are harder to warm passively and create more surface area for heat to escape — a small tent where the walls aren't far from your sleeping bag is often warmer by default. My personal threshold for solo winter camping: a sleeping area and a place to keep gear I don't want getting wet are sufficient. More interior than that tends to work against you.
For snow-free cold-weather camping, the core candidates are a lightweight dome or a skirted single-pole tent. Well-designed dome models from Arai Tent or single-pole designs like the Tent Mark Designs Circus TC have clear setup logic and work well. Domes hold up better in wind; single-pole designs offer more floor area per weight and fast setup — both are practical for cold, dry conditions. The single-pole with a skirt is particularly easy to optimize for cold-weather use, and a faster pitch means less time standing in the wind.
Snow camping changes the calculation. Here, small geodesic designs or domes with multiple pole crossings are the primary choices. The structure found in MSR Access-class tents and similar alpine 4-season designs limits deformation under load, which is what matters when wind and snow are working against you simultaneously. Solo snow camping favors tents that you can pitch quickly alone, knock snow off easily, and find intact in the morning. Smaller tents are also easier to anchor completely and simpler to plan deadman systems for.
Two-Person
Two-person is the trickiest sizing scenario: cramming into a solo tent immediately hurts comfort, but going to family-scale creates a tent that's wasteful and unwieldy in winter. For snow-free cold weather, low-profile tunnel tents or low-dome models suit two people well. Beyond just sleeping space, having room to move gear to one end or into a vestibule makes nighttime movement and a morning routine dramatically more manageable. Two people in an enclosed space also means facing each other more often — shoulder room and headroom matter more than peak height for day-to-day satisfaction.
In snow conditions, a dome with a denser pole structure is the stable choice. If you're looking at single-pole tents, don't judge them on their simple setup alone — plan for secondary pole reinforcement and robust guy line rigging as part of the system. Single-pole TC shelters are comfortable in snow-free winter but in actual snow, maintaining a functional form matters more than the spaciousness they offer. Two people's sleeping bags and gear compress the usable floor area once you account for sloped walls, so one size above the rated capacity is a better target than right-sized.
One thing two-person camping makes obvious: even without a heater, the vestibule earns its keep. Wet boots, steaming cookware, and a dew-covered jacket separated from the sleeping area means less moisture inside and better sleep quality. Two people generate twice the humidity of solo camping, so the ability to route wet and steam-producing activities outside the sleeping space matters more than raw interior size.
Family Camping
For families, the exact-capacity mindset doesn't hold in winter. A family of four benefits from a 2-room shelter sized for 5–6 people rather than 4. The margin goes toward children's gear spread during the bedtime routine, wet jacket staging, and creating safe clearance around any heat source. That extra space is significant for both safety and comfort — it's not about luxury.
For snow-free winter conditions, a large skirted 2-room tent is the practical center. From Coleman, Snow Peak, Ogawa — models with upper and lower venting on both the living room and sleeping sections allow you to actually manage humidity across a family-sized space. More people means more moisture production, so the ability to circulate air between zones rather than sealing everything shut matters more than with smaller groups. Kids moving in and out frequently makes the combination of skirt-protected entry and manageable ventilation particularly valuable.
Taking a large family tent to a snowy campsite is a different conversation — it really suits managed, cleared-surface camp areas rather than open snow fields. Making a large 2-room functional in deep snow requires manpower, extended setup and pack-down time, and a carefully planned snow anchor grid. Snow accumulation at the scale where families camp typically requires 40–50 cm snow stakes as a baseline, with longer stakes and deadman systems for significant depth. Family tents offer excellent comfort — but in snow, "can be pitched" and "can be operated reliably through the trip" are two distinct challenges.
Powered vs. Non-Powered Sites
On powered sites, you can shift the tent selection priorities toward electric heating compatibility. The advantage is that you're no longer asking the tent to be a hermetically sealed thermal box. Electric blankets and hot carpets work with the tent as a wind-breaking outer shell that limits heat loss rather than as a self-heating enclosure. This means a 4-season-or-bust approach isn't necessary — for snow-free conditions, a skirted dome or 2-room performs well without going to full winter-spec.
Non-powered sites sharpen the priorities. Ventilation moves to the top of the list regardless of whether you're using a heater. People and cooking add humidity to any tent interior, and combustion heaters add CO to the equation. The target is below 50 ppm, with 200 ppm carrying real headache risk within hours. So the evaluation for non-powered tent selection focuses less on interior volume and more on whether upper and lower air paths exist and whether partial venting is compatible with staying warm.
Sleeping system thinking also shifts. Non-powered camping means the tent shouldn't be expected to handle floor cold on its own. A sleeping pad rated R-value 5.0 or above for winter, and R-value 6.5 or above for hard freezing conditions, handles ground heat loss more effectively than tent insulation. Thinking of the sleeping system as a complete package — tent + pad + sleeping bag — rather than asking the tent to do all the work gives more reliable results in the field.
Wood Stove vs. No Stove
If you're planning to run a wood stove, the tent choice narrows to designs with a dedicated chimney port. This is structural, not aesthetic. The requirements are: chimney port placement, heat shielding at the port, and functional upper-lower ventilation routing. CanvasCamp-style canvas shelters and other purpose-built stove-compatible designs integrate all three. Adapting a standard tent with an aftermarket solution requires matching chimney diameter, managing clearance, and building heat shielding — a meaningfully higher complexity level.
Stove-compatible tents tend to land on TC or poly-cotton fabric for good reasons — ember resistance and softer condensation behavior both align well with stove use in winter. But evaluating fabric alone misses the more important question: whether there's adequate clearance between the sleeping area and the stove, and whether wood storage and traffic patterns keep combustibles away from the heat source. A large tent that doesn't allow a safe layout is a problem regardless of fabric type. With a wood stove, the operative measure of safety is "usable floor area away from the heat source," not total square meters.
Without a stove, selection is simpler. The core question becomes balancing condensation management and wind resistance — skirted domes or low-profile tunnels for snow-free conditions, 4-season-oriented domes for snow camping. TC remains a valid option, but without a stove, ember resistance drops in relevance and ease of drying and carry weight become more important. The framing that helps: stove setups call for "a tent that safely contains a heat source," while non-stove setups call for "a tent that handles cold and moisture without breaking down." Matching tent design philosophy to that question cuts down on second-guessing.
The field of options — 2-room, solo dome, family shelter, single-pole — each suit different group sizes and winter use patterns. Reference points like Coleman's 2-room lineup, Tent Mark Designs' Circus TC, and dome-style designs from Arai Tent and MSR offer clear structural philosophies that help you map your actual needs onto specific features.
Peripheral Gear to Evaluate Before You Buy
Insulation
The tent gets most of the attention in winter gear discussions, but cutting off ground cold is often what most determines nighttime comfort — and a tent alone can't do that job. Sleeping pad R-values are now comparable across brands using ASTM F3340-18 testing. The practical thresholds: R5.0 or above for winter, and R6.5 or above when genuine freezing temperatures are expected. As touched on earlier, ground insulation works before heating does — when I moved to an R6.5 pad setup, foot cold largely disappeared and middle-of-the-night wake-ups from cold dropped significantly.
Sleeping bags are better evaluated on comfort temperature than rated low temperature, which tends to give more reliable real-world results. Winter conditions make down susceptible to moisture affecting loft, so adding a synthetic-fill inner layer that handles dampness and residual condensation is often a practical solution. The principle from brands like Finetrack — that warmth comes from the full layering system rather than any single item — is the most reliable mental model for building a winter sleep system. In short: winter tent warmth comes more from a properly rated pad combined with a sleeping bag selected at comfort temperature than from fabric thickness.
雪山テント泊でも快眠できる。寒さを防ぐ断熱テクニック | 国産アウトドアブランドのファイントラック
雪山テント泊でテントの保温力がアップする断熱テクニック。快眠できるテント内環境の作り方、断熱性の高い装備選びなど寒い夜を暖かく過ごすためのコツをご紹介します。
www.finetrack.comAnchoring
Beyond the tent body, total anchoring capacity determines stability — and the mindset of using the same number of tent pegs/stakes as summer is a frequent underestimation. Count all wind-facing edges, entrance sides, and guy line attachment points and plan to cover them fully. On snow, standard stakes are largely ineffective — snow stakes or deadman-style snow anchors become essentially required equipment.
For 10–30 cm of snow, 40–50 cm snow stakes are the working standard. Beyond 30 cm, 60+ cm stakes and deadman setups become the realistic answer. The 30–45 degree insertion angle that creates resistance against the pull direction is the baseline technique, and packing snow around the stake after placement is part of getting full hold. As the fundamentals of snow anchoring confirm: snow doesn't hold by penetration alone — the stake starts performing once the snow around it is compressed. Alpine tents from Arai and MSR earn their snow reputation not just from pole design but from being engineered to work as complete systems including guy lines and anchor points.
Waterproofing and Frozen Hardware
The groundsheet makes more difference than most people expect in winter. Snow melt and muddy rain water find their way in easily, and a groundsheet that extends beyond the tent perimeter acts like a collection basin, channeling water toward the floor and entrance. The correct approach is folding the groundsheet edges inward so they stay inside the tent footprint. This is more about geometry and placement than spending money on an expensive sheet.
Zipper freezing is the other issue worth anticipating. Condensation and frost that accumulate around the zipper track freeze overnight and make the door either immovable or easy to damage. Wiping moisture from around the zipper before sleeping is simple and consistently effective. If it's frozen in the morning, warm it gradually through a glove rather than pulling hard — forcing a frozen zipper shortens its life immediately. A complete winter tent setup, in practical terms, means covering the tent body and also groundsheet, tent pegs/stakes, snow anchors, and zipper management as an integrated system.
Wrapping Up: Decision Flow and Next Steps
Start the decision with your primary use case — that keeps the rest of the process from drifting. Snow-free camping around 0°C points toward a skirted dome or low-profile tunnel that balances wind resistance and ventilation. Sub-zero conditions with snow accumulation call for moving toward 4-season construction, prioritizing structural strength and secure anchoring. Layer group size and heater use on top of that baseline, then cross-check against skirt, ventilation, shape, fabric, waterproofing, weight, and packed size to narrow your candidates. If you're planning to heat the tent, CO detection and a functional ventilation routing are part of the selection criteria — not afterthoughts.
Three concrete next steps:
- Decide whether your primary use is snow-free cold-weather camping or snow camping.
- Pull up the spec sheet for your candidate tents and compare skirt, ventilation configuration, fabric, waterproofing rating, weight, and packed size side by side.
- Don't stop at the tent — review your sleeping pad R-value and sleeping bag comfort rating at the same time, and if you're planning combustion heating, build a CO detector into the setup from the start.
For related topics: our winter camping tent selection guide covers the full seasonal decision, and the rain protection and waterproofing guide goes deeper on interpreting waterproof ratings for different conditions. Both are worth reading alongside this piece when you're finalizing a choice.
Related Articles
The Complete Guide to Choosing a Tent
Before hunting for popular models, understanding tent shapes, materials, and sizing will save you from costly mistakes. Whether you're buying your first tent, deciding between solo and family setups, or rethinking rain and wind protection, this guide lays out the criteria that actually matter.
Best Solo Tents Compared: How to Pick the Right One
Choosing a solo tent is never as simple as going with the lightest option. Weight, ease of setup, livability, waterproofing, and vestibule usability all factor in — skip any of them, and buyer's remorse hits fast. This article covers
How to Choose a Family Tent: A Practical Buying Guide
Picking a family tent based on looks or popularity alone often leads to regret -- it felt smaller than expected, or rainy days were miserable. This guide is for families buying their first tent or outgrowing their current one.
How to Choose an Easy-Setup Tent: A Structure-by-Structure Comparison
Picking a tent based on 'looks easy to set up' or 'I like the style' tends to backfire the moment rain or wind hits on your first overnight. This guide breaks down instant, pop-up, dome, and single-pole designs by real-world usability and overnight performance for first-time buyers and anyone tired of regrettin