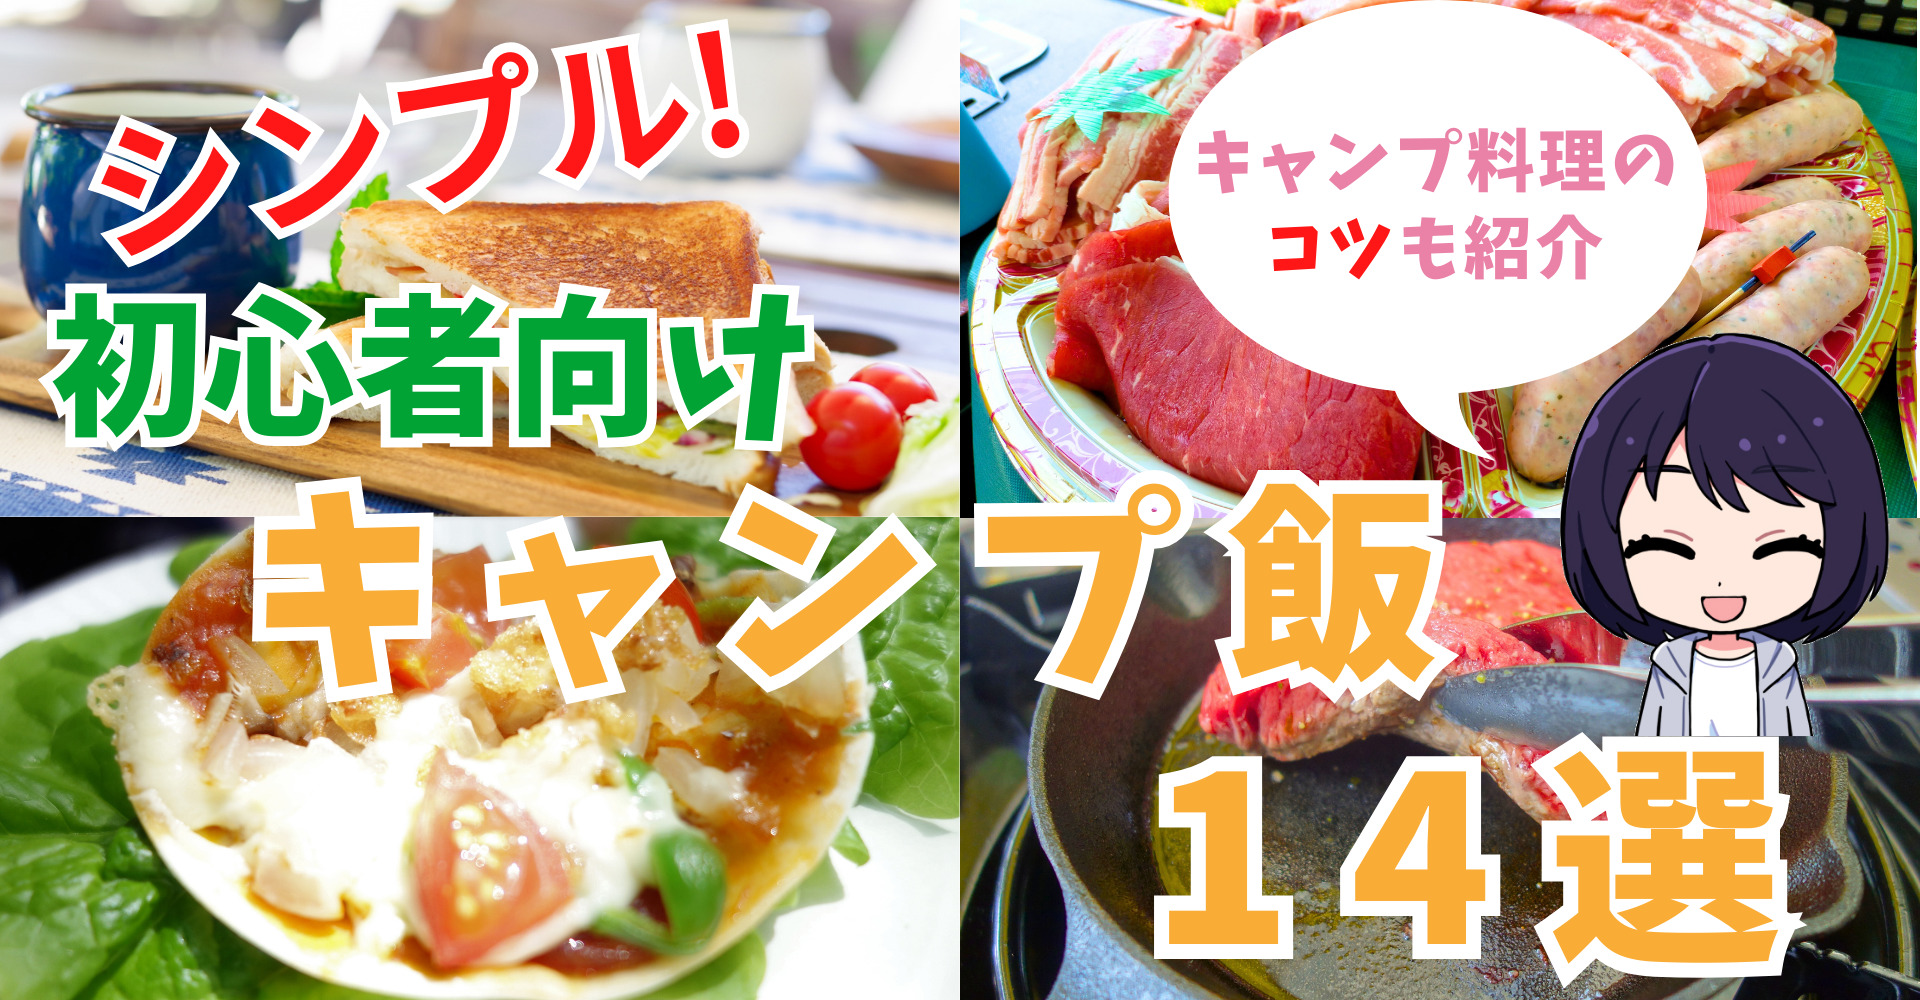
10 Easy Camp Recipes for Beginners — Gear and Food Safety
10 Easy Camp Recipes for Beginners — Gear and Food Safety
The secret to better camp cooking isn't more complex recipes — it's choosing meals that are hard to mess up and easy to clean up after. Here are 10 beginner-friendly recipes compared side by side across tools needed, cook time, dishes, serving size, and storability, so you can find the right fit for your trip.
Camp cooking gets a lot more enjoyable when you stop chasing ambitious recipes and start picking meals that are hard to mess up and easy to clean up after. This article compares 10 beginner-friendly recipes side by side — looking at the tools you need, cook time, dish count, serving size, and how well ingredients store — so finding the right fit for your trip is quick.
I learned this firsthand: arriving at an auto-camping site on a 35°C summer afternoon, nothing beat just wrapping ingredients in foil and letting them cook. On the morning of pack-up, a toasted sandwich was the clear winner. Summer camping means knowing more than just good recipes — the danger zone between 10–60°C and the safe refrigeration range of -5–5°C are worth keeping in mind for a stress-free trip.
Once you understand how to balance a staple, a main, and a side, planning a one-night menu isn't complicated at all. Here's a practical, beginner-focused breakdown of how to build camp meals that are easy, tasty, and manageable even in summer heat.
How to Choose Beginner-Friendly Camp Recipes
The 3 Most Forgiving Cooking Methods
When you're picking a camp meal for the first time, it's more useful to think about what kind of mistakes you want to avoid than what you want to eat. Fewer steps, less fire management, one piece of gear, minimal cleanup — those are the criteria. The methods that consistently check all those boxes, as seen across multiple outdoor cooking media, are toasted sandwiches, foil packet cooking, and one-pot meals. A look at Soto Recipe's Camp Meal Rankings and CAMP HACK's 40 Easy Camp Meal Ideas confirms this pattern clearly.
First: toasted sandwiches. A rock-solid breakfast option. You can fill them with ham, cheese, egg, or even leftovers from the night before — no need to plan a separate morning menu. Direct flame toasted sandwich makers tend to weigh around 0.65kg in most comparison guides; the IWANO direct flame model is listed at 4,990 yen (~$33 USD) on their official site. You can make do with a frying pan, but a sandwich maker holds everything in place, which makes a real difference when you're still getting your bearings. The main pitfall is burning — just don't overfill, and flip it every minute or so to stay on track.
Second: foil packet cooking. Wrap, heat, eat — and the foil doubles as your plate, which is genuinely useful at sites far from the water station. After a sweaty setup on a hot day, my go-to is sliced salmon with mushrooms, or potato and sausage — whatever I've already prepped, straight into the foil and onto the heat. Heavy-duty foil holds up to juicy fillings much better; Captain Stag's outdoor-grade thick foil (8m roll) has a manufacturer's suggested retail price of 2,000 yen (~$13 USD, tax not included). Butter, soy-based dipping sauce, or ponzu tie the flavors together without much effort — all very beginner-friendly.
Third: one-pot noodles, pasta, and rice bowl dishes. Everything starts and finishes in one pot or cooker, which keeps the cooking and eating workflow short and manageable for solo campers. Lunch works especially well this way: instant noodles with packaged shredded vegetables and sausage, pasta cooked in the same water as the sauce, or retort oyakodon or beef bowl over rice. You don't need to cook a staple, main, and side separately — dishes like curry or a rice bowl bring everything together in one serving, which beginners tend to find very satisfying.
The urge to go big with a Dutch oven or elaborate rice dish is real, but for the first trip, sticking to "grill only," "wrap and cook," or "one pot" gives you a far better chance of walking away happy. If you want to think through your gear alongside your cooking style, reading about cookware types alongside a tent sizing guide helps you see how the two fit together.
全50種キャンプ飯人気ランキング!簡単、子ども、肉などジャンル別 | ソトレシピ|キャンプ飯からご当地グルメまで「おでかけ×食」に特化したメディア
sotorecipe.comHow Much Time You Actually Have — Morning, Afternoon, Evening
What makes a camp recipe "right" often has less to do with the recipe itself and more to do with how much time and headspace you realistically have at that point in the day. Treating all three meals the same difficulty level makes planning harder than it needs to be.
Mornings are tight. Pack-up and cleanup are already on your mind, so the window for cooking is shorter than it feels. This is when you want meals where the heat does the work and your hands barely need to stop. Toasted sandwiches, a thermos of soup with a rice ball, or warming up leftovers from the night before are all natural fits. One slice of bread covers one serving of your staple, so a toasted sandwich with egg, ham, and cheese handles breakfast entirely. Add multiple dishes or chopping in the morning and the chaos usually beats the satisfaction — keeping it simple raises the overall mood of the trip.
Afternoons often land mid-activity or mid-travel, so light and fast is what works. One-pot noodles, quick pasta, and canned food adaptations are strongest here. A single serving of noodles counts as two staple servings, so it's filling without needing sides. A small frying pan or cooker is plenty for solo cooking; titanium sierra cups weigh as little as 37g each — four together come in around 148g — making them a genuinely useful lightweight option for eating and cooking on the go.
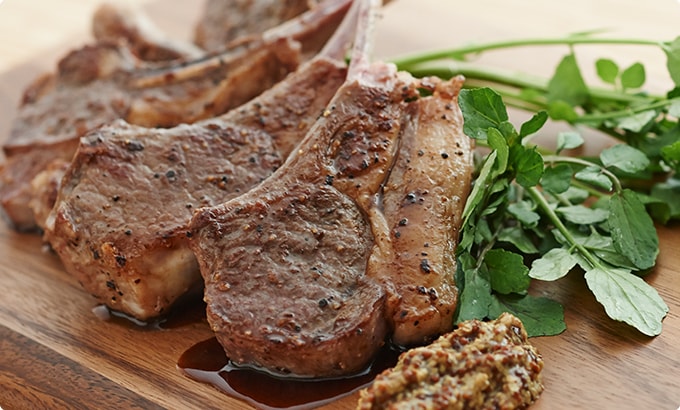
Evenings are where spending more time is actually worth it. Once the tent is up and the site is settled, a bit more effort translates into real satisfaction. Foil packets, hotpot, curry, and skillet-cooked dishes all suit the slower pace. Using curry as a reference point: rice at around 200g, meat at around 60g, and vegetables at 140–150g per person gives you a well-balanced, filling meal in a single bowl. Dinner is the one time when "slightly more effort for better flavor" is the right call — don't apply the same time-pressure logic you use for breakfast.
The pattern becomes clear: keep mornings minimal, keep lunches quick, and put your effort into dinner. Beginners do best with one slightly more ambitious dinner rather than spreading effort evenly across all three meals.
Getting the Most Out of Pre-Made Ingredients
For beginners, using packaged food at camp isn't cutting corners — it's smart design that prevents failure in the field. Retort pouches, canned goods, instant meals, and pre-cut vegetables are consistently recommended in outdoor media for exactly one reason: the closer food is to "heat and eat," the fewer opportunities there are for something to go wrong.
The key is not serving packaged food straight from the container, but adding just one step to make it feel like camp food. Pour retort curry over rice and top it with a grilled sausage and a fried egg. Open a can of yakitori and put it over rice with an egg yolk and sliced green onion. Mix instant corn soup with hot water instead of milk and stir in some cheese. Keep the base packaged, then add flavor and texture on-site — the result feels more satisfying than the effort involved.
I typically arrive with meat, leafy vegetables, mushrooms, and condiments sorted into separate bags. This approach means I rarely need to take out a cutting board at the campsite, and cleanup time — by my own experience — often drops by more than half. Zip-lock style freezer bags work great here; some are rated to -71°C, which means pre-marinated or prepped ingredients stay well-organized and well-chilled in the cooler.
💡 Tip
When building a meal around packaged food, keep it to "one main item, one or two add-ons." One retort pouch paired with an egg or some cheese, or a bit of pre-cut vegetable or sausage — that scope keeps prep and on-site cooking light.
From a storage perspective, canned goods, dried noodles, and retort pouches are far easier to manage than meat or fresh fish, especially in summer. Cooler sizing guidance generally puts a solo one-night trip at 10–20L and a family of three at 30–50L. Shifting more of the menu toward packaged ingredients reduces how much fresh food you need to keep cold, freeing up space. A cooler that's only about 70% full also circulates cold air more efficiently — mixing in even one packaged-food meal can make the whole cooler easier to run.
Packaged food is particularly well-suited to lunch right after arriving and breakfast on day two when fatigue is starting to show. In the evening, using it as a base while adding a grilled or foil-cooked component gives you the best balance of convenience and the feeling of actually cooking at camp. Being a good beginner camp cook isn't about making everything from scratch — it's about knowing which parts to hand off to packaged food so everyone enjoys the trip.
10 Beginner Camp Recipes: Comparison Table
Related: Tent Size Selection Guide, Complete Tent Buying Guide
For anyone who wants to see all 10 options at once, here's a side-by-side comparison of the most manageable classics for beginners. Cook time is rated as short / moderate / longer rather than exact minutes, factoring in fire management and cleanup. The "Recommended Meal" column on the right is the best place to start — once you know which meal you're planning, the candidates narrow down fast.
| Recipe | Main Tool | Cook Time | Difficulty | Servings | Dish Count | Ingredients Store Well? | Best Meal |
|---|---|---|---|---|---|---|---|
| Toasted Sandwich | Sandwich Maker | Short | Low | 1–2 | Few | Medium | Breakfast |
| Grilled Rice Balls | Frying Pan | Short | Low | 1–2 | Few | High | Breakfast/Lunch |
| Ajillo | Frying Pan | Moderate | Low | 2–4 | Few | Medium | Dinner |
| Salmon & Mushroom Foil Packet | Aluminum Foil | Moderate | Low | 1–2 | Very Few | Medium | Dinner |
| Curry (retort-based) | Pot | Short | Low | 1–4 | Few | High | Lunch/Dinner |
| Mess Tin Mixed Rice (tuna & mentsuyu) | Pot | Longer | Medium | 1–2 | Few | High | Lunch/Dinner |
| One-Pot Pasta | Pot | Moderate | Medium | 1–2 | Few | Medium | Lunch/Dinner |
| Yakisoba (pre-cut vegetables) | Frying Pan | Short | Low | 2–4 | Some | Medium | Lunch |
| Canned Topping Rice Bowl (mackerel) | Pot | Short | Low | 1–2 | Few | High | Lunch/Dinner |
| French Toast | Frying Pan | Moderate | Low | 1–2 | Some | Low | Breakfast |
Looking at these 10 together, a clear pattern emerges: breakfast goes to toasted sandwiches, grilled rice balls, and French toast; lunch to yakisoba, one-pot pasta, and canned rice bowls; dinner to foil packets, ajillo, curry, and mixed rice. For beginners especially, the deciding question isn't "what can I make?" but "what can I comfortably pull off at that point in the day?"
I've taken to printing this kind of table and bringing it to the campsite. Sharing a quick "left column for morning, right column for evening" with the family genuinely cuts down on indecision. Not having to brainstorm a menu from scratch when everyone's hungry right after setup makes an enormous difference.
How to Read and Use the Table
The two columns to check first are Best Meal and Dish Count. Beginners gravitate toward simplicity and easy cleanup — which is exactly why toasted sandwiches, foil packets, and one-pot meals are the most popular choices. If you're looking for a breakfast dish, prioritize rows with "Short," "Low," and "Few." For a satisfying dinner, "Moderate" or "Longer" is acceptable if the payoff is there.
The Ingredients Store Well? column matters more in warm weather. Canned goods, retort pouches, dried noodles, canned tuna, and soy-based condiments push this rating toward "High," which eases the load on your cooler. By contrast, French toast (requires an egg wash) and the salmon foil packet (fresh fish) are harder to keep, so it makes sense to schedule those for the first evening or the day of arrival.
A "Medium" difficulty rating doesn't mean complex seasoning — it means there's a moment where you need to watch the heat or the liquid level. Mess tin rice doesn't cook itself; it takes a bit of practice to read the steam and timing. One-pot pasta changes depending on how much water is left. If you'd rather avoid that, toasted sandwiches, grilled rice balls, retort curry, and canned rice bowls all land consistently.
The serving size column is easy to overlook, but getting it wrong means running short on-site. For solo cooking, one-pot and rice bowl dishes are the strongest picks. For groups of two to four, yakisoba made in a frying pan, ajillo shared at the table, and curry are all well-suited. Curry and rice bowls bring staple, protein, and vegetables into one bowl, so you don't need to add more dishes to feel satisfied.
The most efficient workflow: decide which meal you're filling (breakfast, lunch, or dinner), then filter by "dishes" and "storage." For example — pack-up morning means a toasted sandwich or grilled rice balls; first evening after setup means salmon foil packet or retort curry; solo lunch means a canned rice bowl or one-pot pasta. You're down to two or three candidates almost immediately.
ℹ️ Note
When in doubt, scan by "Short / Low / Few" for breakfast and "Moderate but satisfying" for dinner. Even with 10 options on the table, the right answer usually surfaces quickly.
10 Beginner Camp Recipes
Toasted Sandwich
A toasted sandwich is the most dependable breakfast option there is. Fill it with ham, cheese, egg, or even last night's curry or stir-fry, and you don't have to plan a separate morning dish. Honda Camp's recipe collection and 40 Easy Camp Meal Ideas both treat it as a go-to for a reason — it's the kind of dish that earns its place as a beginner's first camp meal.
You need a direct flame sandwich maker, or a frying pan if you don't have one. Cook time: short. Dishes: few. Servings: 1–2. Prep is almost nothing — just fill and close. The fire management tip: use low heat and flip frequently. Two common beginner mistakes — overfilling so it won't close, and using too much heat so only the outside burns. The crust edges brown quickly, so pull it off when it's golden rather than waiting until it looks fully cooked. Good filling variations: tuna mayo, sweet red bean paste with butter, or last night's foil packet filling, shredded and stuffed in.
On storage: if you're using ham, cheese, or egg, plan to cook this early in the morning rather than letting those ingredients sit out at room temperature.
My own habit on pack-up mornings is to put the bread in cold rather than pre-warming it — the sandwich holds its shape better that way. Use cheese as a kind of internal glue, and don't pack in too much filling. Those two things alone cut mistakes significantly.
簡単レシピ200品以上!プロの料理家監修のキャンプ料理|Hondaキャンプ
キャンプの楽しみと言えば、やっぱり自然の中で食べる料理!ここではプロの料理家監修による、誰でも作れるお手軽キャンプ料理レシピをご紹介します。難しそうに見えても、実はとっても簡単。ぜひ挑戦してみてください。
www.honda.co.jpGrilled Rice Balls
Grilled rice balls are a great way to use up leftover rice, and they work just as well for breakfast as for lunch. The seasoning is simple — soy sauce, mentsuyu, or miso-based sauce, pick one — and they come together quickly either way. The Japanese Ministry of Agriculture's food balance guidelines classify a rice ball as one staple serving, which makes it easy to build a satisfying meal around.
Tools needed: frying pan or a grill grate. Cook time: short. Dishes: few. Servings: 1–2. Prep: form the rice balls firmly before you leave home. Heat tip: start low, not medium, and let them cook slowly. The idea is to dry out the surface before adding sauce — this creates a crisp, fragrant finish rather than a sticky, limp one. The two main mistakes to avoid: shaping warm, soft rice (it falls apart) and brushing on the soy sauce too soon (it burns black). Wait until the surface looks a little dry before applying anything. Good variations: melted cheese on top, miso glaze, mixed shiso rice. Storage note: while the rice itself is easy to manage, formed rice balls left sitting for too long lose their texture — cook them right before eating for the best result.
When I cook these in a frying pan, I keep the oil minimal. The goal is more "drying and firming" than "frying," and that shift in thinking makes them much easier to flip without breaking.
「何を」「どれだけ」材料と料理区分:農林水産省
www.maff.go.jpAjillo
Ajillo looks impressive and feels special, but the cooking itself couldn't be simpler: warm olive oil with garlic, then add mushrooms, shrimp, octopus, sausage, or whatever you like, and the table transforms. Serve it with bread for dipping and it easily covers both appetizer and main course for a dinner gathering.
Tools: frying pan, skillet, or small pot — any of the three. Cook time: moderate. Dishes: few. Servings: 2–4. Prep: just cutting the ingredients, and using pre-sliced mushrooms or frozen seafood makes it even easier. Fire management: keep it at a gentle simmer, not a rolling boil. A lower heat keeps the garlic from burning and the proteins from turning rubbery. The common beginner pitfalls: cranking the heat so the garlic browns too fast, and adding wet ingredients that cause oil to spit. Patting mushrooms and shrimp dry before they go in makes a noticeable difference. Good additions: cherry tomatoes, broccoli, bacon, canned oysters. Storage note: the oil doesn't preserve the food — plan to eat it all in one sitting.
A skillet looks great and makes the whole thing feel more atmospheric, but honestly the weight is only worth it if you're bringing it for this dish specifically. A small pot works just as well flavor-wise; use whatever cooker you already have.
Salmon and Mushroom Foil Packet
There's something that feels properly dinner-like about a foil packet, despite being almost zero effort. Butter, salt and pepper, mentsuyu, or ponzu — any of these ties the flavors together easily, and even if the seasoning's slightly off it's easy to adjust. The foil becomes your plate, which matters a lot on nights when you want minimal cleanup.
Tools: aluminum foil, grill grate, or frying pan. Cook time: moderate. Dishes: very few. Servings: 1–2. Prep: separate the salmon and mushrooms; if you're adding onion, slice it thin so it cooks through. Heat tip: medium-low, slow steam. High heat heats the foil bottom too fast and burns the underside of the salmon before the rest is done. The pitfalls: a loose seal that lets steam escape, and too much liquid that causes the foil to tear. Double-layer the foil and fold the top edge firmly — that's all you need. Variations: potato, shimeji, enoki, corn, miso butter. Storage note: fresh salmon goes in early — use it the first evening and avoid letting it sit.
Windy days are when I reach for this dish most. It doesn't need constant attention, and when I'm tired from setup, that matters. Heavier-duty foil makes a real difference in peace of mind.
Curry
Curry gives you that classic camp feeling while being genuinely flexible in how much effort you put in. The full version — sauté the ingredients, then simmer — is satisfying. But for beginners, heating retort curry and pouring it over rice works perfectly well. The Japanese Ministry of Agriculture uses curry as an example of a balanced meal that combines staple, protein, and vegetables in a single bowl, which means you don't need to plan extra dishes around it.
Tools: pot or cooker. Cook time: short to moderate. Dishes: few. Servings: 1–4. Prep: nothing if using retort, some chopping if starting from scratch. Heat tip: once you're into the simmering stage, keep it low. Strong heat at the roux or retort warming stage causes scorching at the bottom, which makes cleanup much harder. The main mistakes: eyeballing the water and making it too thin, or simmering too long and making it too thick. At camp, liquid evaporates faster than at home, so check frequently during the simmer. Good additions: roasted vegetables, melted cheese, a soft-boiled egg, canned beans. Storage note: building the meal around retort curry reduces how much you need to keep cold, but don't let the cooked curry sit in the pot for an extended period.
When I'm uncertain about what to make on arrival evening, I default to curry. You can dial back the prep significantly without losing satisfaction, and eating it together with friends or family just feels like camping.
「食事バランスガイド」の適量と料理区分:農林水産省
www.maff.go.jpMess Tin Mixed Rice
If you want the full camp cooking experience, Mess tin mixed rice delivers. Tuna, mentsuyu, mushrooms, and carrot is a combination that's hard to mess up and easy to source. There's something genuinely enjoyable about waiting for it to cook — it becomes the centerpiece of the meal.
Tools: Mess tin, burner, and optionally a small towel. Cook time: longer. Dishes: few. Servings: 1–2. Prep: measure the rice and roughly cut the ingredients. Heat method: after years of cooking this, what consistently works best for me is bringing it to a boil, then dropping to low heat for 10–12 minutes, followed by wrapping in a towel for about 10 minutes to steam. On windy days, lowering the trivet so the flame doesn't wrap around the sides reduces burning on the bottom. The two failure points: starting to cook without measuring the water carefully, and keeping the heat high after boiling starts. When the steam starts pushing out, calmly switch to low rather than panicking — that one move is usually the difference between good rice and ruined rice. Variations: tuna with mentsuyu, chicken with burdock root, corn butter, canned salmon flakes. Storage note: canned goods and pantry ingredients work better here than fresh; plan to eat it all in the same sitting.
This dish sounds harder than it is. The real secret is not fiddling with it. Listening to the sounds and watching the steam while you wait is one of the genuinely enjoyable parts of camp cooking.
One-Pot Pasta
For sheer convenience, one-pot pasta is hard to beat. Cooking the noodles in the same liquid as the sauce means fewer dishes, and it's well-suited to solo cooking or a small group at lunch. Tomato, cream, and Japanese-style soy-butter variations are all achievable with the same basic method, and you can make it work with minimal ingredients.
Tools: pot or deep cooker. Cook time: moderate. Dishes: few. Servings: 1–2. Prep: a bit of chopping — bacon, shimeji mushrooms, and frozen spinach are all easy to work with. Heat tip: bring to a boil first, then keep it at a steady gentle simmer. The critical variable is water. Too little and the noodles stay undercooked in the center; too much and you end up with more of a soup pasta. Stir regularly to keep the noodles from sticking to the bottom. Good variations: tuna with tomato, mushroom with butter and soy sauce, consommé base, a small amount of milk for a creamier finish. Storage note: skip fresh cream and raw meat; dried pasta and pantry-stable ingredients keep this easy to manage.
This is my go-to solo lunch dish. After eating, I add a small amount of hot water to the pot and let it warm briefly — the residue lifts right off, and the whole thing from cooking to cleanup has a satisfying rhythm.
Yakisoba
Yakisoba is the reliable crowd-pleaser that works at almost any group size. Pre-cut packaged vegetables and steamed noodles mean you can start cooking almost immediately, and the result appeals to everyone from kids to adults. A single frying pan handles the whole thing, making it an easy choice for a midday main.
Tools: frying pan. Cook time: short. Dishes: some. Servings: 2–4. Prep: almost none — cut the meat if you're using it, that's about it. Heat tip: use different heat for the vegetables and for loosening the noodles. High heat all the way through means the vegetables lose too much moisture before the meat is cooked, and the noodles won't separate properly. The two common mistakes: adding the noodles before loosening them (they clump), and adding the sauce too early (they go soggy). Splash in a small amount of water to separate the noodles first, then toss everything in the sauce at the end. Variations: salt-seasoned yakisoba, kimchi yakisoba, topped with a fried egg. Storage note: pre-cut vegetables are convenient but perishable — use them on the day of arrival.
Yakisoba looks effortless but is really about sequence. Get the order right — meat, vegetables, noodles — and it lands well almost every time.
Canned Topping Rice Bowl
When you want something satisfying without relying on refrigeration, a canned rice bowl is the answer. Canned mackerel, yakitori, tuna, or sardines over warm rice makes a complete meal on its own, and adding toppings like sliced green onion, mayonnaise, or a soft egg transforms it. The broader trend in camp cooking continues to favor low-cleanup, hard-to-fail meals, and canned rice bowls fit that description perfectly.
Tools: pot or small frying pan. Cook time: short. Dishes: few. Servings: 1–2. Prep: almost nothing. Heat tip: warm the can contents over low heat and stop there — this isn't a simmering dish; once it's heated through, it's done. The main mistake: adding all the liquid from the can and ending up with a dish that's too salty or too wet. Hold back some of the brine and adjust. Good variations: miso-seasoned canned mackerel with green onion, yakitori with shichimi and egg, canned tuna with soy sauce and butter. Storage note: unopened cans are very easy to manage; once opened, plan to use everything in the same sitting.
Rainy lunch days are when I reach for this most. Almost no knife work, and yet the satisfaction after eating is consistently higher than you'd expect. When energy is low, that kind of efficiency is genuinely useful.
French Toast
French toast is the right call when you want a morning that feels a little more considered. The warm, sweet smell alone changes the feel of the campsite, and it pairs beautifully with coffee. It looks more involved than it is — the actual process is just two steps: soak, then fry.
Tools: frying pan. Cook time: moderate. Dishes: some. Servings: 1–2. Prep: making the egg mixture and soaking the bread. You can do this at the campsite, or prep it in advance in a sealed bag to save time. Heat tip: use low to medium-low heat and don't rush. The surface can color before the inside is fully warm, so patience produces a better result. The two common mistakes: frying before the bread has absorbed enough egg (the center stays dry), and using too much heat so only the outside browns. Butter adds great flavor but burns quickly — start with a small amount and add more if needed. Variations: cinnamon, honey, maple syrup, served with a sliced banana that's been briefly grilled alongside. Storage note: egg and milk mean this needs to be eaten promptly — don't delay breakfast on this one.
French toast is a high-reward morning dish, but it punishes rushing. Save it for a slower morning, and the extra time becomes part of what makes camp feel worth it.
⚠️ Warning
If you're ranking these by how forgiving they are for beginners, start with toasted sandwiches, grilled rice balls, foil packets, and canned rice bowls. These require the least fire management, work with the widest range of ingredients, and leave you with the least mental fatigue by the end of the meal.
Food Storage and Summer Hygiene
Running Your Cooler
In summer camping, the thing beginners overlook most isn't the cooking — it's temperature control during transport. Keep refrigerated ingredients within the -5–5°C safe zone as much as possible, and minimize how long food spends in the 10–60°C bacterial growth range. The window right after arriving at a site is particularly vulnerable, so decide where the cooler goes before you start setting up the tent — having a plan prevents the storage and setup from stepping on each other.
Sizing is worth settling before you go. A commonly cited guideline — also referenced in beginner camp meal guides — puts 10–20L at the right range for one person on an overnight trip, and 30–50L for a family of three. Bigger doesn't automatically mean better: a large cooler with very little inside struggles to stay cold efficiently. Filling it to about 70% improves airflow and makes it easier to find and retrieve things. Not overpacking has hygiene benefits too, not just organizational ones.
From my own experience, on a 35°C day, consolidating how often you open the lid — rather than opening it every time you need something — can extend ice life by several hours. Ideally, use a separate cooler for drinks so the food cooler stays closed. If you're working with one, put "what you need for the next meal" toward the front and meat for dinner at the very bottom. Meat specifically should sit near the ice packs, ideally at the lowest point.
A detail that makes a real difference: place ice packs on top as well as underneath. Cold air falls, but heat enters from the lid, so cooling the top layer slows the temperature rise noticeably. Position the cooler in shade — under a tarp or in the shadow of the car — rather than on a sunny table. A small tray inside to catch meat drip prevents odor transfer and keeps the interior easier to clean.
ℹ️ Note
Think of a cooler not as a box that cools things down, but as a box that keeps already-cold things cold. Loading pre-chilled food rather than room-temperature drinks and warm purchases keeps the internal temperature far more stable.
【初めてのキャンプ飯】初心者向けレシピ14つとキャンプ料理のコツ4つ紹介
キャンプでどんな料理を作ればよいか悩んでいる初心者必見!この記事では初心者でもカンタンに作れるオススメレシピを14つ厳選して紹介。キャンプ飯はレトルトやチルド食品だけでカンタンに十分美味しく作ることが出来ます。この記事を読めば、初めてでも失
nao-camp.comPrep and Packing at Home
Doing prep at home — cutting meat, marinating, washing vegetables, pulling apart mushrooms — means far less bare-hand contact with food at the campsite, and keeps cooking moving faster. Beginners especially benefit from arriving with everything ready, since the combination of tired post-setup energy and detailed on-site prep tends to go badly.
The packing principle that matters most is keeping meat and vegetables in separate bags. Separate storage dramatically reduces cross-contamination risk and keeps the cooler organized. My approach: one bag for meat, one for vegetables that will be cooked, and one for raw garnishes and leafy greens. That order of operations stays clear throughout the trip, the cooking surface stays cleaner, and nothing gets mixed up. Double-bagging the meat is one of the highest-value precautions for preventing drip leaks.
Pre-cut and pre-treated ingredients are an excellent resource. Packaged shredded vegetables for yakisoba, pre-blanched potatoes, pre-sliced mushrooms, pre-marinated meat — these aren't shortcuts, they're sensible hygiene measures in warm weather. Less chopping means less cleanup and less time fresh food spends at ambient temperature. They pair naturally with foil packets and one-pot dishes, which is part of why those recipes work so well in practice.
For bag organization, portioning by meal rather than by ingredient is easier to manage on-site. Instead of one large bag of chicken for the whole trip, make one bag for dinner and one for the next morning. Fewer openings means less temperature disruption. Freezer-style zip bags handle liquids from marinades well and keep everything organized in the cooler. Putting what you'll use first at the top and what can wait until evening at the bottom keeps the cooler easy to navigate.
Hygiene Routines at the Site
At camp, consistency in your sequence matters more than intensive sanitizing. A reliable flow — take out the food, cook it immediately, use it all up, put away leftovers quickly — keeps good habits in place even when things get hectic. Keeping separate tongs for raw meat and for ready-to-eat food is one of the simplest, highest-impact changes a beginner can make.
During cooking, don't leave surfaces that have touched raw meat or served as cutting boards sitting unattended. Bacteria multiply quickly. Even surfaces that look clean after raw meat contact often aren't — a quick wipe-down in the moment saves a lot of trouble later. The most dramatic-looking dishes at camp often succeed because of exactly this kind of unglamorous attention to sequence.
Cleanup should cover oil and food scraps, not just the obvious dishes. Don't pour cooking oil directly onto the ground or into drain lines. Use a solidifying agent to gel it, or soak it up with paper towels or scrap newspaper. DAISO's tempura oil solidifier, for example, is designed to handle approximately 650mL of oil per 20g packet (~$0.10 worth). For smaller amounts of stir-fry oil, absorption is often faster and simpler.
Food scraps and organic waste should be sealed in odor-resistant bags right away — that's also your best defense against insects. Don't leave sauce residue, meat trays, and vegetable scraps scattered separately. Campsite rules for waste disposal vary, so follow the local guidelines wherever you're staying. Cleaning up well is genuinely part of what makes camp feel good — when the whole cycle runs smoothly, the enjoyment of the food itself goes up.
Planning a One-Night Menu That Won't Go Wrong
Thinking in Staples, Proteins, and Sides
For a one-night camping trip, organizing meals around a staple, a protein main, and a vegetable side works better than picking individual recipes. The Japanese Ministry of Agriculture's food balance framework defines it this way: staples are rice, bread, and noodles; mains are meat, fish, egg, and soy-based dishes; sides are vegetables, mushrooms, root vegetables, and seaweed. At camp, this framing is genuinely useful — instead of asking "what do I cook?" ask "do I have carbs, protein, and vegetables covered?" You'll find that fewer dishes can still produce a satisfying meal.
Having a rough sense of serving sizes also helps with planning. One serving of a staple food equals about one rice ball or one slice of bread; one serving of noodles counts as two staple servings. So if breakfast is a toasted sandwich, two slices of bread means two staple servings — and two grilled rice balls per person is a complete breakfast.
For the protein main, planning around 60–80g of meat or fish per person makes it easier to decide quantities on-site. The curry reference point works well: approximately 200g of rice, 60g of meat, and 140–150g of vegetables per person creates a balanced, filling bowl. In my experience with family camping, curry with a simple salad on the side holds up very well — the curry itself handles staple, main, and most of the sides, so a handful of leafy greens is genuinely all you need to round it out.
Dinner doesn't need to be elaborate. After setup, when energy is lower, an overly ambitious dinner tends to fall apart. Aim for something like a simple grilled or foil-cooked main, an easy staple, and a bagged salad or soup — that's the right scope. For example, a foil packet or grilled meat as the main, a retort rice pouch or pre-cooked rice as the staple, and a packaged salad or sautéed mushrooms as the side: the effort is low, but the satisfaction is high.
A Sample Timeline: Arrival Through Breakfast
On a one-night trip, the sequencing matters as much as the recipes. My advice for beginners: plan something that just needs heat after arriving, something satisfying but complete for dinner, and something that takes 10–15 minutes maximum for breakfast.
Right after arrival, having "food that's ready quickly" prepared in advance removes a huge amount of stress. Good options: salmon and mushroom foil packets, potato and sausage foil packets, or marinated meat cooked straight on a plate. All of these can be prepped at home and pulled from a bag and cooked on-site with almost no setup. Foil packets don't even need a plate to serve from, and they hold up well in wind or heat without needing constant attention.
For dinner, don't overcomplicate the staple. Retort curry with a salad means you heat rice, pour on the sauce, and the meal is done — add a couple of toppings and it feels like a proper camp dinner. If you want to cook a bit more, Mess tin rice or mixed rice as the staple with a grilled main creates a nice balance. If you want minimal cleanup before bed, grill-only or foil-packet dishes are more reliable than one-pot options that require more involved washing.
Mornings work best when the meal is short and cleanup is quick. Toasted sandwiches, grilled rice balls, or a simple soup with last night's leftover rice are all reliable. Toasted sandwiches need only ham and cheese to work, and leftover sausage or cabbage from dinner goes right in to reduce food waste. Grilled rice balls can be formed the night before — just brush with soy sauce, put them on the heat, and the smell alone signals morning. Either option is ready and on the table within 10–15 minutes, leaving time and energy for a relaxed pack-up.
💡 Tip
Planning a one-night camp menu works best when you keep arrival and morning light, and channel your effort into dinner. When the meals run smoothly, the time spent sitting around camp feels better too. If you're going with family, pairing that with a tent layout that has enough living space — covered in our family tent guide — helps the whole day flow more easily.
Scaling for More People
When the group grows, recalculating each recipe isn't necessary. A more useful approach: scale staples by servings per person, and plan protein at 60–80g per person as your baseline. At a campsite where you're often eyeballing rather than measuring, a simple rule like this keeps shopping and prep much more manageable.
For two people, four slices of bread covers breakfast toasted sandwiches with room for a proper main filling. For grilled food at dinner, 120–160g of total meat and fish per person is a workable baseline. Sides are easiest to keep to one dish, slightly larger — a bagged salad, a foil packet of mushrooms — rather than preparing multiple small portions.
At four people, the staple is the one most likely to run short. "The kids won't eat that much" is a common miscalculation — it's better to sort out the staple first and then decide on protein. Eight slices of bread or eight rice balls gives a clear mental image for breakfast, and makes planning much simpler. For dinner protein, 240–320g total is a reasonable target, and mixing in sausages, eggs, or tofu alongside the main protein keeps cost and prep both manageable.
Side dishes scale better as a shared platter than individual portions for groups of four or more. A large bowl of bagged salad, or a pot of sautéed mushrooms passed around, is far less work than four individual side servings. For foil packets, two large packets for the whole family take up less grill space than four individual ones.
One thing that's easy to miss: in groups with kids, people eat at different speeds. Rather than trying to have everything ready at the same moment, putting the staple out first and grilling the main afterward keeps impatient campers fed and gives the cook more breathing room. That single shift in timing cuts the "is it ready yet?" factor dramatically.
If you want to add reliability to the staple, learning to cook rice in a Mess tin opens up your options significantly. Even when the main is just a foil packet or simple grill dish, good rice on the table raises the whole meal. And leftover rice the next morning becomes grilled rice balls almost automatically.
Essential Cooking Gear for Beginners
Building a Minimal Kit
The clearest way to think about first-time gear: divide it into "heat source," "one piece for grilling," "one piece for boiling," and "cold storage." Specifically: a camp burner, lighter or matches, a frying pan or skillet, a pot or cooker, and a cooler. Add consumables — aluminum foil, zip bags, paper towels — and handling tools — tongs and spatula, chopsticks or cutlery, a small cutting board and knife — and you can realistically prepare everything covered in this article.
The key to not over-buying: think in terms of one or two cooking surfaces plus one pot. A frying pan or skillet that handles both grilling and stir-frying, plus a deep cooker that covers boiling water, soup, noodles, and warming retort pouches — that's enough to handle breakfast through dinner. I've cooked dinner for two to four people and breakfast the next day with exactly a skillet and a deep cooker, multiple times, and honestly ran into very few situations where I needed more. Fewer tools also means fewer decisions about washing order and where things go.
If you're deciding between a frying pan and a skillet: frying pans are easier to use and lighter; skillets produce a better sear and more of a campfire-cooking atmosphere. Cast iron skillets retain heat well, which makes meat, sausages, and grilled rice balls come out noticeably better. For lighter cooking on solo trips, a 15–20cm camp frying pan hits the right balance and keeps breakfast moving quickly. If you're using a non-stick pan, a silicone spatula is a better match than a metal one — most silicone spatulas are rated to 210–280°C, which is sufficient for standard camp cooking.
Small accessories matter more than you'd think. Foil serves as a plate, a lid, and a surface protector beyond its obvious role in foil packets. Zip bags handle prepped ingredients just as well at the campsite as at home. Paper towels absorb water and oil, replace separate cloths, and reduce the number of things you need to wash — in a camp context, they're one of the most versatile things in the kit. Tongs at 24–30cm are right for food; if you're managing coals or logs, a separate pair at 40cm or longer keeps your hands clear. Keep cooking tongs and eating utensils separate — it's an easy thing to forget but inconvenient to fix on-site.
Packability and ease of cleaning round out the practical criteria. Foldable handles, nestable cookware sets, and tools without sharp corners or deep grooves all reduce time spent on cleanup. If you're trying to keep the whole pack light, pairing a simple cookware setup with a straightforward tent makes the whole camp experience more streamlined.
Why a Sandwich Maker Is Worth Adding
A sandwich maker isn't essential, but it's one of the highest enjoyment-per-gram additions to a camp kitchen. Breakfast immediately becomes something to look forward to, even with just ham and cheese — that's a lower bar than it sounds, and the payoff is real. Leftover ingredients from the night before go right in, which helps reduce waste across a one-night menu.
It's beginner-friendly for a specific reason: it holds the bread in place. With a frying pan, you're balancing a filled sandwich through a flip; a sandwich maker removes that entirely. Less cleanup, less fumbling on a rushed morning — it handles the annoying parts. Direct flame models are the right pick for camp use; most weigh around 0.65kg or under, making them easy to pack for car camping. The IWANO Sandwich Maker EL is listed at 4,990 yen (~$33 USD) on the official site.
It also does more than sandwiches, which is easy to overlook. Thin cuts of meat and sausages cook well pressed in it. Gyoza and rice balls brown nicely under the press. Simple baked goods are possible too — anything that benefits from heat on both sides is a candidate. If yours opens flat into two halves, you effectively have two small frying pans: fry an egg on one side while warming bread on the other.
On my minimal-gear days, the sandwich maker is still one of the first things into the bag. The reason is simple — mornings at camp just feel better with it. Steam rising out of a freshly pressed sandwich, pulling it open at the table with family or friends, that moment makes the trip feel worthwhile. It adds camp-cooking satisfaction without adding camp-cooking difficulty, which is a rare combination.
The sierra cup pairs well with it as a secondary tool. A good sierra cup handles boiling, soup, measuring, and serving — titanium models stay light even if you pack several. Snow Peak's stainless sierra cup is listed at 1,584 yen (~$11 USD) on their official store, and the titanium version at 3,960 yen (~$26 USD), which makes them easy to add gradually as your kit grows.
Cooler Sizing and Ice Pack Quantities
A cooler is the foundation that makes everything else in the camp kitchen possible. Size guidance: 10–20L for solo one-night trips, 30–50L for a family of three — that range accommodates prepped ingredients, drinks, and the next morning's food with some room to spare. Pack to around 70% capacity rather than stuffing it full — airflow improves, and it's easier to find and retrieve things.
For ice packs in a 20L solo cooler, two to three medium-sized packs is a workable starting point, with enough coverage to keep things cold for the trip duration. Position them both above and below the food layer, or sandwiching items from both sides, for even temperature distribution. Perishables like meat, fish, and dairy go nearest the ice packs; bread and ambient-stable vegetables can sit further away. My typical arrangement: ham and cheese for breakfast toward the upper layer, marinated meat for dinner toward the bottom — that order means natural retrieval sequence and fewer unnecessary openings.
When choosing a cooler, look beyond the insulation rating at ease of cleaning, durability, and how it fits in your car. A shape that doesn't collect water at the bottom, a lid that's easy to wipe, and a rectangular form that fits well in a vehicle trunk matter every single trip. A cooler that's slightly too heavy to carry comfortably is rarely worth it for beginners.
If you want to monitor internal temperature, a small digital thermometer is useful. Basic models are available on Amazon for around 1,650 yen (~$11 USD) and clip to the inside lid for at-a-glance readings. In summer especially, the cooler is food safety equipment — treat it with the same priority as your cookware.
ℹ️ Note
Organize the inside roughly by when you'll use things — "tonight's dinner," "tomorrow morning," "grab anytime." Grouping by meal rather than by ingredient in each bag cuts down the time the lid stays open and makes on-site cooking much less chaotic.
Frequently Asked Questions
How many dishes is realistic for a first-time camper?
For a first overnight trip, one dish for breakfast and one for dinner is genuinely enough. Keeping it that simple means you can actually focus on setting up camp, managing the fire, and cleaning up. Pick something quick for breakfast — a toasted sandwich, grilled rice balls — and something forgiving for dinner, like a foil packet or retort curry. The satisfaction is real even with a short menu.
One staple plus one main is the most practical formula. The Japanese Ministry of Agriculture's serving guidelines define a staple as roughly one rice ball or one slice of bread, which means a simple meal is nutritionally complete without adding multiple sides. Honda Camp's recipe recommendations follow the same logic — their beginner-friendly suggestions center on "one enjoyable dish per meal" rather than elaborate spreads.
On protein quantity, don't feel pressure to pack large amounts of meat. About 60g per person for something like curry is a useful reference. Dividing it as "only what you need for that night's dinner" and "just some ham or sausage for breakfast" keeps the cooler manageable and means nothing gets wasted.
Do I really need a cooler?
In summer, or any time you're packing perishables, yes — a cooler is essentially non-negotiable. If you're bringing meat, fish, ham, cheese, or eggs, it matters more than most of your cooking gear. Temperature control is the single most important food safety factor, and skipping the cooler limits what you can realistically cook.
The right size is straightforward: 10–20L for one person on an overnight trip, 30–50L for a family of three. Whether you're loading it mainly with food or with drinks too affects how much fits, but beginners tend to do better with a bit of extra space — it's easier to stay organized.
The biggest concern for most people is how long meat stays safe. The right mindset: keep it cold and use it all the same day it comes out. I always marinate the meat I'm using for dinner, seal it in a bag, place it next to the ice packs, and make sure it's all cooked by the time dinner is over. That approach also makes planning feel much cleaner.
💡 Tip
If you decide not to bring a cooler, shift your entire menu to shelf-stable ingredients: bread, retort rice pouches, canned goods, dried noodles, instant soup. The planning becomes noticeably simpler.
What foods do kids reliably love? Tips for keeping it mild.
With kids along, something they want to eat the moment they see it is your strongest option. In my experience, sausages, potato and butter foil packets, corn grilled rice balls, and egg-filled toasted sandwiches are consistently reliable. Kids get hungry and impatient in the late afternoon, so anything that's ready quickly after going on the heat is genuinely valuable.
When the restless phase hits, sausages plus a foil packet plus retort rice is the combination that tends to cause the fewest problems. Almost no chopping, predictable flavors, and an immediately positive reaction at the table. It feels like camping without adding too much work for the adults cooking.
For keeping things mild, don't complicate the seasoning from the start. Salt, soy sauce, butter, mentsuyu, and ketchup are all kid-friendly bases. Spice-heavy curries or adult-leaning dishes like ajillo require a bit more coordination to serve separately. Add heat only to the adults' plates and mealtime stays smooth.
How do I go solo with the least possible effort?
For solo camping, stick to meals that use one pot or one pan. One-pot noodles, one-pot pasta, retort curry, and canned rice bowls hit an excellent balance of effort and reward. A menu that starts and finishes in a single cooker doesn't feel like a chore, even early in the morning or right after arrival.
The one-dish-per-meal rule works even better solo. Breakfast can be a toasted sandwich or instant soup with bread; dinner can be one-pot noodles or a foil packet — that's genuinely enough. Rather than adding dishes, a menu that leaves time to sit and eat does more for solo camp satisfaction than anything else.
Gear stays minimal too. A compact frying pan or cooker, some tongs, and a sierra cup handle most of what you need. Titanium sierra cups run around 37g each — four together come to roughly 148g — so a full set fits into a solo kit without any real weight penalty. On the days I'm cutting every gram, multipurpose gear like that earns its place immediately.
When should I use retort pouches and canned goods?
Using retort pouches and canned goods is absolutely the right move. Beginners especially benefit from leaning on them — they raise the success rate of camp cooking without reducing the experience. The worry that it won't feel like "real" camp cooking is overblown: cook fresh rice, crack in an egg, add some cheese, or throw in a few roasted vegetables, and the meal feels like it belongs around a fire.
The right moments: lunch right after arriving, late afternoon when the kids are hungry and can't wait, and breakfast on pack-up morning. Jumping straight into chopping and cooking from scratch at those points tends to produce fatigue before enjoyment. Retort curry is ready the moment you have rice. Canned mackerel and tuna extend naturally into rice bowls, pasta, or cooked rice dishes, and nothing gets wasted.
The best approach: use the packaged item as the base and add just one cooking step. Warm retort rice, grill a sausage. Heat curry, fry an egg to go on top. Use canned tuna to make a Mess tin rice dish. The result feels like camp food, not like eating at home, with very little extra work. Trying to make everything from scratch when you're new to camp cooking is the harder path — strategic use of packaged food is how you build a routine that actually continues.
Wrapping Up: The Fastest Path to Success
Next Actions
Look at the comparison table, then commit to one breakfast and one dinner right now. Go with something in the "hard to fail" category — a toasted sandwich for breakfast, a foil packet or one-pot noodles for dinner — and portion the ingredients into bags the night before. Pair that with a quick check on cooler size and ice pack arrangement, and your first camp meal is already set up to succeed.
If you want to think through the full site setup alongside cooking, the complete tent buying guide covers the rest of the picture.
Time-Saving Tips for the Day Of
Once you're on-site, start with something that just needs heat — don't open with the most elaborate dish. Solid hygiene habits, fast-to-table food, and minimal cleanup matter more than impressive technique.
Camp cooking works best when you sequence by forgivingness rather than ambition. Put the prep work into the evening before. At the campsite, focus on grilling, heating, and eating. That approach produces genuinely good food from the first trip — and makes cleanup easy enough that you actually look forward to the next one.
A camp cooking researcher and food coordinator. Drawing on 10 years in the food industry, she reviews campfire cooking and cookware from the perspectives of both taste and convenience.
Related Articles
Titanium vs Aluminum Cookware: Weight, Heat Conductivity, and Price Compared
On a cold morning at around 3,000 feet, boiling just 300ml of water on an OD canister stove for a cup of noodles, the appeal of a lightweight titanium pot is immediately obvious. But when evening rolls around and you want to cook a cup of rice and fry sausages the next morning, aluminum's even heat distribution makes cooking noticeably easier.
CB vs OD Gas Canisters: How Temperature Should Drive Your Choice
Choosing between CB and OD gas canisters comes down to three practical questions: where are you camping, how cold will it get, and how are you getting there? For spring-through-fall car camping at lower elevations, CB canisters win on availability and cost at around 100-200 yen (~$0.70-$1.40 USD) each. When temperatures drop or you're hiking in with your gear, OD canisters paired with lightweight stoves deliver the cold-weather reliability you need.
Mestin Rice Cooking: 5 Essential Tips and Easy Variations
Mestin rice cooking in Japan might seem difficult at first, but mastering just five fundamentals—water volume (rice portions), soaking time, heat control, steaming, and pot size selection—yields remarkably consistent and delicious results. Beginners often struggle with unclear guidelines on how much rice their mestin can handle and how much water to add, making this a cooking method where clear standards make all the difference.
How to Choose a Camping Skillet and Seasoning Steps
For backpacking, 8-inch cast iron varies significantly by model—lighter versions weigh around 1.1kg, while heavier models approach 1.7kg. When loaded into a pack, the heavier option often makes you think twice. A 6-inch skillet hits that sweet spot for a single serving of bacon and eggs at breakfast, with perfect portability in a campsite setup.