Winter Camping Cold Prevention | 3 Core Principles and Layering Order
Winter Camping Cold Prevention | 3 Core Principles and Layering Order
Sleepless nights on winter camping trips in Japan often stem not from insufficient sleeping bags, but from how the bed foundation is constructed. Ground-transmitted cold, radiative cooling, and inadequate air layers in mats compound when nighttime temperatures drop to near freezing on highland sites—draining body heat from your back.
Sleepless nights on winter camping trips in Japan often stem not from insufficient sleeping bags, but from how the bed foundation is constructed. When ground-transmitted cold, radiative cooling, and inadequate air layers in mats compound—especially at highland elevations with nighttime temperatures near 0–3°C—body heat drains rapidly from your back.
This article walks winter camping beginners and those reconsidering their gear through a systematic approach: stopping cold from the ground up. During a December trip to a site at about 900m elevation, the author struggled with ground cold until adding a silver mat to strengthen insulation, increasing mat thickness from 5cm to 8cm, and topping it with an electric blanket—the transformation was dramatic.
Based on this experience, the article explores a proven hierarchy—insulation → air layer → thermal finish—and shows specific solutions for those with power access, without power, and cot users alike.
Why Ground Cold Occurs in Winter Camping
Winter camping ground cold cannot be explained by outdoor temperature alone. December through March camping sites in Japan typically see –5 to 5°C ranges, and with every 100m elevation gain reducing temperature by roughly 0.6°C, a 1,000m elevation site runs about 6°C colder than lowland areas. If a weather forecast shows 5°C in the city, a highland site may approach freezing. Add ground, sky, and tent air circulation patterns, and your feet or back chill preferentially.
The author clearly notices a "cold pocket" effect on frost-heavy nights—warm air rises, cold air pools near the floor, creating distinct layers within the tent. On such nights, stopping heat loss from the ground works faster than upgrading the sleeping bag.
Primary cause 1: Heat conduction from ground
The top priority for preventing ground cold is thermal conduction from the ground surface. Sources like CAMP HACK and WAQ's winter camping guides share a core principle: the center of cold defense is "how to block ground coldness." While sleeping, contact points—back, hips, shoulder blades—steadily lose heat to the ground. This sneaks up on campers because it's less obvious than wind, yet it's quite powerful.
Even at 3°C ambient temperature, weak floor insulation brings real cold. Reports from spots like Fujikawacamp at 3°C show feet and back chilling regularly. Beginners often think "3°C isn't deep winter," but the ground doesn't retain daytime warmth all night—it cools significantly. Tent floor fabric is thin, so it acts more as a divider than insulation.
Winter camping therefore demands thermally resistant layers and air gaps between ground and sleeping area. How you stack silver mats, foam mats, inflatable mats, or cots determines comfort dramatically—because they control how much ground conduction reaches your body.

【Complete Guide】Winter Camping Cold Countermeasures! Clothing, Tents, Heaters & More | CAMP HACK
Winter camping cold defense checklist! Master four key clothing principles first. We've picked budget options from "Workman" and "Uniqlo" too. Later sections cover tents, meals, and other site-wide strategies.
camphack.nap-camp.comPrimary cause 2: Radiative cooling
Another easily overlooked factor is radiative cooling. On clear, calm nights, ground and tent surfaces shed heat skyward, creating temperatures well below forecast figures. Winter campers often notice "fine until evening, but suddenly brutal at midnight"—radiative cooling drives much of this shift.
Radiative cooling chills the ground surface itself, intensifying floor coldness. Rather than treating it as an independent factor, it's clearer to see it as amplifying ground conduction. Different sources emphasize different causes, but actual field conditions involve both happening simultaneously. While some reports cite multi-layer fly benefits improving comfort by several degrees Celsius, conditions (elevation, wind, condensation) and tent type vary widely—generalizing specific figures is unwise. Tent wall structure affects comfort, but with weak floor insulation, benefits shrink. The author found that rebuilding floor insulation mattered more than tent structure. Winter tents do help, but floor insulation takes priority for ground cold.
Primary cause 3: Warm air rises; cold air sinks
Inside a tent, warm air rises and cold air settles at floor level—simple physics, but critical in winter. You might feel warm sitting, then cold envelops you upon lying down. Especially in solo tents or low-style layouts, most of your body sits near the floor, absorbing both ground chill and pooled cold air. Mismatched warmth—feet freezing while face stays comfortable—stems from this vertical temperature divide.
Frost nights make this visceral. The author notices tent upper air and floor-level air feel entirely different on such nights. Upgrading sleeping bags alone won't fix foot discomfort when you're positioned in the cold layer. Tent structure matters here, but floor insulation and bed height choices influence foot comfort more directly.
3 Core Principles for Preventing Ground Cold
Winter sleeping success comes from layering order more than item count. Priority is 1. floor insulation, 2. air layer security, 3. thermal finish. Reversing this—upgrading only the sleeping bag—leaves heat bleeding from your back, limiting comfort gains. The author finds real sleep happens only when these three are honored. Often, adding one insulation layer eliminates the "cold slab" sensation from the back even with the same sleeping bag—the effect is marked.
Principle 1: Insulation
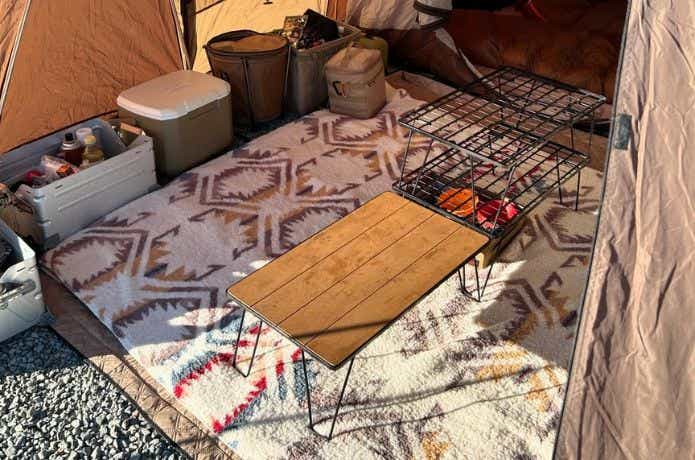
Start by creating a physically cold-blocking layer between ground and bed. Concretely: place a silver mat, foam mat, or insulating sheet atop your ground sheet to build a "cold-resistant wall." CAMP HACK's ground cold guides frame floor building as starting with insulation.
This layer works without premium gear. Standard approaches use silver and foam insulators; BE-PAL's silver mat guidance notes that winter use requires aluminum side facing up. Silver mats alone feel hard but excel as insulation foundations. Full tent-floor coverage smooths out "only-the-feet-cold" unevenness.
Budget-conscious options include cardboard "zero-cost insulation." Less convenient than purpose-made gear, but stopping direct ground contact is a real win. Thin floor fabric plus layered mat feels much warmer than matting on bare fabric. The key insight: treat the sleeping bag's bottom layer as "cold-cut duty" rather than expecting it to comfort-solve.
【Winter Camping Ground Cold Fix】8 Sound Sleep Techniques for Frozen Nights
Winter tent nights sometimes feel cold despite sleeping bags. That "ground cold" drains warmth from below. Here are eight ground-cold tactics and sleep tips.
camphack.nap-camp.comPrinciple 2: Air layer
After insulation comes thickness creating air layers. Inflatable and air mats don't just feel soft—they build distance between you and cold ground, trapping heat. Thicker mats push cold surfaces further away, strengthening the insulating layer.
Beyond "how many centimeters," look at R-value, the thermal resistance metric. Higher R-values block heat better; stacking mats sums their R-values. Winter logic suggests layering a silver or foam mat beneath an inflatable rather than relying on one thin mat. Choosing only for plushness leaves ground cold lingering despite a comfy roll-over.
Cots work well by physically separating you from ground. The catch: cots alone don't stop cold air curling underneath. Because they feel bed-like, campers mistakenly skip mat layers. The author's cot nights stay cold in the hips without insulating layers on top. Treat cots as "ground-separation assists," not insulation substitutes.
Principle 3: Thermal finish
Only after floor insulation and air-layer thickness come sleeping bags, blankets, hot water bottles, and electric blankets for final warmth. Here sleeping bag performance finally works properly. Choose by comfort-use temperature (not limit temperature), aiming for 5°C below expected lows as a safety margin. With substantial ground heat loss, sleeping bag upgrades alone leave back-side dissatisfaction; order of operations matters hugely.
Blankets and hot water bottles are handy supplements. Blankets work as outer or inner layers; hot water bottles concentrate warmth at feet or belly. A bottle may radiate 5–9 hours, making them ideal for non-powered sites. Even localized warmth smooths post-sleep-onset cold considerably.
Electric blankets work well at powered sites with portable power. For one night, roughly 500Wh capacity and 700W+ rated output is the baseline. A Jackery Explorer 500 (512Wh) running a 50W blanket does about 8.7 hours—barely a full night. The Jackery Explorer 1000 (1,002Wh) yields ~17 hours, offering real headroom. A 200W hot carpet drains a 1,002Wh unit in ~4.3 hours. Electric blankets are efficient finishes; hot carpets offer comfort but heavier power draw.
💡 Tip
Electric blankets and hot carpets produce no CO, a major safety advantage. EcoFlow's safety notes (https://blog.ecoflow.com/jp/heating-equipment-in-tents/) indicate burn risk at "44°C for hours or 50°C briefly." These vary with test conditions and skin state, so consult manufacturer manuals and medical sources. Running pre-sleep warm-up then reducing heat is safer than sustained high temperature during sleep.
Principle 3 works only after a solid foundation exists. Relying on sleeping bag strength alone shows less warmth than numbers suggest, because heat escapes downward through cold floors. Winter beds work by: insulation blocking loss, air gaps resisting escape, and warmth finishes. This sequence is most reproducible.
Layering Order Basics: Foundational Bed Setup
Standard order
Start with ground sheet → tent → silver/foam/cardboard mat → rug/blanket → inflatable/air mat → sleeping bag. This progression rarely fails for beginners. CAMP HACK's ground-cold tactics and BE-PAL's silver mat strategy align well here.
Each layer has a role. Ground sheet and tent floor cut moisture and dirt. Silver/foam/cardboard above acts as cold-blocking insulation. A blanket or rug layer between reduces the "cold touch" and mat slipperiness. Inflatable or air mats add thickness, and the sleeping bag traps warm air.
The author sometimes adds a second rug as a strip under hips and back on cold nights rather than full coverage, thickening insulation where cold pools without over-loading. Small floor mats work fine, allowing gear-light adjustment.
Budget alternatives
Professional kit isn't essential for the lower layer. Cardboard is the easiest—lay it on tent floor, then silver mat or rug on top. Cold-ground feel diminishes noticeably. BE-PAL's zero-cost articles confirm adding one layer helps significantly. It won't match premium performance, but its improvement over bare fabric is obvious.
Newspaper supplements too. Placing it under rugs or filling cardboard gaps adds an air-containing layer. Key: don't make it the star—cardboard and newspaper add thickness below a real mattress. Budgeting cheap lower layers while funding quality mats or bags is rational for beginners.
Where budget matters most is not choosing one pricey air mat alone, but stacking a cheap insulation layer below it. Air mats improve comfort while ground-insulation gaps leave your back chilled. "Unseen parts work hardest," so cost-conscious setups benefit most from building upward.

Zero-Cost Winter Camp Ground-Cold Fix! Cardboard is the Ultimate Budget Insulation | Camping Tips 【BE-PAL】Camping, Outdoors, Natural Living Info BE-PAL
Lower winter camping gear barriers! Many have summer experience but skip winter. Cold prep feels expensive. These low-cost, eco-friendly strategies help beginners step up.
www.bepal.netPowered-site additions
With electrical access or portable power, add hot carpet or electric blanket as an extra layer. Placement typically goes directly below or above a rug. Closer to ground risks heat escape downward; positioning above insulation and below supporting mats retains warmth better.
Practical setups look like ground sheet → tent → silver mat → hot carpet → rug → inflatable mat → sleeping bag or silver mat → rug → electric blanket → mat → sleeping bag. Hot carpets warm whole bed areas; electric blankets efficiently warm near-body zones. As noted earlier, electric blankets' lower power draw suits ongoing overnight operation.
💡 Tip
Electrical warmth position matters. Heat generated atfloor level escapes downward; placing it above insulation, beneath supporting mats, keeps warmth in the bed. Follow manufacturer guidance on placement, overlap tolerance, and safety distances.
This addition works best atop solid floor basics. Conversely, plugging heaters directly atop poor insulation wastes energy downward. Even with power, you still insulate at bottom, bulk in middle, finish warmth above—just inserting electrical elements into that framework.
Gear-Specific Solutions: Non-powered, Powered, and Cot Users
Non-powered reality
Without electricity, success hinges on minimizing downward heat loss. Priorities are clear: thick insulation layers, high-R-value and thick mats, sleeping bags rated 5°C below expected lows. WAQ's winter guides reinforce this foundation-first thinking, matching real fieldwork.
Here, silver and foam mats shine—cheap, light, foundational excellently. Yet as foundation, not complete solution. Add inflatable or air mats for durability and insulation combo. Thick-mat-only approaches feel comfortable but leave back-cold pockets. The author repeatedly sees "that thin lower layer" matter once temperatures drop.
Stable supplements are hot water bottles and blankets. Bottles directly warm feet or hips—"point heat." Blankets soften mat coolness and adjust easily inside or outside sleeping bags. Unglamorous but reliably effective without power.

Winter Camping Sleep Cold Countermeasures|Comfortable Bed Tips
Winter sleep cold defense fully explained. From chill sources to bag/mat/cot selection to hot bottles and hand warmers—complete overnight comfort strategies.
waq-online.comPowered-site reality
With electrical access, comfort jumps a tier. Hot carpets or electric blankets atop solid floor basics dramatically ease deep-night chill. Hot carpets warm sheet-wide areas; blankets warm near-body zones efficiently. Where hot bottles are "point," electrics are area heat.
Portable power targets around 500Wh capacity, 700W+ rated output per night. A Jackery Explorer 500–class 512Wh unit sustains a ~50W blanket roughly 8.7 hours—a tight overnight. Jackery Explorer 1000–class (~1,002Wh) yields ~17 hours, offering genuine margin. A 200W carpet exhausts 1,002Wh in ~4.3 hours. Electric blankets run lean; hot carpets demand more.
CO-free operation is a major electrical advantage. Per EcoFlow (https://blog.ecoflow.com/jp/heating-equipment-in-tents/), burn risk occurs at "44°C for hours or 50°C briefly." These vary with test methods and skin condition, so consult manufacturer labels and medical sources. Pre-sleep warm-up then lower-heat overnight sleep is safer than sustained high temp.
💡 Tip
Even powered, solid floor insulation pays. Heat-source strength can't overcome weak lower layers—electricity is a finishing tool, not foundational.
No Power? No Problem! 19 Winter Camping Heater Picks【Selection Guide】| CAMP HACK
Winter camping heater roundup! Fall-winter means prep matters. Non-powered picks, plus safety tips for tent use. Essential reading for winter outdoor fun!
camphack.nap-camp.comCot-user reality
Cots separate you from ground, a winter advantage. They resist moisture and firmness, offering bed-like comfort. However, convective cooling underneath gets overlooked. Off-ground means less direct chill yet air circulates below, leaving hips and back quite cold without insulation layers.
The author slept on a cot alone, waking with lower-back chill—not pushing cold but heat siphoning downward. Adding 10mm foam + 8cm inflatable cut that loss substantially. Cots alone don't winterize; they need mat layering atop.
Effective stacking is foam first (insulation base), then air or inflatable mat (comfort and thickness). Activity Japan's winter guides confirm mat pairing as cot standard. Foam and silver mats still help here, but alone they're thin and weak against both comfort and insulation. Cot beds need one layer below, one above—both matter.
Elevated position has upside: wet or sinking ground won't destabilize your bed. On muddy/flood-risk nights, cots' stability advantage strengthens, tying to tent rain-resilience guides. Winter cots succeed when treating them as separation aids requiring full insulation above ground, not stand-alone fixes.

Winter Camping Cold Defense & Essential Gear! Success Location Picks | Activity Japan
Winter camping deep-dive. Winter's appeal and fun covered. Winning site selection, cold tactics, clothing explained. Cold-season camping loaded with perks—enjoy winter outdoors!
activityjapan.comSleeping Gear Selection Without Failure
Comfort vs. limit temperature differences
First sleeping bag lesson: comfort and limit temperature aren't interchangeable. ISO 23537 separates them. Comfort is "sleepable without strain"; limit is nearer "minimum survivable." Mistaking limit for comfort undoes winter prep.
This gap breaks winter plans often. The author finds comfort-use temp 5°C below expected lows more field-practical than limit-temp numbers. WAQ's guidance confirms this, and real winter scenes feel it. If rough nights loom, comfort-margin approach stabilizes the overall bed more than aggressive limit-temp reliance.
Key insight: back-side cold blame isn't solely sleeping-bag weakness. Floor-side insulation shortfalls leave that discomfort untouched. Sleeping bag labels mark top-side warmth; ground-side cold belongs to mat-and-floor layers. Splitting responsibilities prevents misreading cold sources.

Sleeping Bag Comfort & Limit Use Temperature Explained|Selection Pointers
Comfort vs. limit use temps demystified. Meaning, differences, four selection keys explained.
waq-online.comMat R-value and thickness logic
Ground-cold fix prioritizes mat insulation over sleeping bags. R-value is key—it measures heat-block strength. Higher R means better cold resistance. Stacking mats sums their R-values. Winter thinking favors foam beneath inflatable rather than one thick mat, since comfort-bed math differs from insulation-goal math.
Yet R-value alone doesn't capture bedding reality. High-comfort winter setups pair R-value numbers with air-layer thickness. Inflatable and air mats shine partly through distance creation—body away from cold ground = less heat loss. Thin mats plus high-R bottom beats thick-single-mat approach for back-chill avoidance. Concrete example: upgrading sleeping bags while ground-insulation lags yields back-cold that vanishes when thickening mats. This isn't sleeping-bag failure; mat architecture underdid the job.
Single-stat shopping (thickness or R-value alone) misses half. Two-part thinking—R-value stops conduction; thickness creates air gaps—guides right choices. Back-cold traceback often finds inadequate mattresses, not weak sleeping bags.
💡 Tip
If cold is "shoulder-side chill" not "back cold," upgrading the sleeping bag fits. "Back-side cold" or "hip-only cold" points to mat-side issues. Cold-pattern breakdown divides preservation vs. insulation gaps efficiently.
Layered clothing and inner-layer best practices
Cold nights tempt over-bundling, but thickly dressed sleeping bag users often freeze worse. Reason: bulky garments compress the bag's air-lofting inside, harming insulation.
The author slept bundled in thick fleece, then slept better in thin base + loose mid-layer. Bag air warms more naturally when loose. Moisture-wicking base + non-compressive mid-layers work better. Sleep-clothes aren't body-heat replacement; they're sidecar tools preserving bag airspace.
Inners optimize through targeted warmth at neck, feet, hips—not full-body thickening. Nailing trouble spots beats padding everywhere. Sleeping bag, mat, and clothing synergy beats solo gear strength; one weak link breaks the cycle. Back-cold especially profits from splitting responsibility—bag handles top, mat-and-floor battle bottom, clothes micro-adjust.
Safe Warmth: Key Safety Points
CO prevention: ventilation, detection, operation
One-carbon-monoxide (CO) poisoning from combustion heaters is winter camping's deadliest risk. Gas stoves, kerosene heaters, charcoal, gas burners warm fast but are perilous in small tent spaces. Tokyo Labor Bureau data shows CO becomes headaches and unconsciousness quickly at higher concentrations. Sleeping hides symptoms, multiplying danger. Structurally, tents are "thin fabric shelters," not "heater-safe rooms." The author sees combustion inside tents as inherently unsafe.
Where fires must be used, non-negotiable conditions are: don't seal; ventilate continuously; deploy CO detectors. Slightly cracked doors feel sufficient but don't exchange air without intake-and-exhaust paths. Vents atop and low points work better than single high vents. Importantly, this happens for duration of use, not startup alone.
CO alarms are accident-prevention equipment, not comfort gear. Perfect-seeming flames can burn incompletely from oxygen shortage or wind suck. Since CO is colorless and odorless, detectors are essential. Heater-only safety labels miss the bigger picture; ventilation + detection + operation form one defensive system. Field reality differs from lab specs.
Burn prevention: temperature management and placement
Electric blankets and hot carpets lack CO but carry low-temperature burn risk. Per EcoFlow (https://blog.ecoflow.com/jp/heating-equipment-in-tents/), burns occur at "44°C for 3–4 hours or 50°C in 2–3 minutes." Sleeping reduces movement, so bony spots—ankles, shin, hip—concentrate heat dangerously.
The author used a "strong" blanket overnight, finding ankle warmth trapped and alarming. Full-body comfort masked spot over-heating. Smart operation is pre-sleep warm-up, lower setting for sleep. Timers split startup and steady-state nicely.
Placement matters. Direct under-body heat pooling risks burns; layered positioning spreads warmth. Placing a thin sheet atop electric blankets helps heat diffuse than concentrating. Folded heating coils trap temperature worse. Hot carpets similarly risk under-side heat trapping—thick layering atop diffuses better than direct contact.
💡 Tip
Electric blankets work best as gentle bed-base boosters, not intense heat sources. Whole-body heat with spot-cool avoidance beats localized intensity. One-zone overcooking looks cozy then burns unseen.
6 Recommended Tent Heaters! Winter Camping Electric Supply Methods - EcoFlow Blog
Winter camping comfort needs heat prep. Safe heater picks and power delivery methods covered. Avoid fires and CO risks with electrical solutions. Yet safety distance, low-burn protocol, ventilation pair with electric use.
blog.ecoflow.comElectrical: leakage and condensation countermeasures
Often overlooked: electrical leaks and condensation threaten electrical heaters. Winter tent-interior condensation is severe due to outside-inside swings; floor zones stay wet. Devices might be dry, yet cord ends, connectors, and power-bank zones gather water—suddenly hazardous.
Base practice: follow manuals strictly, use outdoor-rated cords, size for margin over rated needs. Bedside zones get kicked by feet, straining cords. Doorway and pathway cords tear easily, especially under cot legs or luggage corners. The author finds cable routing matters more than heater choice for real-world confidence.
Condensation defense is keeping power sources off wet floor. Shelving or small risers let them clear water-prone zones. Jackery Explorer 500's relatively modest size fits this detail-work. Portable-power safety hinges on staying dry, not specs alone. Heaters lack CO advantages unless entire electrical setup resists moisture. Warmth planning includes dry cabling.
Common Failures and Checklist
Failures cluster predictably: single silver mat reliance, sleeping-bag-only faith, ignoring ground composition, under-spec portable power, foot-warmth dismissal, and delayed evacuation. Cold chains rather than single-fault situations—mat weakness cascades to sleeping-bag inadequacy looks.
Cold nights rarely have one villain. Hard ground or gravel sites with weak floor insulation leaving sleeping bags as sole defense, loses the back. Windy nights amplify this "chill-return" effect; mat-top warmth contrasts with morning-wide floor cold. A single insulation-layer addition changed sleep quality dramatically.
Prep must read forecast lows plus elevation and wind speed, not temperature alone. Elevation math: meters up shift lows downward, city forecasts mislead. Then frame gear in "insulation–air–finish" three layers, spotting gaps easily. Priority floor insulation place before sleeping-bag shopping; beds underperform when base is weak.
Even powered sites require vigilance. Electric blankets (~33–56W) and hot carpets (~200W) differ; combined draws deplete reserves faster than assumed. A 500Wh unit targets "baseline works"; it suits blanket-alone overnight roughly (8.7-hour math), but margins shrink with any add-on. Over-relying on powered heaters while ignoring floor insulation multiplies failure risk.
Gear checklist
Pre-trip review should confirm full three-layer bed assembly, not single-item strength. Silver-mat-only setups look fine initially, failing as night deepens. Layer-role checks catch misses:
- Weather conditions
- Minimum nighttime temperature
- Campsite elevation
- Wind speed forecast
- Floor insulation layer
- Silver mat, foam mat, cardboard—something separating ground contact
- Ground type: frozen earth, gravel, or damp soil assessment
- Air layer
- Inflatable mat, air mat, cot with insulating layers above
- Thermal finish
- Sleeping bag
- Blankets, inner liners, hot-water bottles
- Foot-zone warmth
- Thick socks
- Compact blankets or layerable foot-end extras
- Power setup
- Electric blanket and hot carpet power draw (watts)
- Portable-power capacity (Wh) and rated output (W)
- Cord gauge, outlet paths
- Burn-prevention temperature and timer strategy
- Ground-condition backup
- Spare thin mat
- Spare rug or blanket redistributable to floor-side
Sleeping bags deserve skepticism about numbers. ISO 23537 temps help, yet with floor heat-loss, labeled comfort feels distant. Back-cold during stated-safe temps usually means floor, not bag failure. Foot-chill especially hides—torso tolerance masks frozen-toe misery commonly seen.
💡 Tip
If cutting pack weight, trim upper-layer duplicates before losing floor insulation. Dropping one mat-layer risks more than adjusting finish-warmth lighter. Lower-layer cuts trigger night-fails.
When to retreat
Winter camping demands that unmet-gear cold not be willpower-bridged. Exit signals are shaking and sleeplessness—the bed isn't functioning.
Delayed retreat happens when "dawn's near, tough it out" thinking wins. Sleepless nights trash next-day focus and driving safety. Winter retreat isn't failure; it's smart unmet-gear reporting for next trip. The author sees continuing unsleepable nights as unsafe compared to planned exit.
Retreat signals include sudden wind-driven cold escalation, foot-zone cold immune to added warmth, and depleted electrical reserves. With heaters, ask: if power stops, can I sleep warmly? If no, stop continuing.
Caution surfaces when weather and altitude are read as city-temps. Pre-check the checklist—insulation floor-first, thickness-earned air gaps, finish-warmth added—and reprioritize: floor upgrade beats bag upgrade in failure-prevention. Complete tent-selection guides help bed-and-tent compatibility too.
Ultimately: insulation stops leakage, air gaps slow heat loss, warmth finishes the job. Get these three right, and winter nights transform from endurance to rest.
Related Articles
Down vs Synthetic Sleeping Bags: How to Read Temperature Ratings and Pick the Right One
Down or synthetic? The answer is never one-size-fits-all. Factor in your transport method, the season, condensation risk, budget, and long-term care, and the right choice becomes surprisingly clear.
Envelope vs. Mummy Sleeping Bags: How to Pick the Right Shape
Choosing between an envelope and a mummy sleeping bag comes down to more than just shape. Roomy envelope bags shine for summer family camping and car-based trips, while body-hugging mummy bags excel in cold highland nights and weight-conscious backpacking or motorcycle touring. The real key to avoiding a bad purchase? Understanding temperature ratings.
Best Winter Sleeping Bags 2026: 8 Top-Rated Options for Comfort Down to -5°C
Choosing a winter sleeping bag that won't fail you starts with a simple rule: prioritize comfort temperature ratings of -5°C or lower. This guide compares 8 winter sleeping bags across price, weight, packed size, temperature range, and fill material—then walks you through temperature rating interpretation and down vs. synthetic selection to help you narrow down your options with confidence.
How to Choose a Sleeping Bag | Minimum Temperature, Comfort Range, Materials, and Shapes
The key to avoiding mistakes when choosing a sleeping bag is working backward from the expected minimum temperature of your destination. Rather than focusing on the Extreme rating, start with the EN/ISO Comfort temperature, then narrow down between down and synthetic materials, and mummy, envelope, or egg shapes based on your load capacity and how prone you are to condensation.