Ultralight Solo Camping: How to Pack Under 10kg
Ultralight Solo Camping: How to Pack Under 10kg
For solo campers traveling by foot or train in Japan, gear weight isn't just \"lighter is easier\"—there's a clear shift in effort around the 10kg mark. This guide is designed for anyone wanting to keep a one-night, two-day spring/autumn setup under 10kg, assuming water sources are available and you'll source some food locally.
For solo campers traveling by foot or train in Japan, gear weight isn't just "lighter is easier"—there's a clear shift in effort around the 10kg mark. This guide is designed for anyone wanting to keep a one-night, two-day spring/autumn setup under 10kg, assuming water sources are available and you'll source some food locally.
The key is separating baseweight from total packed weight, then reviewing your existing gear in order: measure → subtract → swap → multi-purpose. The biggest wins come from bringing "Big Three + backpack" (tent, sleeping bag, mat, pack) down to around 5kg, which gets you close to a 9–10kg total when factoring in consumables at 2.5–3.5kg.
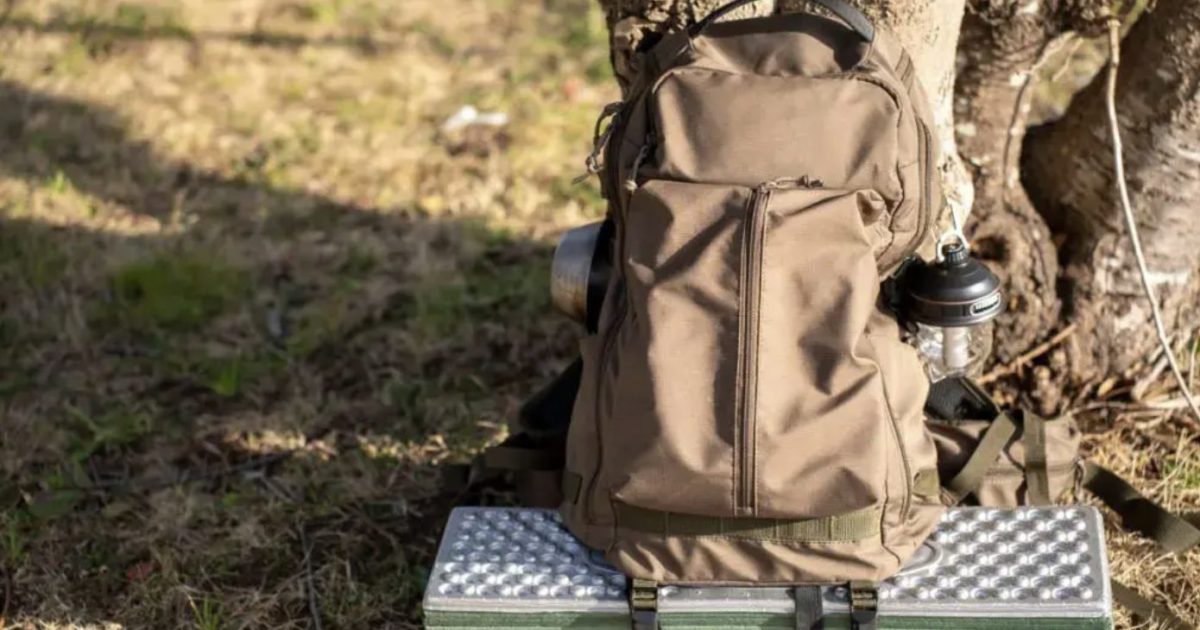
From personal experience, a 25-minute walk to a campsite carrying 9.6kg total (including stuff sacks, measured on a household scale) felt noticeably different—my shoulders and lower back had more reserve. The climb back uphill didn't wind me as much. "Lightweight" isn't about cutting comfort; it's about moving easier.
Foundational Terms Before Chasing 10kg
Baseweight vs. Total Weight vs. Pack Weight
Before cutting anything, lock in terminology. Vagueness here leads to the frustration of "gear should be light, but hiking feels heavy."
Baseweight is all gear except consumables: tent, mat, sleeping bag, pack, stove, rainwear, etc. Total weight (or pack weight) is baseweight plus water, food, and fuel at trip start—your actual carry load. Publications like BE-PAL and Yamatomichi distinguish these two consistently.
For camping, this split matters hugely. A 6kg baseweight sounds great until you add 2L of water (about 2kg). Water scales 1L = ~1kg, so the jump is direct. By the time you add food and gas, your on-the-trail feel differs sharply from your baseweight number. Understanding both keeps you honest about what "light" really means in practice.
I measure everything in its stuff sack or sleeve, including spare pegs and manuals. Catalog specs alone run lighter than what you actually shoulder. When I hit 6.3kg baseweight including all the "little stuff," even escalators and train stations felt less chaotic. Numbers translate to real comfort.
ULキャンプを始めるには?実践のポイントとおすすめギアの紹介 | 山・ハイキング・クライミング 【BE-PAL】キャンプ、アウトドア、自然派生活の情報源ビーパル
Ultra-light camping is gaining attention as a way to enjoy the outdoors with minimal gear. With lighter loads, your range of movement expands and you gain more freedom than conventional camping. Let's explore the appeal of UL camping and the essentials for getting started.
www.bepal.netWhy Under 10kg Matters
The 10kg threshold for solo camping on foot or train isn't just a round number. When you carry your own gear continuously, handling shifts noticeably around this point. KAKERUアウトドア treats sub-10kg as the realistic target for foot and rail travel because it actually works.
Above 10kg, stairs, crowded platforms, packed train cars, and that final hill to camp compound strain. Below 10kg, your movements stay stable and the load shifts from "heavy" to "something to manage." For hiking or multi-modal trips, this gap is substantial.
Backpack design matters too. Ultra-light packs (sub-1kg) typically assume ~10kg comfort load. If your pack is light but your gear is heavy, the frame and straps lose cushioning—you get worse comfort, not better. Downsizing the pack but keeping a 12kg load defeats itself. The sweet spot is designing the whole system around 10kg, not just the pack.
💡 Tip
Lightweight packs shine when total load is 10kg or under. "Optimizing the whole system for that weight" beats trying to lighten one component in isolation.
The 4.5kg Ultralight Standard
UL forums often cite baseweight under 4.5kg. This comes from backpacking and thru-trail culture. Camping adds comfort gear—cooking, lounging, fire, cameras—so 4.5kg isn't a hard rule for camp; it's a reference point.
Example: Helinox Chair One shows weight variance across sources (roughly 490g to 950g depending on the source; always check Helinox Japan or official specs for current figures). UL thinking itself is valuable for camping. Skip unneeded items, multipurpose everything, swap heavy items—that sequence works. And the "add a light insurance layer" concept applies: SOL Escape Lite Bivvy at roughly 146–156g is only ~1.5% more than a 10kg base but gives real peace of mind for wind and insulation.
Six Moon Designs' Gatewood Cape (310g) shows the idea well: bundling shelter and rain cape saves both weight and volume, more elegant than adding gear one item at a time. Chasing 4.5kg exactly matters less than rethinking which roles can merge. For camp, that design mindset beats hitting a number.
Start Here: Measure Your Current Gear Methodically
Measurement Tips: Include Stuff Sacks, Pegs, Everything
Lightweight starts with honest measurement of what you actually carry. Measure in real-world state: stuff sacks, spare pegs, instruction booklets, everything. Catalog specs lie. Your fieldpack reality includes wrapping and padding.
Use a 1g-precision kitchen scale for small items and a body scale for big ones. Weigh poles, pegs, lights with the kitchen scale; tents, stuffed packs, whole systems on the body scale. Measure tents as complete kits (body, fly, poles, pegs, bag), then note the total.
When I audited my gear, stuff sacks alone totaled 280g—just consolidating pouches wiped that out without buying anything. Small wins like this are surprisingly efficient because you don't replace, you just rethink. Yamatomichi's "Lightweight in 3 Steps" emphasizes measuring first; in practice, "that 'light' stuff sack is heavier than expected" always surfaces.
前編:軽量化の3つのステップ | 山と道 U.L. HIKE & BACKPACKING
Visitors to 山と道 often ask, "I want lighter gear but don't know how." This guide walks you through measuring, reducing, and testing—the three steps to real ultralight
www.yamatomichi.comGear List Template for Visibility
Document measured numbers; don't trust memory. Visibility flips everything. Minimal structure works: category · weight · alternatives · usage history.
Split into "Shelter," "Sleep," "Cooking," "Clothing," "Misc." Record actual measured weight, note what you could swap, log whether you used it. This alone surfaces redundancy and unused items instantly.
What stands out: unused top-3 items are prime deletion candidates. Heavy and unused? That's your lead target. Light but unused? Low priority. Layering usage data onto weight numbers makes the cuts obvious. Reverse the sort by weight (heaviest first) so the next thing to tackle jumps out.
Once you hit major gear, shelter and sleep system differences matter. How tent structure or sleeping-system weight ripples through your total is covered in "Tent Selection Complete Guide" and matters deeply.
💡 Tip
Sort by heaviest-first, not lightest-first. You'll see what actually impacts your back and the trail experience first.
Field Test → Drop Unused Items → Iterate
Gear lists exist to be tested and revised. Measure, pack, hike, camp, unpack. Check what didn't get used and what you craved. Spreadsheet theory meets reality fast.
I jot down "unused items" and "missing items" separately before leaving the field. Unused usually reads: extra dishes, unused towels, unsat-in chair. Missing usually reads: extra insulation, rain contingency, packing tweaks. This delta drives next refinement.
Best practice: drop the unused top-3 each test cycle. Cutting too much obscures cause-and-effect; three items gives enough signal to track what actually changed. "Going chairless was fine." "Mug + cooker combo worked." Incremental beats radical.
Running this loop shows that lightening isn't suffering—it's design iteration. When measured numbers align with field reality, what to cut becomes obvious.
Target 10kg: Weight Breakdown for One Night, Spring/Fall
Aim to get baseweight to the low-7kg range, add consumables to taste, landing near 10kg. Water and food drive the swing, so "where to resupply" matters as much as "what to pack."
Sample Breakdown
Here's a water-source-available, partial-local-sourcing reference:
| Category | Contents | Target (Example) |
|---|---|---|
| Baseweight | Big Three + Pack | 4.9kg |
| Baseweight | Misc. Gear | 0.9kg |
| Clothes | Insulation + Minimal Spares | 0.7kg |
| Cooking | Stove, Utensils, Tools | 0.6kg |
| Safety | Headlamp, First Aid | 0.3kg |
| Baseweight Total | 7.4kg | |
| Consumables | Water | 1.0–2.0kg (site-dependent) |
| Consumables | Food | 1.0–1.5kg (site-dependent) |
| Consumables | Fuel | 0.1–0.2kg (site-dependent) |
| Packed Total | 9.5–10.9kg |
ℹ️ Note
This breakdown assumes water sources and local food sourcing. Temperature, duration, and resupply options shift numbers. (Detailed tracking available separately if needed.)
The lever: water volume. Water is 1kg/L, so 1L vs. 2L is a 1kg swing. On a spring/fall water-source site, I often leave carrying 0.5L, top up on arrival, and drain for the walk out. Completely different shoulder feel.
Food works the same. Carrying everything versus resupplying locally changes the math entirely. Yamatomichi's "UL Packing in Practice" emphasizes building a stable baseweight, then adjusting consumables. That's smarter than cutting everything thin. Keep baseweight steady, dial consumables to conditions.
Comfort gear shows up here. A Helinox Chair One (roughly 490–950g range) or lightweight table (~450g) occupies noticeable space in a 10kg budget. Choosing one or picking neither tightens the total significantly.
Water-Source-Free or Full-Ration Sites
Without water nearby or carrying full meals, weight climbs fast. Water doesn't compress; 2L more = 2kg minimum. The gap from the 9.5–10.9kg reference above can easily balloon another 1–2kg.
To reclaim margin:
- Skip the table (~450g savings)
- Skip or swap the chair (490–950g depending on model)
- Lean on lightweight shelter/bivy setup
These swaps are real: drop table and chair, reclaim ~1.4kg at the high end. Apply light-insurance layers instead: SOL Escape Lite Bivvy (~146–156g) trades a comfort item for peace of mind. Structurally sound.
Multi-purpose shelters help: Six Moon Designs Gatewood Cape (~310g) handles both rain cape and shelter roles, consolidating what would otherwise be two items.
💡 Tip
When margins are tight, "cut one comfort item" works better than "reduce safety gear." Baseweight is your foundation; consumables flex.
Packing Priority Order
Don't pack heaviest-first. Pack by impact-per-gram:
- Big Three + Pack (4.9kg)—the skeleton. Get this right; everything else flows from here.
- Water and food ops (1–2.5kg)—biggest swing. Resupply strategy matters more than shaving grams.
- Comfort items (chair, table) (~1kg combined)—first cuts when space is tight.
- Safety layers (rain, insulation, light, first aid)—last to reduce, first to reinforce.
The order mirrors impact on trail feel and total weight. Design this way, and numbers naturally settle near 10kg.
Focus First on Big Three + Backpack
Shelter: Tent vs. Non-Freestanding
Biggest single weight win: shelter. Traditional solo tents run ~2kg; light ones hit 1.0–1.5kg. That 1kg delta changes everything. I swapped a 2.2kg tent for a 1.2kg model; a 15-minute hilly walk felt like a different load—not just numerically, but viscerally.
Ultra-light goes further. Six Moon Designs Gatewood Cape at 310g bundles rain cape and shelter in one piece. Yamatomichi's ultralight guide treats multi-purpose shelters as core thinking. Non-freestanding gear requires technique—site choice, wind management, peg skill—but the payoff in weight and volume is real.
Trade-off: freestanding tents are forgiving and spacious; non-freestanding demands competence and site sense. Conditions matter: fine weather? Non-freestanding wins. Unsure forecast? Self-standing peace of mind has value. Rain prep is covered in "Tent Rain Guide & Waterproof Specs."
Sleep System: Bag vs. Quilt
For spring/fall (lows 5–10°C), a 700–900g sleep system pairs well with overall design. Down is light and packs small, classic ultralight. Synthetic is bulkier but forgives humidity; in a condensation-prone shelter or wet morning, synth is friendlier.
Comfort isn't just insulation; it's loft through the night. A wet-lofted bag keeps you cold until morning, making light baseweight pointless. Consider total performance, not catalog numbers. Quilts eke out more grams but require fiddling with foot coverage.
Pad: R-Value Before Weight
Third priority, huge impact: R-value 2.5–3.5, weight 300–500g. Cold seeping from below kills sleep worse than cool air. Spring/fall is deceptive; ground gets cold even when daytime is comfy. A 300g pad with marginal R-value loses to a 400g pad that actually insulates.
I prioritize bottom insulation over raw weight. A thin, light pad makes you shiver, spoiling the next day. A slightly heavier pad that you sleep through wins every time.
Pack: Last, Not First
Good baseweight first; then pick pack. UL packs (sub-1kg) assume ~10kg load. Downsizing the pack before shrinking the load causes pressure points and poor ergonomics. Fit the pack to the refined load, not the other way.
Light packs sacrifice padding and weight distribution. At 5kg actual load, a minimal frame is fine. At 10kg, a slightly heavier pack with real support is more comfortable than a light pack that transfers every lump.
Summary: Big Three + Pack Priority
| Rank | Gear | Target | Key View |
|---|---|---|---|
| 1 | Shelter | 1.0–1.5kg | Weight, setup ease, weatherproofness |
| 2 | Sleep Bag | 700–900g | Insulation, humidity resistance, packability |
| 3 | Pad | 300–500g (R 2.5–3.5) | R-value first, then weight; bottom warmth is non-negotiable |
| 4 | Pack | <1kg | Safe carry load ~10kg, fit actual gear, shoulder comfort |
This order steers 4.9kg for Big Three + pack. The rest—consumables and accessories—builds on that foundation and becomes responsive.
💡 Tip
Big Three + pack are your skeleton. Don't penny-pinch here; get the structure right, then finesse everything else.
Easy Cuts vs. Don't-Cut Items
Deletion Candidates (No Safety Loss)
Lightweight succeeds by cutting what feels good to drop, not what sounds necessary. Smart cuts preserve function and safety.
Furniture: Tables (~450g) and chairs (490–950g) are pure comfort. Ground-sitting is free. Benchtop or cooler-as-seat? Works fine. Dropping both gains ~1.4kg and doesn't break camp.
Dishes: Carrying mug, bowl, plate, and utensils separately is wasteful. One pot, one utensil set, drink from the same vessel—modern, solo, smart. Fewer dishes, easier cleanup.
Stuff Sacks: Multipurpose. Keep waterproofing, ditch redundant pouches. Clothes and food can share organized compression; save the fancy cases.
Spare Clothes: 1–2 day trip, 1 extra shirt + 1 underwear set. Layering beats excess spares. Less weight, less laundry, same comfort.
| Item | Why Cutable | Alternative |
|---|---|---|
| Table | Not essential | Ground, cooler-top seating |
| Chair | Comfort, not survival | Sit on pad, ground, stone |
| Redundant Dishes | Roles overlap | Pot as bowl, pot as mug |
| Extra Stuff Sacks | Organization bloat | Combine categories |
| Spare Clothes (beyond 1) | 1–2 day trips don't need many | Swap layers, hand-wash if needed |
Non-Negotiables (Keep Them)
Some gear keeps you safe when conditions shift. Cut these and you're exposed, not light.
Rain gear: Stops wind, prevents heat loss. "Only if rain" thinking fails when sun goes down soaked. Spring/fall chill + wet = dangerous.
Insulation: Extra fleece or down isn't luxury; it bridges daytime to nighttime. Walking stays warm; sitting cools you. One insulating layer is baseline.
Light: Moving at night or emergency. Stable hands in dark. Non-negotiable.
First Aid: Minimum taping, disinfectant, bandage. Small volume, zero field use = worth carrying.
Shelter Redundancy: Backup layer (bivy, cape, even a large plastic bag). Not comfort, insurance.
Examples: SOL Escape Lite Bivvy (~146–156g) is ~1.5% of a 10kg load but buys night/cold backup. Yamatomichi retains these insurance pieces even in refined setups. A light insulation piece costs nearly nothing in total weight, massively in morale when it's 10°C at sunset.
💡 Tip
When unsure: "Is this uncomfortable without it?" = keep it. "Is this annoying without it?" = consider dropping it.
Dual-Purpose Gear Ideas
Best lightweight move: 1 item, 2+ roles.
Cookware-as-Dishware: A deep pot handles boiling and eating. Simplifies, reduces redundancy. Gatewood Cape style: One piece, rain + shelter.
Footwear as Site Shoe: Trail shoe you can slip on easily doubles as campsite shoe. No extra pair. SOL Bivvy as Backup: Insulation help and emergency cover—two jobs, ~150g.
| Dual-Purpose | Job 1 | Job 2 | Gain |
|---|---|---|---|
| Pot | Cook | Eat | Drop dish set |
| Shelter-Cape | Rain | Camp Walls | Merge roles |
| Bivvy | Insulate | Emergency | Light insurance |
| Trail Shoe | Hike | Camp | No slipper |
This isn't sacrifice; it's design. Fewer total items, merged functions, same capability.
How Weight Shifts with Season, Weather, and Water Access
Spring/Fall Adjustments
Spring/fall (lows 5–10°C) is where 10kg is easiest to hit. Add one insulation layer and dial sleep system to R 2.5–3.5 mat. That lows-5–10 range is deceptively cold at night.
Shore up ground insulation before upgrading the bag. And swap food sourcing: arrive with dinner/breakfast intent, source in-town on approach or via camp store. Consumables are where you dial weight up/down without touching baseweight.
Rainy-Day Additions
Rain changes the math. Don't cut rain gear to fit a number; add insurance on top. Swap comfort items (chair, table) instead.
Rain + cold compounds. SOL Escape Lite Bivvy's ~150g buys wind-proof + backup warmth—a bargain in terms of peace-of-mind-to-weight ratio.
Wet-gear storage matters: keep damp stuff outside the pack in waterproof pockets or drybags, or your sleeping stuff wicks moisture by morning. Lived experience: wet shelter → wet bag = bad sleep + slow recovery next day.
💡 Tip
Rainy trip: trade comfort gear for insurance gear. Chair-free trips free up the ~500g easily.
Waterless or Full-Ration Calculation
No water source = carry 2–3L minimum, maybe 4L if isolated = +2–4kg upfront. Adjust: drop table + chair, lean on local food, minimize cooking water by eating simpler meals. The math changes entirely.
Carry water mentally upfront; everything else flows from that reality.
Lightweight Approach Styles: Cost vs. Impact
Comparison: Cut vs. Multi-Purpose vs. Replace
Cutting (delete whole items) costs zero, impacts immediately. Don't bring a table. Done.
Multi-purpose (merge roles) needs some thought but no cash; impact is weight and volume and point count reduction. Gatewood Cape handles rain and shelter, freeing mental load.
Replacement (swap for lighter gear) costs real money but moves largest numbers. A 2.2kg tent → 1.2kg cuts 1kg alone. ザック 1.5kg → 0.5kg is another 1kg. These are the big levers.
Real efficiency: Cutting → Multi-purpose → Replace, in that order. Cut what doesn't get used (free), merge overlaps (cheap), then upgrade heavy items if the foundation is solid.
💡 Tip
Temptation: Buy lighter gear first. Truth: Delete junk first, then assess what's truly heavy before spending.
Shelter vs. Sleep Gear vs. Seating: Trade-Offs Explained
Tents (Freestanding) vs. Shelters (Non-Freestanding) vs. Bivvies
Freestanding (~1.2kg): Site-agnostic, easy, spacious interior. Sets you up fast. Great for unknowns.
Non-freestanding (~0.3–0.5kg): Tiny, technique-heavy, site-dependent. Rewards skill, rewards lightweight obsession.
Bivvy (~0.15kg): Ultra-minimal, not shelter alone—backup layer. Pair with tarp or under stars.
Choose based on confidence in forecasts and site pre-scouting. Unknown conditions? Freestanding. Familiar routes, calm forecasts? Non-freestanding. Both? Bivvy + open air.
Down vs. Synthetic Sleep Bags
Down: Light, packs small. Humidity kills insulation. Bad in wet.
Synthetic: Bulks more, heavier. Wet-weather friendly.
Spring/fall isn't super-wet usually, so down wins weight-wise. But spring can be wet, so synthetic's peace-of-mind is real. Choose by condition forecast and personal-error tolerance.
Ground Sitting vs. Chair
Ground: 0g net, fast, intimate.
Chair (~500–900g): Huge quality-of-life bump for reading, coffee, fire-watching.
Alternate: Chair-free hike days, chair-on-camping days. One trip, no furniture. Next trip, one furniture. Splits the difference.
Making 10kg Enjoyable, Not Austere
Spending Your 1–2kg Budget on Joy
Once baseweight + consumables sit ~8kg, you have 2kg wiggle room. Don't use it to cut further. Use it for one favorite thing.
Firewood? Drop chair, keep fire kit. Photography? Include a camera, skip comfort. A small bottle of good spirits? Trade a meal variety.
Splitting into camera-centric days and fire-centric days beats half-measures. Depth beats breadth.
💡 Tip
Lightweight isn't austere. It's focused. One main joy per trip scales better than a little of everything.
To Fire or Not to Fire
Firewood kit (stove, wood, gloves, etc.) adds 1.5–3kg. On water-accessible sites without fire prohibition, it's a trade-off.
Ask: Do I want to tend fire, or just want the vibe? If it's vibe, skip it. Lantern + hot drink + quiet hits the mark at 0.3kg added. If it's fire-tending passion, commit, drop other items, make it work.
Yamatomichi notes this: lightweight trips aren't grim. They're chosen simplicity. The days you choose fire are fire days. The days you choose walking are walking days. Alternating beats half-commitment.
Action Items: Make It Stick
Gear List Template + Log
- Measure everything (in stuffed state).
- Categorize by type, weight, and "used last time" flag.
- Identify top 3 unused items from your last test.
- Drop those 3 next trip. No more, no less. Test the delta.
- Record field notes: what went unused, what you craved.
- Repeat. After 3 cycles, you'll see your personal pattern.
| Gear Name | Weight | Used? | Notes |
|---|---|---|---|
Testing Conditions to Lock In
Keep conditions steady so you can isolate changes. Suggested baseline:
- Spring/fall, 1 night
- Lows 5–10°C
- Water source on-site
- Partial food-sourcing locally
- No fire (or fire, but track it)
Measurable, repeatable, fair comparison.
Improve & Document
After each trip, note:
| Unused | Deficiency | Next Adjustment |
|---|---|---|
Simple form, massive insight over time.
Closer
Getting under 10kg in Japan for a one-night, two-day spring/fall trip is wholly achievable. Start with Big Three + pack, use water sources and local sourcing, skip furniture you don't use, keep safety gear light but present. The secret isn't deprivation—it's clarity. Measure, cut unused items, test, record, repeat.
For deeper shelter and sleep planning, see "Tent Selection Complete Guide" or "Solo Tent Comparison & Choices." The formula works. The freedom of 9.6kg on the trail is worth the iteration to get there.
Related Articles
Campfire Cleanup and Ash Disposal in Japan | Starting 2 Hours Before Departure
The cleanup after a campfire in Japan depends far less on the moment you extinguish the flames than on when you start wrapping up. This guide walks through a realistic approach—stopping fuel addition about 2 hours before departure, letting the fire burn down, then using suffocation or water cooling in sequence—tailored to different campground rules. You'll also find practical tips for ash disposal and gear maintenance that make the next campfire much easier.
Women's Solo Camping Safety Guide | Site Selection and 4-Stage Night Operations
Safety in women's solo camping in Japan depends far more on where you choose to pitch than on what gear you bring. This guide breaks down safety strategies into four stages—before booking, setup, nighttime, and emergencies—for women starting solo camping or beginners feeling uneasy about their reservations.
Getting Started with Solo Camping in Japan | Essential Gear, Budget, and Weight Guidelines
Your first solo camping trip in Japan often brings two conflicting worries: buying too much gear, or not having enough. This guide walks through everything you need for a one-night debut at a well-equipped campground in spring or fall. We break down gear lists, budgets ranging from ¥20,000 to ¥70,000 (roughly $135–$475 USD), and weight targets for car, motorcycle, and foot travel—all in concrete, decision-ready detail.
Solo Camping Gear Checklist: 20 Essential Items
Packing for solo camping isn't as simple as "more gear means more safety, less gear means more comfort." For a single overnight trip in spring through fall, you can narrow down what you truly need — just don't cut corners on the gear that keeps you warm and sheltered through the night.