Solo Camping Gear Checklist: 20 Essential Items
Solo Camping Gear Checklist: 20 Essential Items
Packing for solo camping isn't as simple as "more gear means more safety, less gear means more comfort." For a single overnight trip in spring through fall, you can narrow down what you truly need — just don't cut corners on the gear that keeps you warm and sheltered through the night.
Packing for solo camping isn't as simple as "more gear means more safety, less gear means more comfort." For a single overnight trip in spring through fall, you can narrow down what you truly need — just don't cut corners on the gear that keeps you warm and sheltered through the night.
Solo Camping Gear Checklist: 20 Items to Start With
Must-Haves
These 20 items are the minimum viable setup for a comfortable one-night trip from spring through fall. My approach is to lock in the four fundamentals first — sleep, light, boil water, stay dry — then add comfort gear afterward. For tent fly waterproofing, 1,500–2,000mm is the widely cited benchmark for heavy rain, and starting in that range gives beginners a solid baseline. If you're thinking about weight, keep a target of around 4–5 kg base weight in mind, and trim from chairs and tables first — never from your sleep system or shelter.
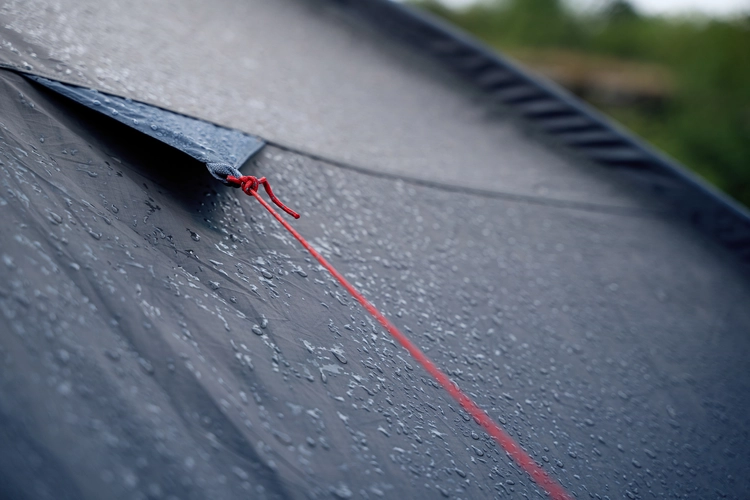
□ Tent: Your rain cover and sleeping space. For beginners, a solo tent with a vestibule and a fly rated at 1,500–2,000mm waterproofing is the practical starting point. Without it, the trip doesn't happen. □ Tent pegs / Guy lines / Mallet: What keeps your tent anchored in wind. Check that you have enough stakes and at minimum a basic mallet — skip these and you're in trouble the first time the wind picks up at night. □ Ground sheet: Protects your tent floor from abrasion and moisture from below. Match it reasonably close to your tent floor size for easy handling. Without it, you'll feel the cold from below and risk damaging your tent floor. □ Sleeping bag: Your primary warmth at night. For spring and fall, building around a 0–10°C rating is a reliable frame of reference. Leave this out and cold nights will wreck your sleep. □ Sleeping pad: The insulation layer between you and the ground. For spring through fall, targeting an R-value around 2–3 is a practical starting point within the 1–4 range for three-season use. Even a good sleeping bag won't save you from ground cold without an adequate pad. □ LED lantern: Your main campsite and table light. LED is the beginner-friendly choice — safe, easy to use, and widely available. Without it, meals and cleanup become genuinely awkward after dark. □ Headlamp: Hands-free lighting for walking and setup tasks. Around 100 lumens works well for close-up tasks. Without one, nighttime bathroom trips and packing in the dark become real inconveniences. □ Single-burner stove: Your heat source for boiling water and simple cooking. A reliable, easy-to-light model is the right starting point. Without it, hot food and drinks are off the table. □ Fuel (OD or CB canister): The consumable that powers your stove. Match it to your burner type. A stove without compatible fuel is dead weight. □ Ignition (lighter, etc.): Needed to start your stove and any fire. A simple lighter is the easiest option for beginners. Forget this and your cooking plans stop completely. □ Cookset, dishes, utensils: Everything needed for boiling, eating, and serving. Starting with a single small pot and minimal dishes keeps things manageable. Without these, having food doesn't mean being able to eat it. □ Drinking and cooking water: Plan on roughly 2–3 liters for a single overnight trip. Running short on water doesn't just affect drinking — cleanup becomes a problem too. □ Food: Fuel for your activity and your meals. Beginners do well starting with retort pouches, bread, and other no-fuss options. Forget food and you'll feel it not just in your stomach, but in your decision-making. □ First aid kit and personal medications: Your response to minor issues like cuts, blisters, and headaches. Keep it small and practical, centered around what you personally need. Without it, small problems feel a lot bigger.
You don't need a heavy stove to make this work. Something like the MSR PocketRocket 2 at 73g fits in the gaps of any pack and leaves breathing room in your load — whether you're driving or hiking to your site. For weight-conscious packing, the approach that works is making your current gear's weight visible before deciding what to cut.
耐水圧…?初心者キャンパーの疑問、テントの耐水圧を徹底解説! | キャンプ・アウトドア情報メディアhinata
テントを選ぶ際の重要な要素となる「耐水圧」。この記事ではキャンプ初心者の疑問である耐水圧の基準から、見るべきポイントまで解説します。
hinata.meGood to Have
Everything below is skippable for a single night — but these six items meaningfully improve comfort and cleanup. If you're trimming, start here. Conversely, if you came home from your first trip wiped out, these are worth adding before your next one.
□ Chair: Stable seating for meals and time by the fire. A lightweight low-style chair works well for beginners. Without one, you're sitting on the ground for extended stretches, which wears on you. □ Low table (compact): A surface to keep your cookware and dishes off the ground. A small low table is the most practical starting format. Without it, meals and cooking both tend to get messier. □ Cooler bag / ice packs: Keeps perishables and drinks at a safe temperature. A soft cooler with ice packs is an approachable starting setup for one night. In summer, skipping this narrows your food options significantly. □ Power bank / charging cables: For keeping your phone and lights charged. A 20,000mAh unit (~$X USD equivalent) gives roughly 3–4 full phone charges in practice, which is plenty for a one-night trip including map use and photos. Without it, you'll feel the pinch on navigation, communication, and photos. □ Hygiene basics (wet wipes / toothbrush / small towel): Keeping clean before meals and before sleep. Centering on wet wipes and a small towel keeps this category light. Skip it and the discomfort on your hands and face tends to linger until morning. □ Trash bags (large and medium): Useful for sorting trash, storing wet items, and temporary organization during breakdown. Having two sizes gives you flexibility on-site. Forget them and your site gets messy fast — rain breakdown especially.
For the power bank, capacity isn't the only thing that matters in practice. A 20,000mAh unit comes in around 74Wh, which puts it within the under-100Wh carry-on limit most airlines use. That said, airline rules vary, so always check your carrier's current guidelines before flying. Even on car-based camping trips, a bit of extra capacity pays off once you factor in overnight charging for lanterns on top of your phone.
Tips for Your Printed or Written Checklist
When you write this out on paper, list items by component group rather than just by name — it's more fieldproof. "Tent" as a single line can still lead to leaving the stuff sack at home. Breaking it out as "tent body / fly / poles / stuff sack" catches those gaps. Same goes for your cook system: listing "stove body / fuel / lighter / cookpot" as one unit means nothing gets separated.
If you're tracking weight, jotting numbers in the right margin gives you a fast overview. As noted in ultralight packing guides, base weight is your gear weight excluding consumables like water, food, and fuel. Pack weight adds those back in. Keeping that distinction in your notes makes it easier to diagnose why your pack feels heavier than expected even after you thought you'd cut things down.
💡 Tip
Beyond "essential" and "good to have" columns, adding three more columns to your printed checklist — "loaded in car/pack," "use on-site," and "double-check at breakdown" — catches both pre-trip and post-trip gear losses.
This framework is built around a comfortable one-night trip from spring through fall. The approach: lock in sleep, light, fire, and shelter first, then layer in comfort gear. Waterproofing guidance consistently points to 1,500–2,000mm as the benchmark for heavy rain — starting there means fewer bad surprises in rough weather. For weight-conscious packing, keep a 4–5 kg base weight target in view, and trim chairs and tables before anything else. Shelter and sleep gear stay.
いまは一般的な縦走登山のスタイルだけどもっと荷物を軽くしたい、けれど装備を簡素化|https://cdns3.yamatomichi.com/wp-content/uploads/2020/10/2020_07_yamatomichi_theARTofUL_2_169.jpg}}
Breaking Down the 20 Items: Shelter, Food, Light, and Safety
Shelter and Sleep
Trying to memorize all 20 items tends to lead to gaps. Grouping them by function cuts the forgetting. My starting breakdown is three categories: "keep rain and wind out," "block ground cold," and "actually sleep." That means tent, pegs/guy lines/mallet, ground sheet, sleeping bag, and sleeping pad. In other words, your shelter and sleep setup alone determines whether the night works.
The practical value of this grouping is that priorities stop shifting around. Chairs and tables can be improvised or skipped, but a missing pad collapses sleep quality immediately. I've camped without a pad before — even with a sleeping bag, the cold from below came through by morning and left me genuinely tired. A sleeping pad isn't really a comfort item; it functions as insulation, and treating it that way leads to better decisions. For three-season camping, R-values in the 1–4 range cover spring through fall, with R2–3 being a practical sweet spot for solo use. Keep in mind that R-value measurements can vary between manufacturers and test conditions, so comparing within the same brand or looking for ASTM-rated specs gives you a more apples-to-apples read.
Rain management also lives in this category. Beyond the tent itself, how you combine your ground sheet, oversized trash bags, and waterproof storage shapes how hard your breakdown is. When rain is in the forecast, this shelter group expands to include a rain jacket, tarp, and waterproof bags. Tent waterproofing ratings are one input, but fabric tension, seam quality, ventilation, and how tightly you pitch the fly all affect real-world rain performance. The 1,500–2,000mm benchmark is a useful starting point, but thoughtful wet-gear management matters just as much.
Cooking and Food
The cooking category is where beginner gear lists tend to expand the fastest. It includes your single-burner stove, fuel, ignition, cookset and utensils, food, and water. The decision that keeps this category clean is simple: decide upfront whether you're boiling water or actually cooking. Leave that unclear and you end up with a cutting board, knife, and a lineup of spices that didn't need to make the trip.
For simplified meals, you can cut a lot. If you're working with instant noodles, retort pouches, and bread, the kit is: stove + fuel + one pot + a spoon. No cutting board, no multi-piece cookset, no condiment collection needed. Pouring hot water into cup noodles and having bread and coffee in the morning can be done with minimal dishes and no dedicated table. Honestly, in that kind of setup, a table is more "nice to have" than essential — as long as things you don't want on the ground have somewhere to go, you're fine.
When cooking is part of the plan — grilling sausages, a simple stir-fry, carefully brewed coffee — the math changes. Even a compact table creates an organizing surface for your stove, ingredients, and utensils that meaningfully raises the quality of the experience. If you're eating cup noodles and bread, a table is easy to drop. If you're cooking, a small low table earns its weight immediately. This is the context where beginner-oriented gear guides make the most sense: get the core kit right, then scale the cooking setup to what you actually plan to eat.
Going from one to two nights, the cooking category grows mainly in consumables. Your gear doesn't change — what you're adding is food, water, and fuel proportional to the extra day. If you were planning 2 liters of water per night, two nights means double that. Gear that felt light on day one starts feeling heavier on day two, but the culprit is usually consumables, not equipment.
Light and Power
Lighting breaks cleanly into two roles: ambient light for your site and task light for movement. An LED lantern handles the first; a headlamp handles the second. Separating them in the 20-item list isn't redundancy — it's because each fills a gap the other can't. A lantern lights your table well but can't follow you to the bathroom. A headlamp is great for hands-free tasks but doesn't create comfortable ambient light around camp.
LED lanterns make sense for beginners because they balance usability and safety. Around 200–300 lumens works well for a table and immediate surroundings; 1,000+ lumens if you want to light a larger area. For solo camping, my preference is a moderate LED lantern for the table and tent, paired with a headlamp for moving around. Two focused light sources beats one very bright one, because you can direct light where you need it rather than just flooding the area.
The power bank is most useful when you treat it as a buffer rather than a primary tool. A 20,000mAh unit (~$X USD) provides enough charge to top up your phone 3–4 times and keep rechargeable lights going through the night. At roughly 74Wh, it falls within most airlines' carry-on limits. Even without a powered campsite, one of these covers maps, payments, calls, and photos without any anxiety.
Hygiene and Safety
Hygiene and safety gear tends to be small and numerous, which makes it easy to miss items — grouping everything together helps. First aid kit with personal medications, hygiene supplies, and trash bags all go here. These look unglamorous on a gear list, but they do a lot of heavy lifting for on-site comfort. Trash bags in particular earn extra duty beyond waste management: wet rain jackets, muddy peg bags, condensation-covered flies all end up in them during packing. They're effectively dual-purpose storage and wet-weather gear.
Connecting rain prep to this category rather than treating it separately makes for faster packing decisions. A rain jacket is wearable waterproofing; a waterproof bag or large trash bag is storage waterproofing; a ground sheet and tarp are shelter waterproofing. When rain breakdown goes wrong, the real problem usually isn't getting wet — it's not being able to keep wet things away from dry things. I notice this most on rainy breakdowns: one large bag dedicated to wet gear means the sleeping bag and clothes stay dry all the way home.
On the safety side, the basics are night visibility, footing, and warmth. At higher-elevation sites or in mountain terrain, spring and fall nights can feel significantly colder than flatland expectations. That's where your sleeping gear and rain jacket move up in priority. The framing that holds up best: reduce danger and discomfort first, then add comfort.
ℹ️ Note
For preventing forgotten items, talking through each category out loud works surprisingly well. Running through "did I get everything for sleep?" and "is my fire kit complete?" catches more gaps than scanning 20 individual items one by one.
Car Camping vs. Hiking and Touring
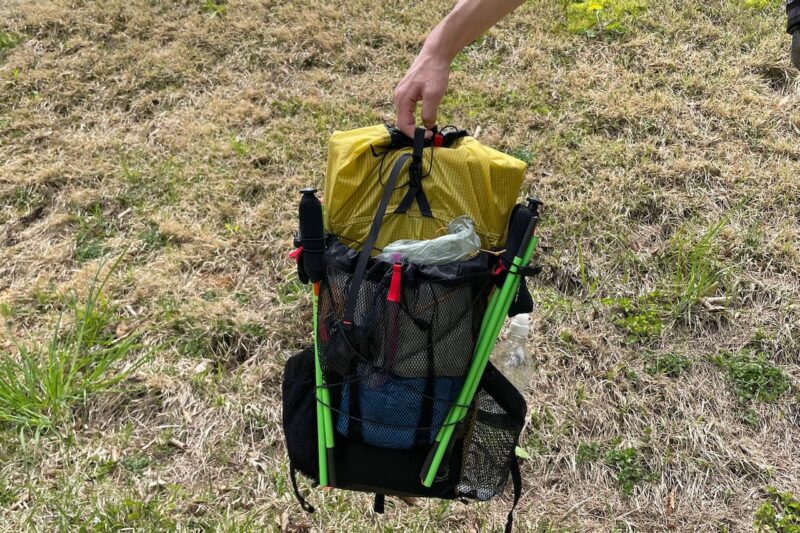
The same 20 items mean different things depending on how you're getting to your site. The key variable is tolerance for weight and bulk. By car, chairs, a compact table, and a cooler bag are all easy additions that don't compromise your travel. On foot or by motorcycle, everything you add becomes something you carry — and "can I actually carry this?" becomes the first question, not an afterthought. When weight matters, what you preserve is shelter, sleep, light, and safety. Furniture gets deferred.
For hiking and touring, ultralight frameworks are directly applicable. Targeting a base weight of 4–5 kg and a total carry weight (including water, food, and fuel) of 6–8 kg produces a real difference in how you feel while moving. Within that range, sites far from the parking area stop being a concern, and you arrive at setup with energy left. That's the context where cutting a chair or large lantern makes clear sense.
Car campers tend toward "if it fits, it goes" packing — and that's when setup and breakdown start getting chaotic. Hikers are forced into clarity because the consequences of poor prioritization are immediate. I see the difference less as a comfort gap and more as transport constraints shaping gear philosophy. Car camping trends toward livability; hiking and touring trend toward ultralight. Neither is wrong. The right answer depends on how you're getting there.
This category breakdown reveals something useful about the 20-item list: the number isn't arbitrary. The list is the result of covering the functions needed for one reliable night — sleep, eat, light, safety — with rain management and storage layered in. When you approach it that way, what to pack starts answering itself.
How Beginners Can Choose Gear Without Getting it Wrong
Tents with Vestibules, and What Waterproofing Numbers Actually Mean
If there's one feature to prioritize for your first tent, it's a vestibule. The logic is straightforward: having a half-step of covered space outside your sleeping area creates somewhere to put your shoes, a wet rain jacket, and small items. Without it, you're making bad choices in the rain — bring wet shoes inside and the floor gets dirty; leave them outside and they're soaked by morning. After one rainy night with a vestibule-less tent, I stopped treating that feature as optional.
The difference becomes even more obvious in real rain. A vestibule gives you a buffer zone when you're entering and exiting — you're not opening the door directly into the rain and immediately letting moisture into the sleeping area. It's not the most glamorous spec on paper, but in practice it functions more as failure prevention than comfort enhancement.
On waterproofing: as covered above, 1,500–2,000mm on the fly is a practical starting benchmark. That's the range consistently cited for handling heavy rain. That said, raw numbers aren't the whole picture — fabric tension, seam quality, ventilation, and how firmly you've pitched the tent all affect how it performs in real conditions. The catalog number is a useful entry point, but a tent with a vestibule and a fly in that waterproofing range is a more reliable buying frame for beginners than chasing high numbers alone.
LED Lanterns and Headlamps
Trying to manage with a single light source tends to leave gaps. Using an LED lantern and headlamp for different jobs produces better results from the start. LED lanterns are easy to use, run cool, and are safe to use near your tent — solid general ambient light. Fire-based lanterns have real atmosphere, but as your first light, something you can switch on instantly is more practical.
Even so, a great ambient lantern can't do everything. Checking inside a pot, hunting for a peg or guy line in the dark, organizing gear by hand — all of those tasks go smoother when the light moves with your head. For solo camping, my standard setup is a soft LED lantern for the table and tent interior, plus a headlamp for movement and detail work. Splitting those two roles is what makes the nighttime camp flow.
For gear selection: two focused lights beat one very bright light for beginners. The LED lantern covers safety and ease; the headlamp covers working tasks. With those roles clearly defined, you're not improvising in the dark at 10pm.
Getting Started with a Single-Burner Stove
Cooking gear can spiral quickly, but starting with one single-burner stove is genuinely enough. Boiling water, heating instant noodles or a retort pouch, making coffee in the morning — one burner handles all of it for a solo overnight. Multi-burner setups and large stoves add convenience but multiply both weight and complexity.
Either OD or CB canisters work as a starting point. OD canisters pack more compactly, making them a natural fit for hiking or motorcycle camping. CB canisters are widely available and easier to source, which makes them practical for car-based trips. If weight is a priority, ultra-light models like the MSR PocketRocket 2 at 73g or the SOTO Amicus at around 81g are immediately noticeable when you hold them — on foot, the difference between stove weights compounds across every other gear decision.
For beginners, though, weight alone shouldn't be the deciding factor. Burner stability, how easy it is to light, and compatibility with your cookpot all matter. The goal isn't the widest range of cooking options — it's getting through one night without complications.
Why Your Sleeping Pad Matters as Much as Your Bag
The sleeping pad is the most underestimated item in most beginner sleep systems, but it's just as important as your sleeping bag. Ground cold doesn't respond to fabric layers the way air cold does — even a moderate amount of ground contact causes heat loss that keeps you awake. My clearest bad-sleep memories aren't from a weak sleeping bag. They're from an inadequate pad.
When choosing, prioritize thickness and R-value over packed size or weight. R-value measures a pad's thermal resistance; for three-season camping, the 1–4 range covers most conditions, with R2–3 being a reasonable target for spring and fall one-nighters. A thinner pad you push through is almost always less satisfying than one that actually insulates. Keep in mind that R-value testing methods differ between brands, so direct cross-brand comparisons can be misleading — comparing within a single brand or looking for standardized ratings gives a cleaner read. In spring and fall, the right question isn't "what can I cut?" — it's "is my sleep system solid before anything else?"
Chairs and tables can be adjusted later, but cold nights and poor sleep can't be fixed on-site. That's why, when thinking through first-purchase priorities, I'd put budget toward the sleeping pad before any of the visible "nice to have" gear.
💡 Tip
For spring and fall solo trips, strengthening your sleep system by one level almost always does more for satisfaction than adding a comfort item. The difference between waking up rested and waking up stiff is bigger than the difference between having a chair and sitting on the ground.
The 0–10°C Framing for Elevation and Season
Sizing your sleep system based only on your local low temperature is how campers get caught out at elevation. In mountain terrain and at sites above 1,000 meters, spring through fall nights can drop sharply even when the afternoon felt warm. Summer mountain camping especially — the air shifts noticeably once the sun goes down. The frame that works: build your sleep system assuming 0–10°C overnight, regardless of season.
This doesn't mean full winter gear. It means setting your expected temperature one step lower, then choosing your sleeping bag and pad combination to have a bit of margin. The idea carries through from experienced hikers' gear philosophy — don't apply flatland temperature assumptions to sites above the treeline. The most common mistake in spring and fall is "it was warm all day, so tonight should be fine." That's the exact situation where elevation bites back.
For first-time buyers, the more reliable approach is one step up from summer-only gear — something that handles cold spring and fall nights without being a full winter setup. Tents, lights, and stoves have some room for improvisation; cold nights don't. A slightly conservative temperature estimate at purchase means fewer expensive lessons later.
Extra Gear for Rainy Conditions
Personal Waterproofing First
When rain is in the forecast, the first thing to add isn't a pack cover — it's keeping yourself dry. A tent can handle the rain, but if you're soaked during setup and breakdown, your judgment and dexterity both suffer. My rain-day priority order: rain jacket and pants first, then footwear. That sequence doesn't reverse.
The baseline for a rain jacket is a breathable waterproof upper and lower set. Ponchos are convenient, but they catch wind, and the hem gets in the way when you're crouching to drive tent pegs or manage guy lines. A proper jacket-and-pants combo moves with your body when you're leaning over to pitch a tarp or folding down a wet fly. Rain camping isn't just about staying dry — it's about staying functional while wet work is happening.
Footwear follows the same logic. Once your socks are wet, cold and discomfort build fast. Even in summer, a rain-saturated campsite creates small muddy patches right around your tent. Low-cut breathable trail shoes that work great in dry conditions become a liability in those spots. Any shoe that can handle some moisture without immediately soaking through keeps you moving at a normal pace through the whole trip.
Designing Your Wet Gear Storage
The part of rain preparation that often gets overlooked is the breakdown storage plan. In a fair-weather packing system, a wet fly or tarp placed against dry gear immediately starts spreading moisture to your sleeping bag and clothes. The fix: a dry bag or a large 45-liter-plus trash bag dedicated to wet items, kept separate from everything else.
On rainy breakdowns, my approach is to plan for bringing everything home wet rather than trying to dry it first. That shift alone speeds things up considerably. Trying to neatly fold and re-pack a wet tent and fly in the rain just extends the time you're standing in it. Pushing the wet tent body, fly, and rain jacket into a dedicated bag — even messily — stops the moisture from spreading. I've gotten home from a downpour breakdown with sleeping bag and clothes completely dry because the wet tent went into a 45L trash bag and directly into the car. On days like that, tidy packing matters a lot less than containing the spread.
Large trash bags aren't a budget substitute — they're genuinely functional for wet camping. They don't have the self-structure or durability of a dry bag, but they let you corral tent poles and the wet fly together, keep muddy shoes separate, and carry everything directly to a balcony or bathroom when you get home. Rain camping gear guides consistently emphasize separating wet and dry gear as a core practice, and waterproofing your storage is just as important as waterproofing your tent.
Gear That Makes Setup and Breakdown Easier in Rain
In wet conditions, the same tent becomes harder to manage without the right supporting gear. Two additions with the highest priority: ground sheet and tarp. Both look like comfort upgrades, but their real job is reducing the physical effort of setup and breakdown.
For the ground sheet, a thicker option that fits your tent floor reasonably well is worth the small added weight. Heavier material holds off ground moisture and resists mud transfer better, and a well-fitted sheet produces less excess fabric to manage — which means less mud caught in the folds during breakdown. A tent's built-in rain resistance is one layer of protection; reinforcing the floor side reduces wear on rainy trips.
A tarp, when you can bring one, is genuinely effective. Solo camping normally pushes toward cutting gear, but on rain days, adding a tarp creates a covered work zone that changes the whole experience. It's not just about keeping the rain off while you cook — it's about having a place to take your rain jacket off, a temporary spot for wet shoes, and a staging area for gear during breakdown. The hardest part of setting up in rain is losing the boundary between inside and outside. A tarp restores that boundary, creating a dry buffer zone between your tent and the open weather.
ℹ️ Note
In the rain, splitting roles works: tent for sleeping space, tarp for working space. Having somewhere to stash wet gear temporarily cuts down the number of steps in breakdown and keeps your sleeping area drier through the whole trip.
Waterproof Ignition and Backup Systems
In the rain, the question isn't whether you can light a fire — it's whether you can light it quickly, with wet hands, in wet conditions. That's where waterproof ignition earns its place. Specifically: waterproof matches, or a lighter stored in a waterproof case. A single standard lighter in your pocket sounds like enough, but pocket humidity and stray rain drops cause more failed attempts than you'd expect, especially when you want coffee before a wet breakdown.
Alongside that, carrying two backup ignition systems makes a meaningful difference in peace of mind. A layered approach might look like: your stove's built-in igniter, plus a lighter, plus waterproof matches. A lightweight stove is perfectly practical on a rain day, but the stove's weight matters less than having a reliable way to start it. Struggling with ignition while standing in rain before your morning coffee — or worse, before a cold breakdown — is an avoidable problem.
Ignition gear is small enough that it tends to get treated as an afterthought, but it has an outsized failure cost when it goes wrong. You can have everything else working — waterproof shelter, dry clothes, solid food plan — and still get stuck because the lighter you threw in loose is too damp to spark. Rain-day upgrades aren't about adding impressive gear; they're about making small systems more redundant. On top of the standard 20 items, add: rain jacket and pants, waterproof footwear, dry bags or large trash bags, a heavier ground sheet, a tarp as needed, and waterproof ignition. That combination takes most of the "everything is different in rain" feeling out of the equation.
Extra Gear for Winter Solo Camping
Upgrading Your Sleep System
The top priority for winter camping additions isn't a heating device — it's stepping up the insulation in your sleep system. Concretely: move your sleeping bag toward a comfort rating of -5°C, and either upgrade to a higher R-value pad or layer two pads for more ground insulation. The reason cold nights feel unrecoverable in winter usually isn't the air temperature — it's heat loss through the ground.
I've had nights where I focused only on the sleeping bag and underestimated the pad. The ground pulled heat steadily throughout the night, and by morning I'd barely slept. Cold from above can be addressed with more clothing layers or a warmer bag. Cold from below has nowhere to go if your pad isn't doing its job. Since that experience, upgrading the pad before the bag has been my first move in winter sleep system planning.
For pad selection, R-value 4 or higher is a commonly used winter-season benchmark. One option is a single high-R inflatable or air pad; another is layering your three-season pad with a closed-cell foam pad underneath for stacked insulation. The stacking approach is practical if you already own a three-season setup. On sleeping bags: focus on the comfort temperature rating, not the lower limit. For winter solo camping, planning around temperatures dropping to near 0°C, a comfort rating of around -5°C is a stable baseline. Whether you use down or synthetic fill, neither works as intended if your pad insulation is too weak. Sleep system upgrades only make sense when the bag and pad are upgraded together.
Heating Devices: What's Permitted and What's Safe
Winter camping makes heating devices tempting, but before asking "what heater should I bring?" the more important question is whether using one is appropriate for your setup. For solo camping especially, the key factors aren't the device itself but the space size, ventilation, and what you do with it when you sleep. Running any combustion device in an enclosed space creates real carbon monoxide risk.
Heating devices belong in the "assess carefully before adding" category rather than standard gear. The more wind-resistant and insulated your tent, the more seriously you need to manage combustion device use. Winter tent selection has its own logic for this reason — improving shelter also changes the risk profile of what you burn inside it.
Fuel behavior also changes in cold temperatures. OD canisters can lose pressure in the cold, which weakens output noticeably unless you're using a cold-weather blend. A 250g OD canister gives roughly 1.0–1.7 hours of burn time under typical single-burner conditions, but winter conditions and extended use compress that estimate. If you're factoring in any heating role on top of cooking, your fuel plan needs to account for that extra load. The more stable approach: build a solid sleep system, then use any heating only as a supplement during waking hours — not as the foundation for staying warm.
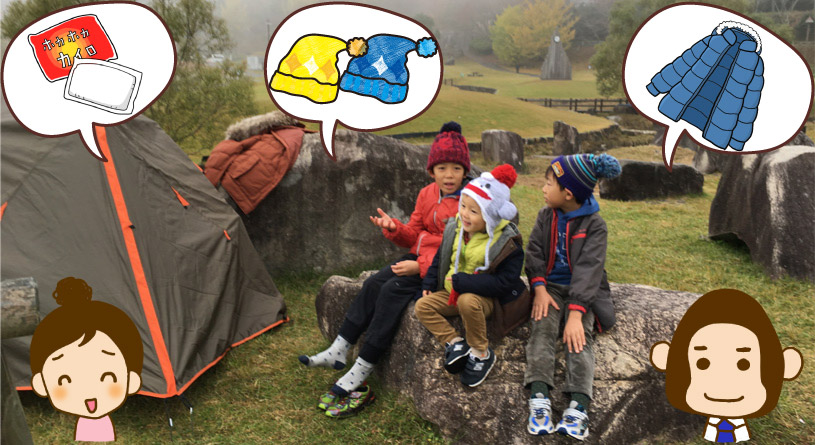
Hand Warmers and Layering
For winter additions that actually deliver, the big wins aren't large heating devices — they're hand warmers and extra insulating layers. Disposable hand warmers work well when you plan for volume: 10–20 per person gives you enough to cover activity time, evenings by the campfire, and warming up your sleeping bag before you get in. They seem like a lot, but in winter, there's rarely a shortage of uses.
The most effective layering strategy focuses on extremities first. Gloves, thick socks, a neck gaiter, and a beanie do work that extra down in your jacket can't — they close off the exit points where heat leaks fastest. A wind-resistant shell over your insulation layer is also more effective than you'd expect: without a windproof outer, cold air compresses your insulation and reduces how much heat it traps. In winter, the better frame isn't "what am I wearing?" — it's "where is heat escaping?"
Hand warmers are versatile beyond just warming your hands. Putting one in the foot of your sleeping bag before you get in pre-warms the interior and makes getting to sleep much easier on a cold night. Rather than waiting to warm up inside a cold bag, pre-heating the sleeping space before entry is a noticeably more comfortable approach. Winter gear guides consistently recommend carrying more hand warmers than you think you'll need, and the reasoning matches real field experience.
冬のキャンプの持ち物リスト | ゴリラキャンプ部
13+ 冬のキャンプに行きたいけど&h...
gorillacamp-club.comKnowing When Not to Go
What gets overlooked in winter gear planning isn't gear at all — it's building a go/no-go decision into the plan itself. When extreme cold, icy roads, and high wind forecasts stack up, the more rational move is often adjusting your destination or timing, not adding more gear to push through. In winter, the gap between trips that work and trips that don't has more to do with conditions than equipment.
This matters especially for solo camping. When something unexpected happens overnight — a deeper cold snap, wind stronger than forecast — there's no one to help compensate. Experienced hikers plan gear by combining season, elevation, and activity conditions rather than season alone. Winter camping works the same way: flatland weather forecasts are unreliable inputs for high-altitude or exposed sites. Add elevation, wind exposure, or ice to any equation and the baseline shifts.
⚠️ Warning
In winter planning, building in the possibility of turning back before you leave produces clearer gear decisions. The goal isn't pushing through discomfort with enough equipment — it's building a plan that includes retreat as a real option. Solo winter camping that works is planned to be abandoned if conditions warrant it.
Winter gear is built on top of the standard 20-item base, but more items doesn't automatically mean more safety. The right build order: high-insulation sleeping bag, upgraded pad insulation, extremity warmth, wind-resistant layering — and then assess whether a heating device fits the situation. Cold weather naturally expands your load and makes ultralight approaches harder. The key is knowing what cannot be cut versus what the weather simply requires you to carry more of.
いまは一般的な縦走登山のスタイルだけどもっと荷物を軽くしたい、けれど装備を簡素化|https://cdns3.yamatomichi.com/wp-content/uploads/2020/10/2020_07_yamatomichi_theARTofUL_2_169.jpg}}
Cutting Weight: Minimal Setups and the Ultralight Approach
Getting the Vocabulary Straight
Conversations about going lighter tend to talk past each other when everyone is measuring different things. The two numbers worth tracking: base weight is your gear weight excluding consumables like water, food, and fuel. Pack weight adds those back in for the total you're actually carrying. Ultralight frameworks use this distinction consistently — and it matters, because the two numbers point to different optimization strategies.
For a UL-leaning solo setup, a practical target is a base weight of 4–5 kg and a total pack weight of 6–8 kg. Getting into that range makes a noticeable difference during hiking approaches, site-to-site travel, and even just moving gear around camp. When I dropped my own base weight from 5-something kilograms down to 4.3 kg, the difference felt larger than the number suggested. Less shoulder tension while walking, and a clear sense of having energy left when setup was done. Weight reduction isn't primarily about looking minimal — it's about increasing your reserves for everything else.
【ベースウェイトとは】登山におけるUL(ウルトラライト)は何Kg?
UL(ウルトラライト)に興味を持つと「ベースウェイト」という言葉を必ず目にしますよね。 今回は、「ベースウェイトとは何か?どうやって測るか?」について説明します。 &
ul-compass.comWhere to Start Cutting
Efficient weight reduction for beginners isn't a full UL gear swap. The right first move is weighing everything you currently own, building a list, then cutting items that are heavy relative to how much you actually use them. In practice, the items with the worst weight-to-value ratio tend to be duplicated comfort gear.
Cut in this order: first the table, then the chair. A table is genuinely useful, but for solo camping, a cooler bag or storage bin often works as a surface substitute, and a ground-style setup with a pad underneath works for the chair. Lightweight folding chairs start around 600g, but that's still 600g for a place to sit. Next comes dish quantity — adding plates, mugs, bowls, and cutlery means more to wash and more stuff sacks to manage. After that, cut cooking complexity: dropping the goal from "cook a full meal" to "boil water" simplifies the cookset dramatically. One underrated area is redundant stuff sacks — categorized packing is organized, but adding a small bag for every sub-category quietly adds up.
What you do not cut: tent, sleep system, rain gear, and first aid. Getting the priority order wrong means trimming safety margin instead of comfort margin. When you want to reduce weight, always start with furniture and cooking equipment.
Safety Gear That Stays
The ultralight mindset sometimes drifts toward evenly thinning everything, but certain gear has clear limits on how far you trim it. For solo camping specifically, shelter, insulation, rain protection, and basic first aid should stay off the cutting floor.
Your tent is a structural element, not just a fabric shelter. As noted, a fly rated around 1,500–2,000mm is a useful baseline for heavy rain, and the actual performance depends on seam quality, fabric tension, and pitch. Cutting there saves grams during the hike and costs you on-site. The sleeping system is the same — a pad with insufficient R-value undermines the sleeping bag's performance. Pads rated R1–4 cover spring through fall, and the insulation they provide from the ground isn't easily substituted.
Rain gear is also hard to cut. Deciding to leave your rain jacket because "it probably won't rain" trades a couple hundred grams for real loss of freedom and safety margin. And considering the role it plays in wet breakdown — keeping you functional while working in rain — a rain jacket is doing work well beyond its listed weight. First aid is similar: small footprint, disproportionate importance, poor candidate for weight savings. The ultralight philosophy isn't "endure more." It's separating what's cuttable comfort from what's non-negotiable safety.
ℹ️ Note
When you want a lighter pack, the clearest framing is "keep anything load-bearing, cut luxury items in order." A slightly heavier but stable setup is less fatiguing over a full trip than a technically lighter one that leaves you managing gaps all night.
Pitfalls of UL Gear
UL gear looks compelling by the numbers, but without understanding how the weight savings are achieved, catalog satisfaction is the main result. Tents are the clearest example. The under-1 kg category is a meaningful threshold — the weight reduction is genuinely felt during movement. But that weight comes from two places: simplified pole structures and thinner fabric. Both have implications.
Standard tent fabrics run around 30–40 denier. UL fabrics can be 7–15 denier. That denier gap is a direct usability gap. At 7–10D, you can immediately feel the weight difference, but the fabric responds more to abrasion against the ground and to imprecise pitching. Using gear in that range means also investing in how you pitch it, how you manage the ground sheet, and how carefully you handle it in general. UL tents aren't "beginner-friendly because they're light" — they're lighter in exchange for demanding more careful use.
The other trap is treating published numbers as universal answers when the threshold for "light enough" and "comfortable enough" varies by person. Some campers feel better without a chair; others find that not having one leaves them genuinely drained by the end of the day. That's why the right first step is weighing your own gear and identifying where the heaviest items are — not shopping for theoretical perfection. Weight reduction produces results when you target the biggest numbers first, not when you optimize smallest items while heavy ones stay.
Case Study: Ultra-Light Stoves at 73g and 81g
The cooking category shows weight reduction's concrete value most clearly. Stoves already exist in the 70–80g range — the MSR PocketRocket 2 at 73g and the SOTO Amicus at around 81g are real production models. At that weight, a single-burner stove stops being a significant gear item and becomes a minimal boiling unit that disappears into your pack.
The real benefit of this class of stove isn't the number — it's how it shapes the cooking approach. When your stove weighs 73g, it naturally pulls your meal plan toward freeze-dried and instant noodles, which means your cookpot, utensils, and cleanup tools all get simpler too. If you're grilling and want broad burner coverage and precise heat control, a few extra grams matter less than functional design. "Lighter is always better" doesn't hold here — the question is what you're cooking and whether the stove's design matches that.
On hiking days especially, a lightweight stove produces compounding effects. The stove is a few dozen grams, but orienting your meal plan around boiling water also reduces your cookpot count, dish count, cleanup kit, and stuff sack count. The pack simplifies in layers. Weight reduction produces bigger results through simplifying how you use gear than through premium single-item upgrades.
Quick Reference: Gear Configurations by Condition
The difference between conditions isn't building a completely new kit each time — it's starting from the standard setup and adjusting what you add or subtract. Before packing, I mentally run through four configurations: standard, rain, winter, and light. Rain days especially benefit from committing to a "rain-mode packing" approach before you leave, because the sequence in which you pack and unpack changes significantly — wet gear you'll reach for first needs to be accessible, and gear you can't afford to get wet needs to be buried deepest.
The table below is built on the 20-item baseline. It's not a shopping list — it's a framework for deciding what shifts by condition.
| Category | Spring–Fall Standard | Rain Conditions | Winter Conditions | UL/Minimal |
|---|---|---|---|---|
| Shelter | Solo tent as the core | Add tarp for rain cover at the entrance | Shift toward wind-resistant, insulated tent | Target sub-1 kg tent or tarp setup; manage carefully |
| Sleep system | Sleeping bag + three-season pad | Add waterproof storage for sleep gear | High-insulation bag + upgraded pad R-value | Keep sleep system intact; cut comfort items only |
| Rain protection | Minimal waterproof storage | Add rain jacket/pants, waterproof ignition, dry bags, large trash bags | Also protect insulation layers from moisture | Keep rain jacket; cut extra clothing and redundant fabrics |
| Ground protection | Standard ground sheet | Upgrade to heavier ground sheet | Reinforce below-ground insulation | Keep ground sheet; size down to minimum needed |
| Lighting | Headlamp + LED lantern | Prioritize water-resistant, operable with wet hands | Carry spare batteries and extra power for long nights | Center on headlamp; consolidate to one small lantern |
| Cooking | Single burner + minimal cookset | Add waterproof ignition; plan for cooking under tarp | Account for OD canister performance in cold | Shift to boiling-only; lightweight stove + compact pot |
| Added gear | 20-item baseline | Tarp, rain jacket/pants, dry bags | Insulating layers, hand warmers, extremity gear | Remove chair, table, extra dishes in that order |
| Breakdown approach | Standard | Separate wet and dry gear before packing | Plan for frost, freezing, and cold morning temps | Prioritize easy packing; fewer items means faster cleanup |
| Overall pack feel | Approachable baseline for beginners | Slightly bulkier with waterproofing additions | Heaviest of the four configurations | Oriented toward 4–5 kg base weight |
Spring–Fall Standard
For a one-night trip in spring through fall, the 20-item baseline covers it. The core is tent, sleep system, light, stove, and power bank. With those in place, a simplified meal plan still gets you through the night safely — and leaving any of those out creates real problems.
In this configuration, resist loading up on comfort gear. Chairs and tables are nice, but they're optional in the standard build. My approach for a regular spring or fall overnight: fill the 20-item baseline first, then look at what space is left before adding anything else. That sequence keeps the core from getting buried under nice-to-haves.
For the sleep system, three-season thinking is plenty here. R-values in the 1–4 range work for spring through fall; R2–3 is a practical solo target that avoids over or underpacking. Cooking stays light when you're not trying to do too much — a 73g MSR PocketRocket 2 or 81g SOTO Amicus keeps the stove from feeling like a significant load when you're oriented toward boiling water. Standard gear isn't about being "fully equipped" — it's about a high-reliability baseline that doesn't create problems.
Rain Conditions
Rain day packing adds layers in a clear direction: rain jacket/pants, waterproof storage, tarp, heavier ground sheet, and waterproof ignition. The core challenge in rain isn't getting wet — it's keeping wet and dry gear separated. Solving that problem changes how manageable the whole trip feels.
You can overnight in a tent without a tarp even in rain, but weather conditions make the entrance zone matter a lot more. A tarp over your approach path and cooking area — essentially a covered workspace — makes gear retrieval, shoe management, and breakdown dramatically easier. For the ground sheet, a heavier option rated at 1,500–5,000mm waterproofing handles wet ground better and picks up less mud, which simplifies cleanup at both ends of the trip.
Waterproof storage planning is about role assignment, not quantity. On rain days, I move sleep gear and clothing into waterproof storage first, then arrange everything else so items I'll reach for immediately are on top. During breakdown, wet flies and tarps go into oversized bags first, and the sleeping bag and pad stay dry until the last possible moment. In rain, packing order and retrieval order matter more than the gear's waterproofing ratings alone.
💡 Tip
Rain-day packing isn't just about adding gear — it's about reordering what goes where. Rain jacket, tarp, and tent pegs at the top; sleep gear protected at the bottom. That sequencing makes on-site movement feel natural rather than improvised.
Winter Conditions
Winter configuration leads with insulation, warmth, and wind resistance before anything else. The additions center on sleep system upgrades, insulating layers, hand warmers, and extremity protection. Getting the sleeping environment right is the prerequisite for everything else.
For the sleep system, pair your bag and pad together rather than evaluating each in isolation. Pad R-value matters more in winter than any other season — if you're on snow or frozen ground, R4+ is the practical benchmark. If your current pad doesn't reach that, layering a closed-cell foam pad underneath is a straightforward fix. Winter nights don't make people cold primarily through air temperature — they do it through ground contact, and pad insulation is the only real answer.
Clothing priorities: don't stop at your core. Thick socks, gloves, neck gaiter, and beanie address the exit points where heat escapes fastest. Hand warmers: plan for 10–20 per person. Carrying more than you think you'll use feels wasteful, but in winter, uses multiply and it's better to have the buffer. For fuel, OD canisters run weaker in cold conditions — a 250g canister that's reliable in mild weather gets less predictable when temperatures drop, so build in extra fuel rather than assuming your standard estimate holds.
UL/Minimal
Minimal configurations subtract comfort without cutting safety. The cleaner frame: remove easy-to-cut items first, rather than thinning everything uniformly. What goes first: chair, table, extra dishes, unnecessary clothing, extra lanterns. What stays: shelter, sleep system, rain gear, minimal power.
Base weight targets of 4–5 kg and total pack weight of 6–8 kg (including water, food, and fuel) are practical UL reference points. Getting into that range changes how tired you are at the end of a long approach, and how fast setup and breakdown go. For solo camping, the breakdown time savings are real — fewer items means everything goes back in faster.
Shelter is a legitimate ultralight opportunity, but handling demands follow. A sub-1 kg tent is a meaningful weight cut; a 7–15D fabric requires more careful pitching and ground sheet management than a 30–40D standard tent. Going lighter on the shelter is a package deal — you're also committing to the operational discipline that keeps thin fabrics intact. On cooking: orienting toward boiling water lets you run a single lightweight stove and a compact pot, which cuts dish count, cleanup kit, and stuff sacks at the same time.
Even in UL setups, a 20,000mAh power bank (~$X USD) is hard to cut. Three to four full phone charges, plus headlamp backup — the device carries enough utility to outweigh its grams. Minimal camping isn't about accepting hardship. It's about finding the line where removing comfort gear doesn't undermine the night — and then packing exactly that.
Frequently Asked Questions
How to think about costs
"How much does a full kit cost?" is genuinely difficult to answer. The gear you need looks completely different depending on whether you're building the bare minimum to get through a night versus outfitting for cooking comfort and good seating. The biggest price variables: tent, sleep system, lantern, and chairs/tables.
Tents swing widely based on materials and design — lighter fabrics and faster-setup structures push the price up fast. Sleep gear follows the same logic, and since your sleeping bag and pad directly determine sleep quality, cutting too aggressively here hurts satisfaction more than most other categories. LED lanterns span a wide price range, but the right configuration depends on whether you want full-site coverage or just immediate-area light. Chairs and tables are the classic "not required, but appreciated" category — how much you want that comfort shifts the total.
The good news: you don't have to buy everything at once. Foundation gear is shelter and sleep; comfort gear is furniture and cooking upgrades. Thinking in that order makes budget allocation clearer. For your first trip, putting money toward what you absolutely cannot skip beats buying premium versions of everything.
Cooking: do you really need to cook, and what's a simple plan?
Cooking is optional. For a first solo trip, set one baseline: being able to boil water. Instant noodles, freeze-dried meals, retort pouches, and instant soup get you through a night without any cooking skill. That keeps the kit to a single burner, a gas canister, one pot, and a spoon. The MSR PocketRocket 2 weighs 73g and the SOTO Amicus around 81g — when boiling water is the goal, your stove barely registers.
Where the kit expands is when cooking becomes part of the plan. A pan, a cutting board and knife, cleanup tools — it compounds quickly. The basic relationship is real: more cooking freedom means more gear. Trying to cook ambitiously on a first trip tends to mean distracted attention during setup and bedtime prep. For your first night out, "boil water and eat something easy" is the right pace. Getting shelter and light sorted before dark does more for first-trip satisfaction than a hot meal.
How consumables change between one and two nights
Going from one to two nights, consumables change more than gear. Tent, sleeping bag, pad, and lights stay constant. What scales with the nights: water, food, fuel, batteries.
Water is the most tangible — a liter weighs a kilogram. Planning for roughly 2 liters per person per night for drinking and cooking, two nights adds real weight on that line alone. Food follows the same math — the gear footprint stays flat but stacking another day's eating and drinking noticeably changes how loaded the pack feels. Fuel scales too, especially if cooking time is significant.
From experience, two nights doesn't double your gear. What grows is mainly food and water, and you feel it gradually. The reason breakdown tends to be messier on multi-night trips isn't the gear — it's managing empty containers and tracking remaining consumables. Thinking of extra nights as "more things to manage" rather than "more things to carry" tends to match what actually happens in the field.
How to spot campsites that get cold even in summer
Cold isn't only a winter concern. At elevations above 1,000 meters or in mountain terrain, nights can drop noticeably even when the afternoon was warm. When you're above the flatlands, your daytime temperature experience stops being a reliable guide to nighttime conditions. For solo camping gear year-round, building around 0–10°C overnight prevents the most common cold-weather surprises.
Certain campsite characteristics consistently predict cold nights. Low spots within a campground, forested sites that hold humidity after dark, and sites along rivers with consistent airflow all run colder than open grassy areas — sometimes at the same campground on the same night. What felt fine in afternoon clothes can feel inadequate by midnight.
What actually helps: compact, low-bulk insulation — a light down jacket, fleece, beanie. Even in summer, one throwable layer and something for your head makes a real difference for the hours between dinner and sleep. Warmth planning that covers how you'll spend time from dinner until you get in the sleeping bag — not just the sleeping bag's rating — produces more reliable summer trips.
ℹ️ Note
Summer cold is more about location than season. When a site combines elevation, valley terrain, river proximity, and tree cover, plan for overnight temperatures rather than afternoon ones — that's when equipment choices actually pay off.
Gear philosophy by transportation
Car camping and hiking to your site call for fundamentally different approaches. The split comes down to how much furniture you can carry and how you manage food temperature. By car, chairs, a table, a proper cooler bag, and spare clothing are all practical additions that improve site livability. On foot, every item you add returns as accumulated fatigue on the trail.
For foot travel, UL frameworks are directly applicable. A base weight of 4–5 kg and a total carry weight of 6–8 kg (water, food, and fuel included) is a target that changes how you feel during hiking approaches. Inside that range, distant sites stop feeling like a problem, and you arrive at setup with energy left. That's where cutting chairs and large lanterns has real impact.
Car campers tend toward "if it fits, bring it" packing — which is when setup and breakdown start getting chaotic. Hikers are forced to prioritize because weight has direct consequences. The difference isn't really about comfort level — it's about how your transport constraints shape your gear philosophy. Car camping trends toward livability; foot travel trends toward ultralight. Neither is wrong. The right answer changes with how you're getting there.
Before You Leave: Final Check and Next Steps
Before heading out, don't just glance at these 20 items on your phone — transfer them to paper or a notes app and close every empty checkbox. What causes problems on-site isn't forgetting what to buy; it's the item you thought was packed that wasn't. For a first trip, choose a staffed campsite in spring or fall, and if there's any rain in the forecast, add a rain jacket and waterproof storage before you leave.
When loading up, weigh your current gear, then separate what can be cut from what cannot. The cuttable items are furniture and comfort gear — chairs, tables, extra dishes. The non-negotiables are tent, sleep system, and first aid. After removing "heavy items I wasn't using anyway" before one weekend trip, setup and breakdown each shortened by about ten minutes, and the way gear was distributed around the site changed noticeably.
If you're still unsure about tent sizing, working through a tent sizing guide alongside this list helps clarify the whole packing approach. For budget questions, the "How to think about costs" section above covers the framework.
A former product development engineer at an outdoor gear manufacturer. A technically-minded writer who can discuss everything from tent materials and construction to sleeping bag insulation specs. With 60+ nights of solo camping per year, he rigorously tests the gap between catalog claims and real-world performance.
Related Articles
Campfire Cleanup and Ash Disposal in Japan | Starting 2 Hours Before Departure
The cleanup after a campfire in Japan depends far less on the moment you extinguish the flames than on when you start wrapping up. This guide walks through a realistic approach—stopping fuel addition about 2 hours before departure, letting the fire burn down, then using suffocation or water cooling in sequence—tailored to different campground rules. You'll also find practical tips for ash disposal and gear maintenance that make the next campfire much easier.
Women's Solo Camping Safety Guide | Site Selection and 4-Stage Night Operations
Safety in women's solo camping in Japan depends far more on where you choose to pitch than on what gear you bring. This guide breaks down safety strategies into four stages—before booking, setup, nighttime, and emergencies—for women starting solo camping or beginners feeling uneasy about their reservations.
Ultralight Solo Camping: How to Pack Under 10kg
For solo campers traveling by foot or train in Japan, gear weight isn't just \"lighter is easier\"—there's a clear shift in effort around the 10kg mark. This guide is designed for anyone wanting to keep a one-night, two-day spring/autumn setup under 10kg, assuming water sources are available and you'll source some food locally.
Getting Started with Solo Camping in Japan | Essential Gear, Budget, and Weight Guidelines
Your first solo camping trip in Japan often brings two conflicting worries: buying too much gear, or not having enough. This guide walks through everything you need for a one-night debut at a well-equipped campground in spring or fall. We break down gear lists, budgets ranging from ¥20,000 to ¥70,000 (roughly $135–$475 USD), and weight targets for car, motorcycle, and foot travel—all in concrete, decision-ready detail.